반응형
웹서버와 앱과 서로 연결되어 데이터를 가져오도록.
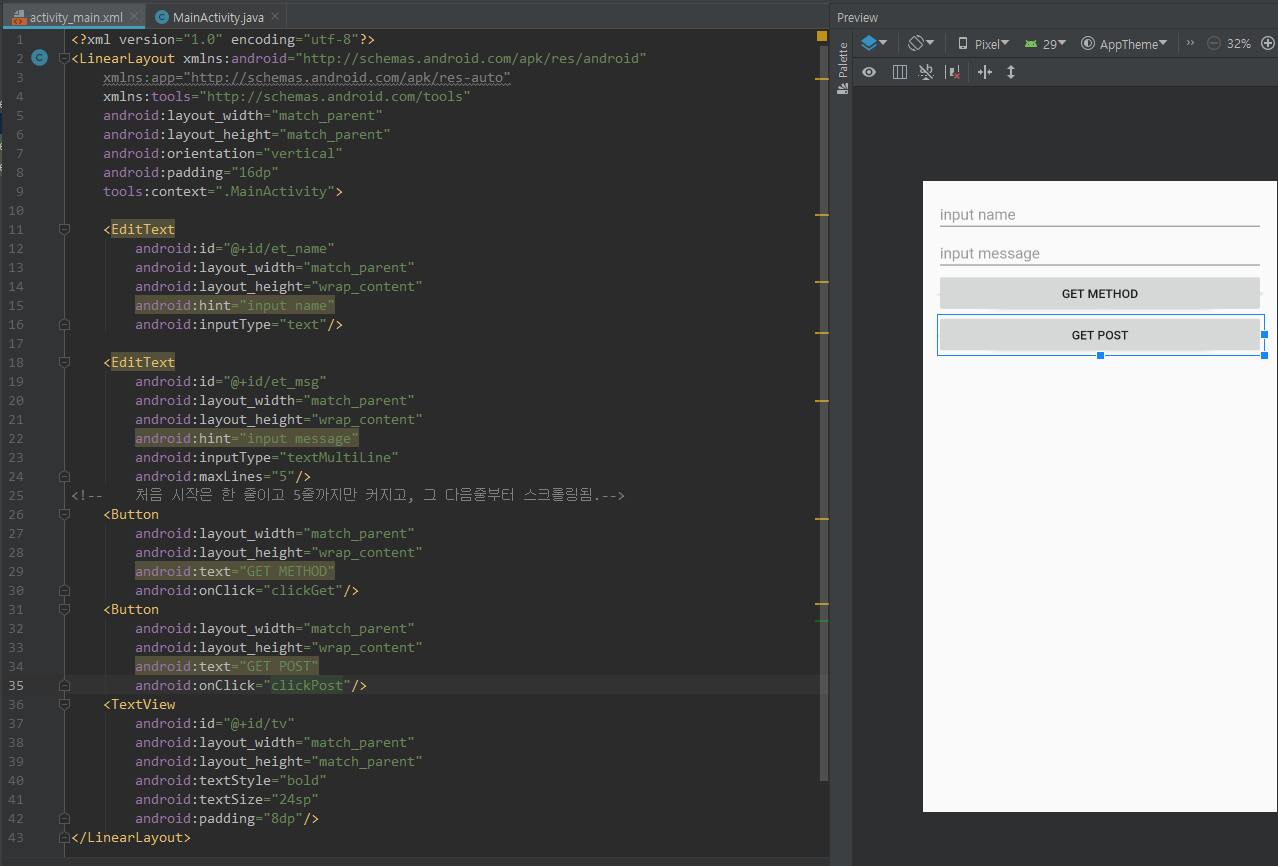
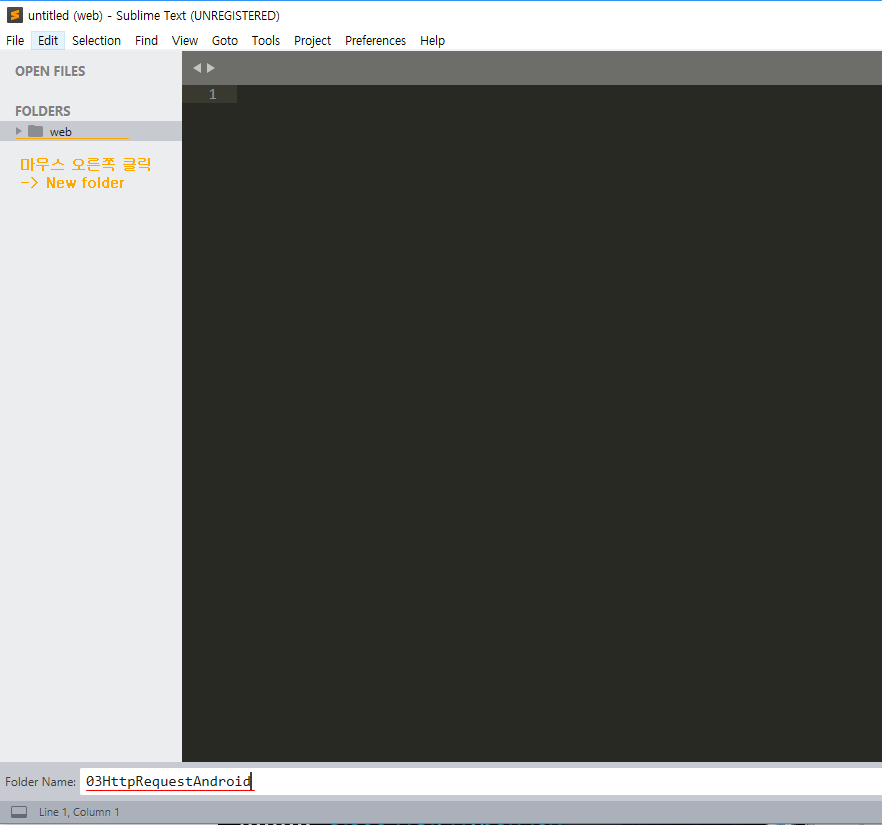
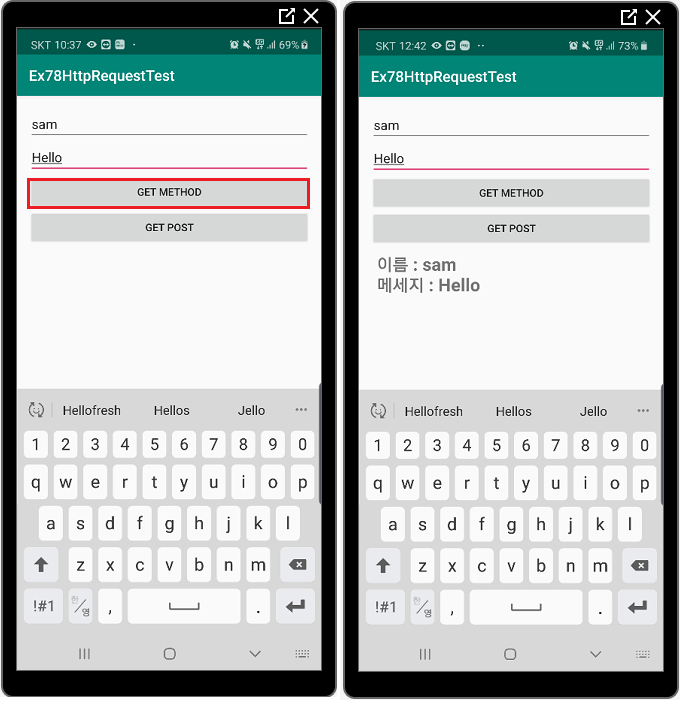
화면 구성
이름 , 메세지 작성하여 GET방식/ POST방식으로 데이터 전송
|
1
2
3
4
5
6
7
8
9
10
11
12
13
14
15
16
17
18
19
20
21
22
23
24
25
26
27
28
29
30
31
32
33
34
35
36
37
38
39
40
41
42
43
|
<?xml version="1.0" encoding="utf-8"?>
xmlns:app="http://schemas.android.com/apk/res-auto"
xmlns:tools="http://schemas.android.com/tools"
android:layout_width="match_parent"
android:layout_height="match_parent"
android:orientation="vertical"
android:padding="16dp"
tools:context=".MainActivity">
<EditText
android:id="@+id/et_name"
android:layout_width="match_parent"
android:layout_height="wrap_content"
android:hint="input name"
android:inputType="text"/>
<EditText
android:id="@+id/et_msg"
android:layout_width="match_parent"
android:layout_height="wrap_content"
android:hint="input message"
android:inputType="textMultiLine"
android:maxLines="5"/>
<!-- 처음 시작은 한 줄이고 5줄까지만 커지고, 그 다음줄부터 스크롤링됨.-->
<Button
android:layout_width="match_parent"
android:layout_height="wrap_content"
android:text="GET METHOD"
android:onClick="clickGet"/>
<Button
android:layout_width="match_parent"
android:layout_height="wrap_content"
android:text="GET POST"
android:onClick="clickPost"/>
<TextView
android:id="@+id/tv"
android:layout_width="match_parent"
android:layout_height="match_parent"
android:textStyle="bold"
android:textSize="24sp"
android:padding="8dp"/>
</LinearLayout>
|
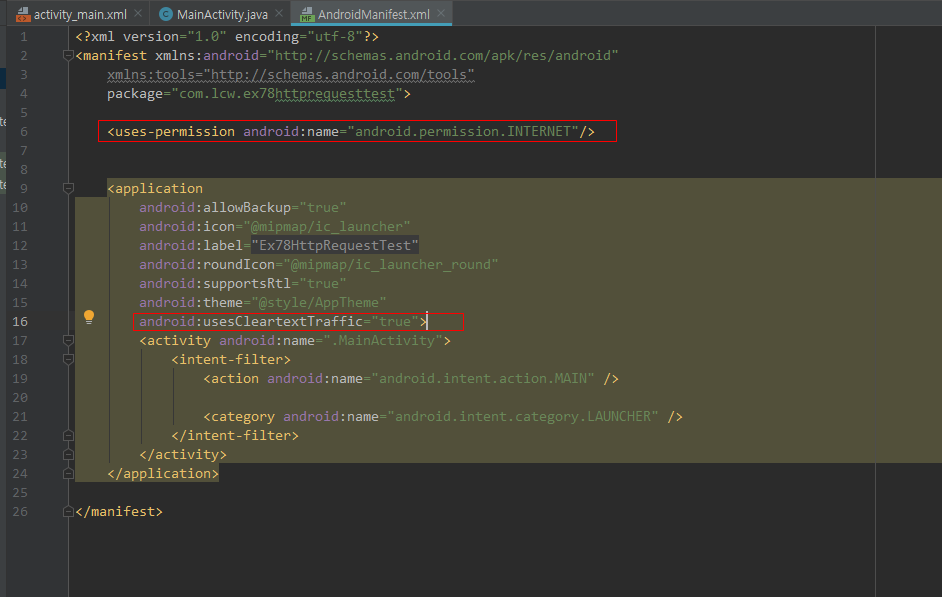
네트워크 작업은 퍼미션이 필요하다.
|
1
2
3
4
5
6
7
8
9
10
11
12
13
14
15
16
17
18
19
20
21
22
23
24
25
26
|
<?xml version="1.0" encoding="utf-8"?>
xmlns:tools="http://schemas.android.com/tools"
<uses-permission android:name="android.permission.INTERNET"/>
<application
android:allowBackup="true"
android:icon="@mipmap/ic_launcher"
android:label="@string/app_name"
android:roundIcon="@mipmap/ic_launcher_round"
android:supportsRtl="true"
android:theme="@style/AppTheme"
android:usesCleartextTraffic="true">
<activity android:name=".MainActivity">
<intent-filter>
</intent-filter>
</activity>
</application>
</manifest>
|


|
1
2
3
4
5
6
7
8
9
10
11
12
13
14
15
16
17
18
19
20
21
22
23
24
25
26
27
28
29
30
31
32
33
34
35
36
37
38
39
40
41
42
43
44
45
46
47
48
49
50
51
52
53
54
55
56
57
58
59
60
61
62
63
64
65
66
67
68
69
70
71
72
73
74
75
76
77
78
79
80
81
82
83
84
85
86
87
88
89
90
91
92
93
94
95
96
97
98
99
100
101
102
103
104
|
package com.lcw.ex78httprequesttest;
import android.os.Bundle;
import android.view.View;
import android.widget.EditText;
import android.widget.TextView;
import java.io.BufferedReader;
import java.io.IOException;
import java.io.InputStream;
import java.io.InputStreamReader;
import java.net.HttpURLConnection;
import java.net.URL;
import java.net.URLEncoder;
public class MainActivity extends AppCompatActivity {
EditText etName, etMsg;
TextView tv;
@Override
protected void onCreate(Bundle savedInstanceState) {
super.onCreate(savedInstanceState);
setContentView(R.layout.activity_main);
etName=findViewById(R.id.et_name);
etMsg=findViewById(R.id.et_msg);
tv=findViewById(R.id.tv);
}
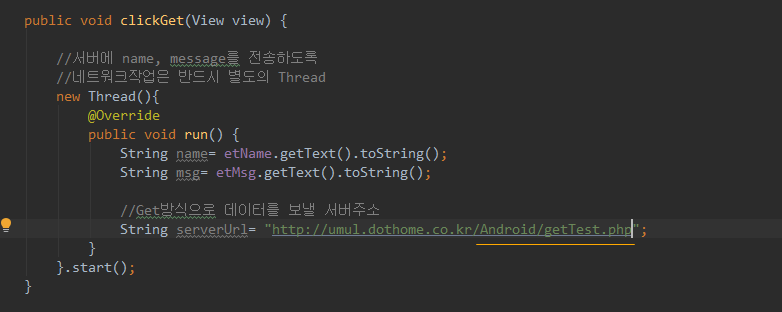
public void clickGet(View view) {
//서버에 name, message를 전송하도록
//네트워크작업은 반드시 별도의 Thread
new Thread(){
@Override
public void run() {
String name= etName.getText().toString();
String msg= etMsg.getText().toString();
//Get방식으로 데이터를 보낼 서버주소
//Get 방식은 보낼데이터(name, msg)를 URL 뒤에 붙여서 보내는 방식
//한글은 인터넷 URL에 사용 불가!! 그래서 한글을 utf-8 인코딩
try {
} catch (UnsupportedEncodingException e) {
e.printStackTrace();
}
String getUrl=serverUrl+"?name="+name+"&msg="+msg;
//서버와 연결 작업 시작!
try {
URL url= new URL(getUrl);
//URL 객체는 데이터를 읽어들이기 위한 InputStream을 여는 것만 가능하고
//데이터를 서버로 보낼 수 없다.
//즉, OutputStream을 열수는 없음.
//HTTP 통신 규약에 따라 데이터를 주고 받는 역할을 수행하는 객체 얻어오기
HttpURLConnection connection= (HttpURLConnection) url.openConnection();
connection.setRequestMethod("GET"); //반드시 대문자!
connection.setDoInput(true);
connection.setDoOutput(true);
connection.setUseCaches(false);
//보낼 데이터가 있다면 여기서 OutputStream을 통해 전송
//Get방식으로 이미 URL에 데이터를 붙여 보냈기에 필요 없음.
InputStream is= connection.getInputStream();
InputStreamReader isr= new InputStreamReader(is); //바이트 스트림을 문자 스트림으로
BufferedReader reader= new BufferedReader(isr);
final StringBuffer buffer= new StringBuffer();
String line= reader.readLine();
while (line!=null){
line= reader.readLine();
}
runOnUiThread(new Runnable() {
@Override
public void run() {
tv.setText(buffer.toString());
}
});
} catch (MalformedURLException e) { e.printStackTrace();} catch (IOException e) {}
}//run() ..
}.start();
}
public void clickPost(View view) {
}
}
|
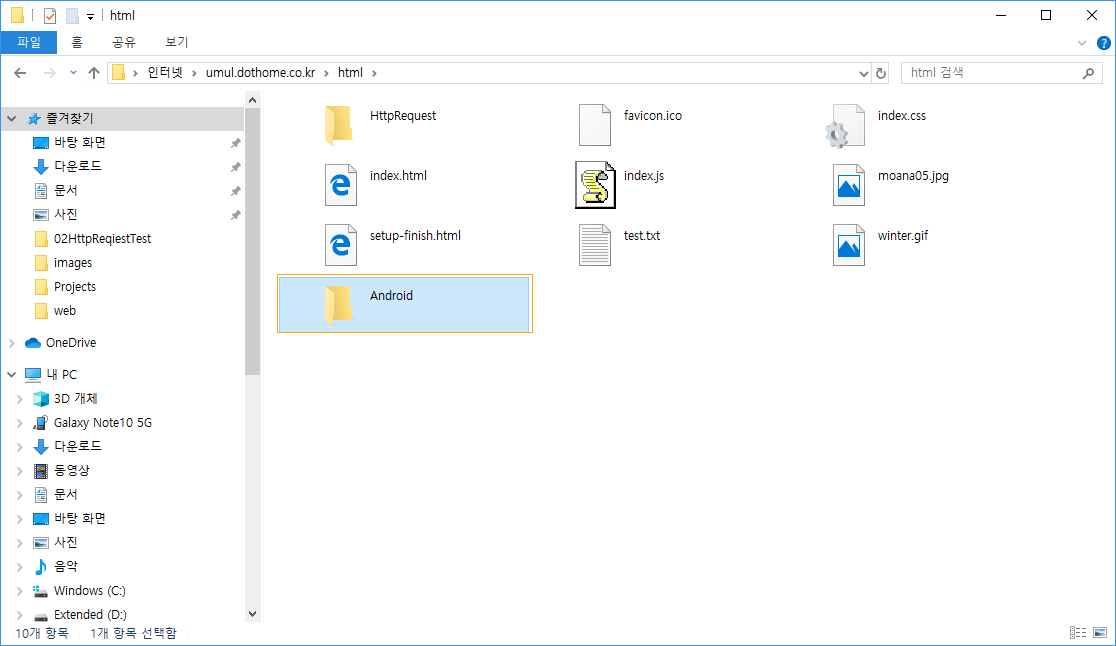
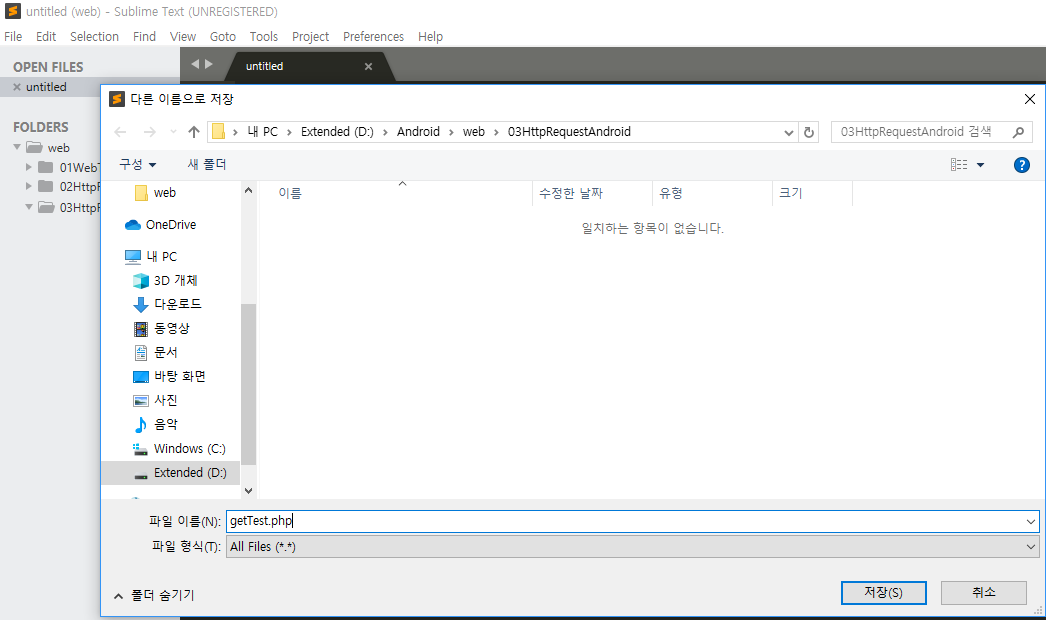
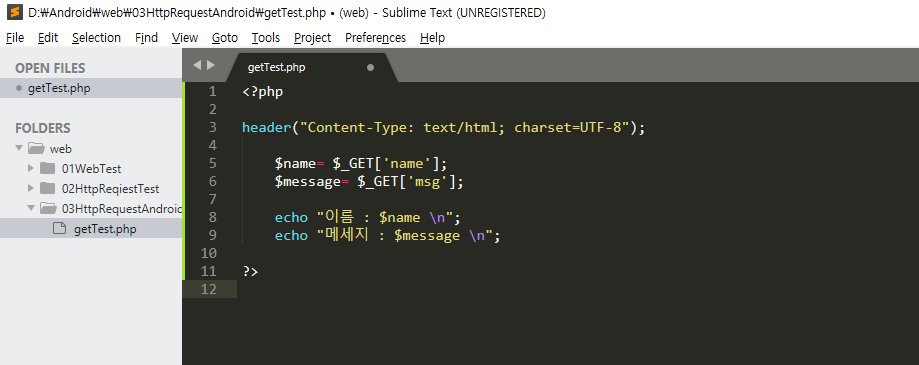
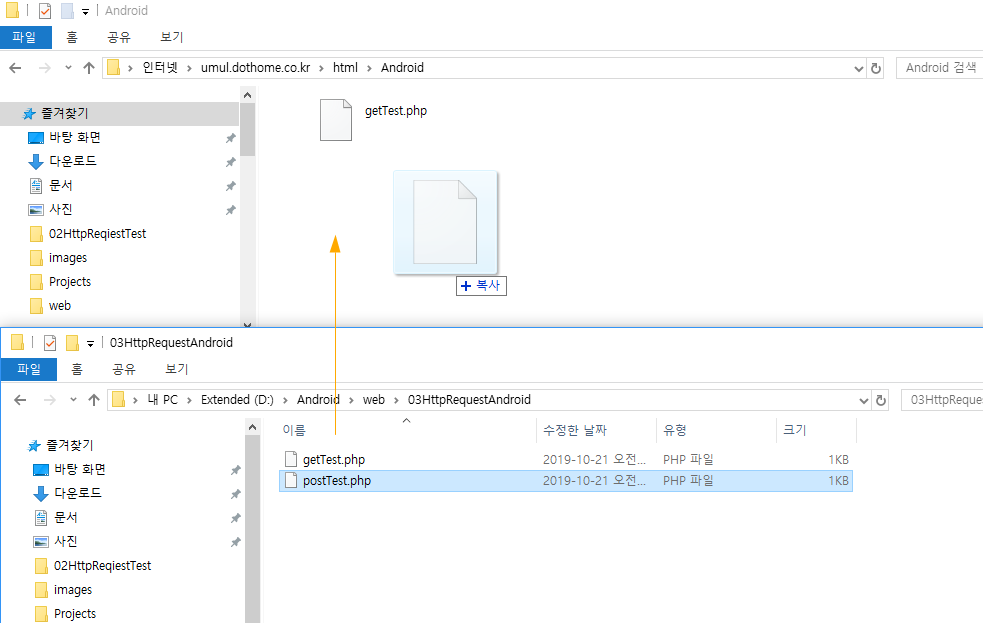
이제 경로에 미리쓴 getTest.php를 만들자.
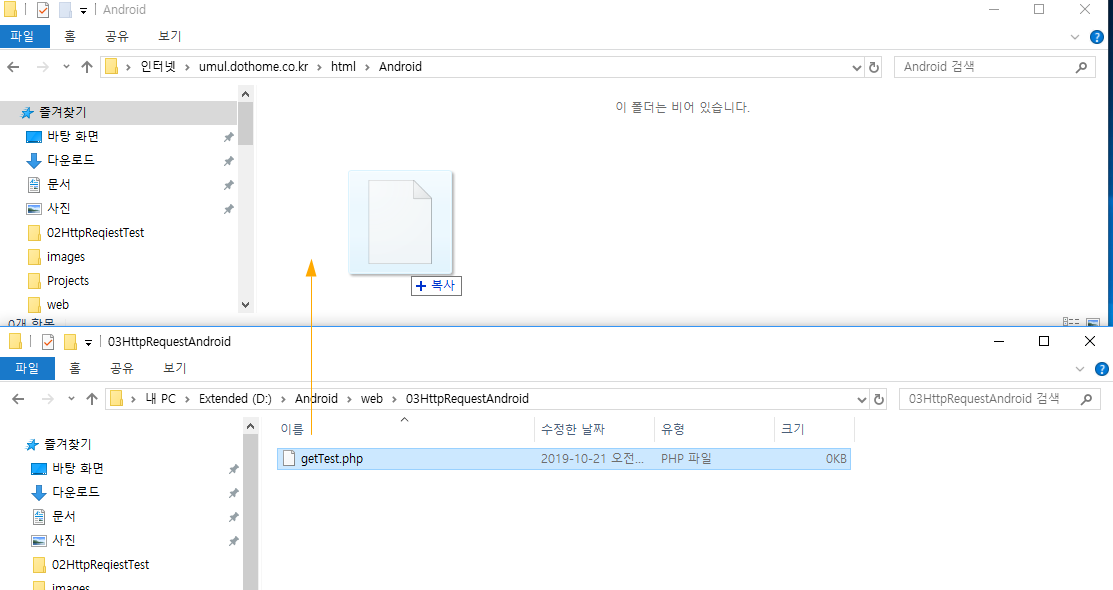
하고 안드로이드에서 동작을 해보자.
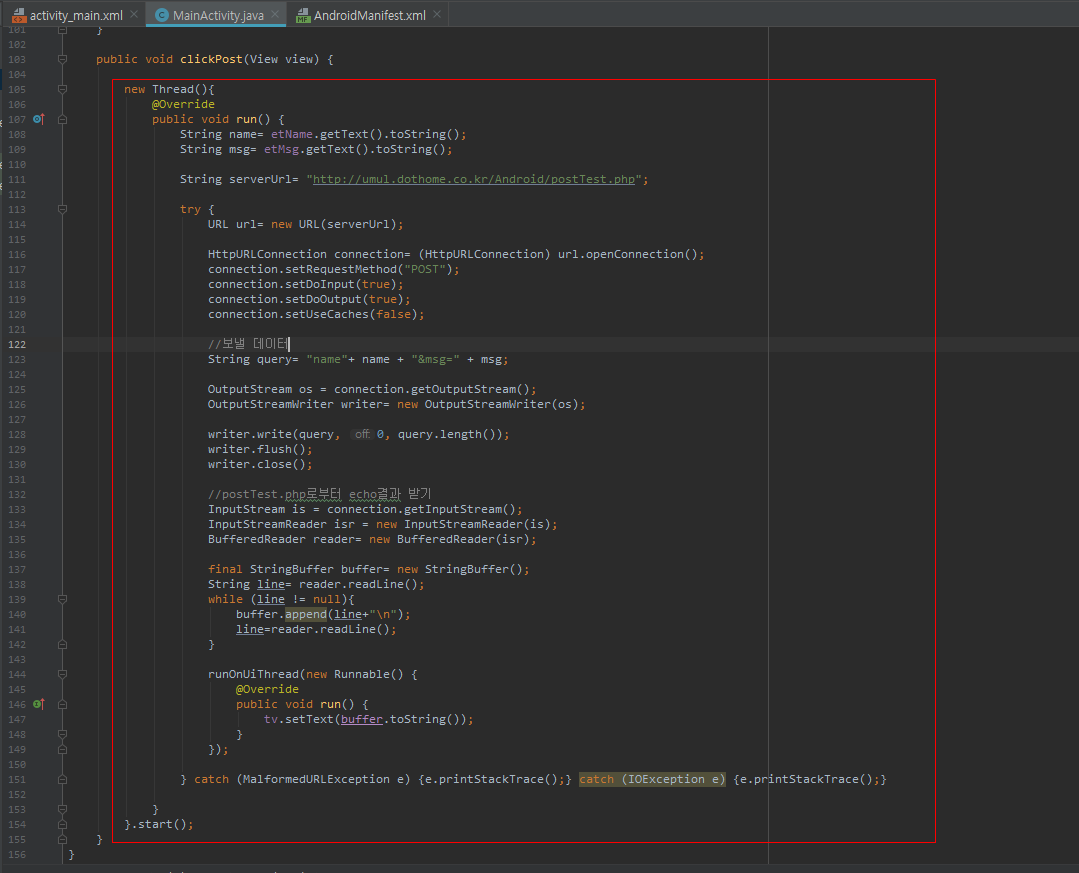
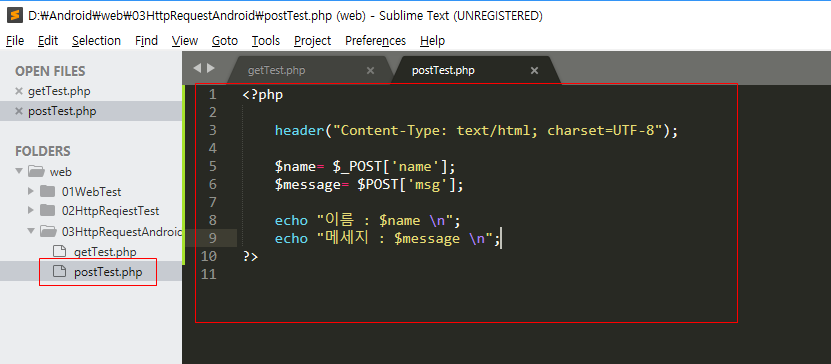
post 방식 코드 작성
|
1
2
3
4
5
6
7
8
9
10
11
12
13
14
15
16
17
18
19
20
21
22
23
24
25
26
27
28
29
30
31
32
33
34
35
36
37
38
39
40
41
42
43
44
45
46
47
48
49
50
51
52
53
54
55
56
57
58
59
60
61
62
63
64
65
66
67
68
69
70
71
72
73
74
75
76
77
78
79
80
81
82
83
84
85
86
87
88
89
90
91
92
93
94
95
96
97
98
99
100
101
102
103
104
105
106
107
108
109
110
111
112
113
114
115
116
117
118
119
120
121
122
123
124
125
126
127
128
129
130
131
132
133
134
135
136
137
138
139
140
141
142
143
144
145
146
147
148
149
150
151
152
153
154
155
156
|
package com.lcw.ex78httprequesttest;
import android.os.Bundle;
import android.view.View;
import android.widget.EditText;
import android.widget.TextView;
import java.io.BufferedReader;
import java.io.IOException;
import java.io.InputStream;
import java.io.InputStreamReader;
import java.io.OutputStream;
import java.io.OutputStreamWriter;
import java.net.HttpURLConnection;
import java.net.URL;
import java.net.URLEncoder;
public class MainActivity extends AppCompatActivity {
EditText etName, etMsg;
TextView tv;
@Override
protected void onCreate(Bundle savedInstanceState) {
super.onCreate(savedInstanceState);
setContentView(R.layout.activity_main);
etName=findViewById(R.id.et_name);
etMsg=findViewById(R.id.et_msg);
tv=findViewById(R.id.tv);
}
public void clickGet(View view) {
//서버에 name, message를 전송하도록
//네트워크작업은 반드시 별도의 Thread
new Thread(){
@Override
public void run() {
String name= etName.getText().toString();
String msg= etMsg.getText().toString();
//Get방식으로 데이터를 보낼 서버주소
//Get 방식은 보낼데이터(name, msg)를 URL 뒤에 붙여서 보내는 방식
//한글은 인터넷 URL에 사용 불가!! 그래서 한글을 utf-8 인코딩
try {
} catch (UnsupportedEncodingException e) {
e.printStackTrace();
}
String getUrl=serverUrl+"?name="+name+"&msg="+msg;
//서버와 연결 작업 시작!
try {
URL url= new URL(getUrl);
//URL 객체는 데이터를 읽어들이기 위한 InputStream을 여는 것만 가능하고
//데이터를 서버로 보낼 수 없다.
//즉, OutputStream을 열수는 없음.
//HTTP 통신 규약에 따라 데이터를 주고 받는 역할을 수행하는 객체 얻어오기
HttpURLConnection connection= (HttpURLConnection) url.openConnection();
connection.setRequestMethod("GET"); //반드시 대문자!
connection.setDoInput(true);
connection.setDoOutput(true);
connection.setUseCaches(false);
//보낼 데이터가 있다면 여기서 OutputStream을 통해 전송
//Get방식으로 이미 URL에 데이터를 붙여 보냈기에 필요 없음.
InputStream is= connection.getInputStream();
InputStreamReader isr= new InputStreamReader(is); //바이트 스트림을 문자 스트림으로
BufferedReader reader= new BufferedReader(isr);
final StringBuffer buffer= new StringBuffer();
String line= reader.readLine();
while (line!=null){
line= reader.readLine();
}
runOnUiThread(new Runnable() {
@Override
public void run() {
tv.setText(buffer.toString());
}
});
} catch (MalformedURLException e) { e.printStackTrace();} catch (IOException e) {}
}//run() ..
}.start();
}
public void clickPost(View view) {
new Thread(){
@Override
public void run() {
String name= etName.getText().toString();
String msg= etMsg.getText().toString();
try {
URL url= new URL(serverUrl);
HttpURLConnection connection= (HttpURLConnection) url.openConnection();
connection.setRequestMethod("POST");
connection.setDoInput(true);
connection.setDoOutput(true);
connection.setUseCaches(false);
//보낼 데이터
String query= "name="+ name + "&msg=" + msg;
OutputStream os = connection.getOutputStream();
OutputStreamWriter writer= new OutputStreamWriter(os);
InputStream is = connection.getInputStream();
InputStreamReader isr = new InputStreamReader(is);
BufferedReader reader= new BufferedReader(isr);
final StringBuffer buffer= new StringBuffer();
String line= reader.readLine();
while (line != null){
line=reader.readLine();
}
runOnUiThread(new Runnable() {
@Override
public void run() {
tv.setText(buffer.toString());
}
});
} catch (MalformedURLException e) {e.printStackTrace();} catch (IOException e) {e.printStackTrace();}
}
}.start();
}
}
|
하고 실행 시키자.
<최종 실행 화면>

반응형
'안드로이드 웹앱 콘테츠 개발자 양성(국비지원) > HTML 도메인' 카테고리의 다른 글
| HTTP 서버와 DB 앱 연동 (텍스트,이미지를 GET,POST로 DB까지) 1-1 (13) | 2019.10.21 |
|---|---|
| HTTP 서버와 앱 연동 (Volley 라이브러리를 이용해서 간단하게 구현) (0) | 2019.10.21 |
| HTML(언어 사용 html,css,js, php) 기존 도메인을 이용 GET,POST 방식으로 서버 업로드 1-2 [DB 연동] (1) | 2019.10.18 |
| HTML(언어 사용 html,css,js, php) 기존 도메인을 이용 GET,POST 방식으로 서버 업로드 1-1 (0) | 2019.10.18 |
| HTML(언어 사용 html,css,js) 무료 호스트 및 간단한 도메인 만들기 1-2 (0) | 2019.10.17 |


댓글