반응형
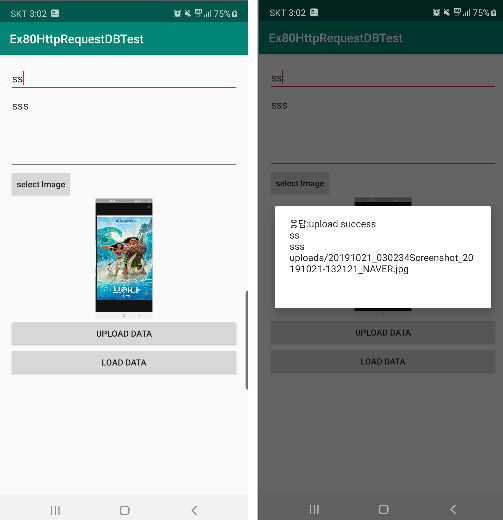
앱에서 기재한 텍스트와 휴대폰에 있는 이미지를 웹서버에 올리고
그 해당 값을 DB에 저장하는 예제이다.
전체적인 구조
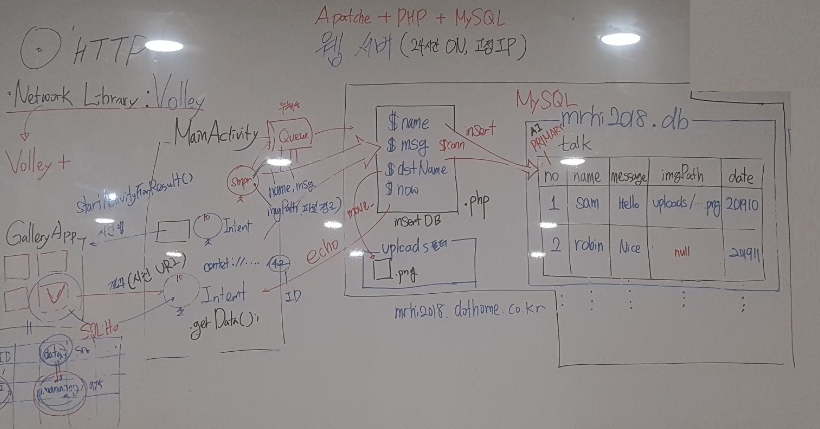
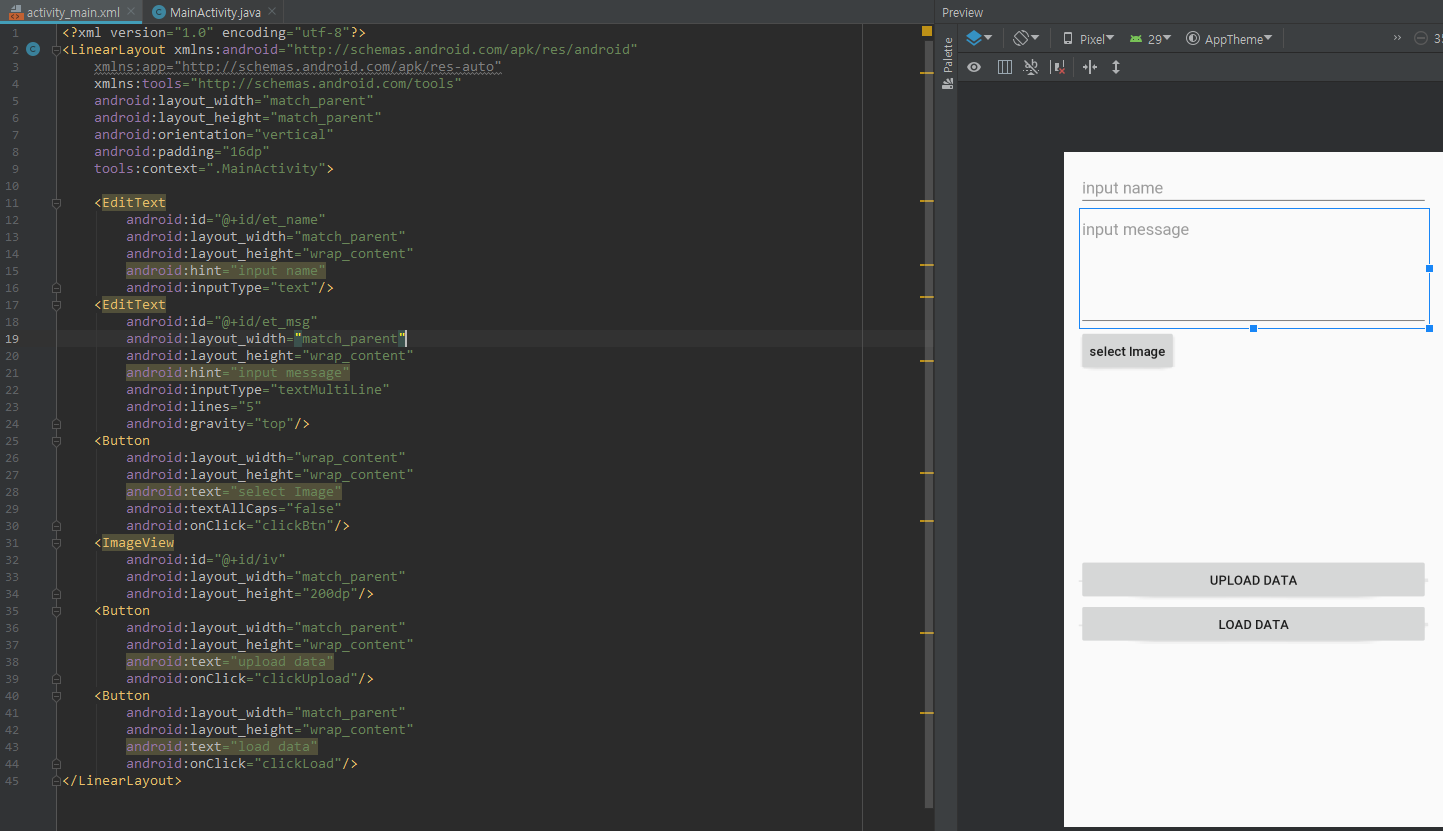
화면 구성을 먼저 하겠다.
|
1
2
3
4
5
6
7
8
9
10
11
12
13
14
15
16
17
18
19
20
21
22
23
24
25
26
27
28
29
30
31
32
33
34
35
36
37
38
39
40
41
42
43
44
45
|
<?xml version="1.0" encoding="utf-8"?>
xmlns:app="http://schemas.android.com/apk/res-auto"
xmlns:tools="http://schemas.android.com/tools"
android:layout_width="match_parent"
android:layout_height="match_parent"
android:orientation="vertical"
android:padding="16dp"
tools:context=".MainActivity">
<EditText
android:id="@+id/et_name"
android:layout_width="match_parent"
android:layout_height="wrap_content"
android:hint="input name"
android:inputType="text"/>
<EditText
android:id="@+id/et_msg"
android:layout_width="match_parent"
android:layout_height="wrap_content"
android:hint="input message"
android:inputType="textMultiLine"
android:lines="5"
android:gravity="top"/>
<Button
android:layout_width="wrap_content"
android:layout_height="wrap_content"
android:text="select Image"
android:textAllCaps="false"
android:onClick="clickBtn"/>
<ImageView
android:id="@+id/iv"
android:layout_width="match_parent"
android:layout_height="200dp"/>
<Button
android:layout_width="match_parent"
android:layout_height="wrap_content"
android:text="upload data"
android:onClick="clickUpload"/>
<Button
android:layout_width="match_parent"
android:layout_height="wrap_content"
android:text="load data"
android:onClick="clickLoad"/>
</LinearLayout>
|
MainActivity.java 코드
|
1
2
3
4
5
6
7
8
9
10
11
12
13
14
15
16
17
18
19
20
21
22
23
24
25
26
27
28
29
30
31
32
33
34
35
36
37
38
39
40
41
42
43
44
45
46
47
48
49
50
51
52
53
54
55
56
57
58
59
60
61
62
|
package com.lcw.ex80httprequestdbtest;
import androidx.annotation.Nullable;
import android.content.Intent;
import android.net.Uri;
import android.os.Bundle;
import android.view.View;
import android.widget.EditText;
import android.widget.ImageView;
import android.widget.Toast;
public class MainActivity extends AppCompatActivity {
EditText etName,etMsg;
ImageView iv;
@Override
protected void onCreate(Bundle savedInstanceState) {
super.onCreate(savedInstanceState);
setContentView(R.layout.activity_main);
etName=findViewById(R.id.et_name);
etMsg=findViewById(R.id.et_msg);
iv=findViewById(R.id.iv);
}
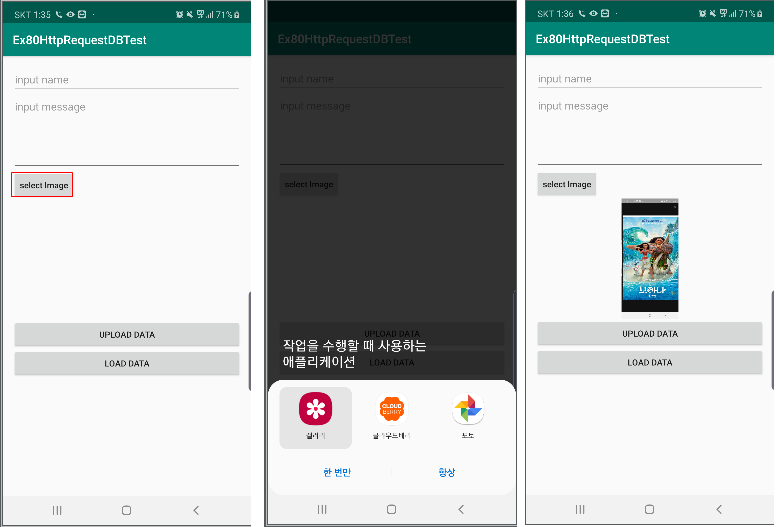
public void clickBtn(View view) {
//갤러리 or 사진 앱 실행하여 사진을 선택하도록..
Intent intent= new Intent(Intent.ACTION_PICK);
intent.setType("image/*");
startActivityForResult(intent,10);
}
@Override
protected void onActivityResult(int requestCode, int resultCode, @Nullable Intent data) {
super.onActivityResult(requestCode, resultCode, data);
switch (requestCode){
case 10:
if(resultCode==RESULT_OK){
//선택한 사진의 경로(Uri)객체 얻어오기
Uri uri= data.getData();
if(uri!=null){
iv.setImageURI(uri);
}
}else
{
Toast.makeText(this, "이미지 선택을 하지 않았습니다.", Toast.LENGTH_SHORT).show();
}
break;
}
}//onActivityResult() ..
public void clickUpload(View view) {
}
public void clickLoad(View view) {
}
}
|
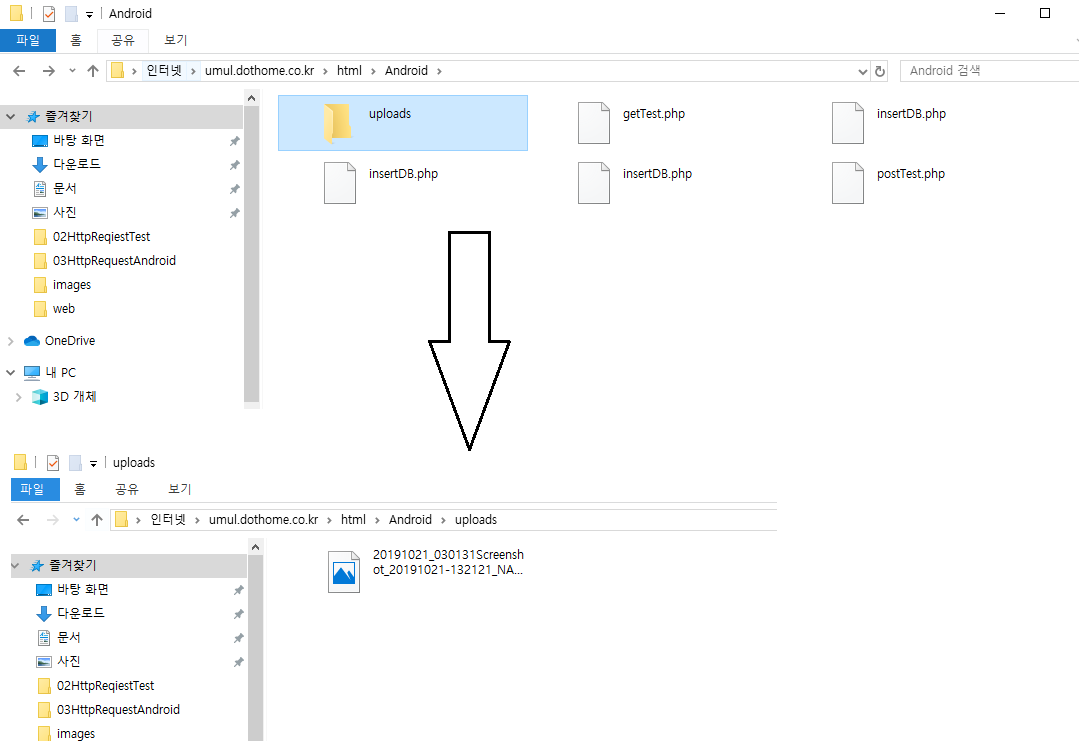
이제 이미지를 서버에 업로드 시키자.
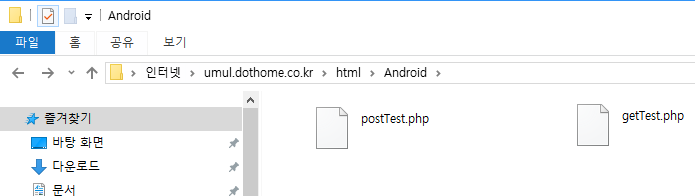
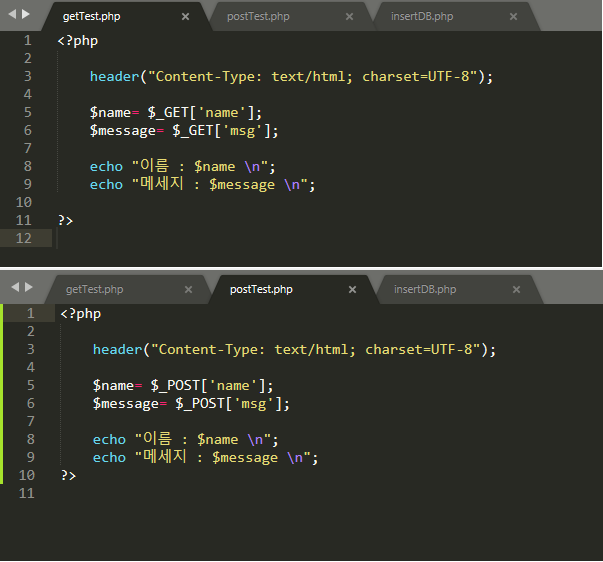
getTest.php
|
1
2
3
4
5
6
7
8
9
10
11
12
|
<?php
header("Content-Type: text/html; charset=UTF-8");
$name= $_GET['name'];
$message= $_GET['msg'];
echo "이름 : $name \n";
echo "메세지 : $message \n";
?>
|
postTest.php
|
1
2
3
4
5
6
7
8
9
10
11
|
<?php
header("Content-Type: text/html; charset=UTF-8");
$name= $_POST['name'];
$message= $_POST['msg'];
echo "이름 : $name \n";
echo "메세지 : $message \n";
?>
|
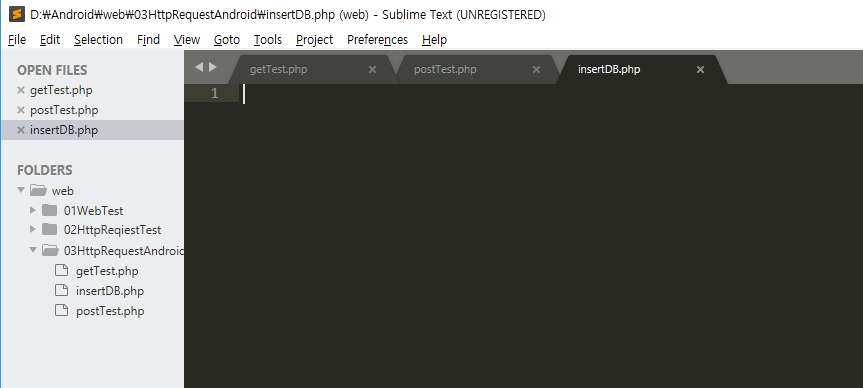
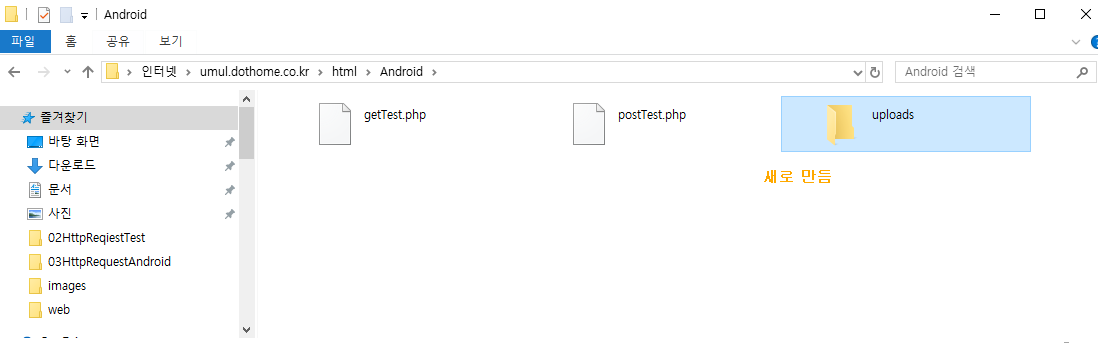
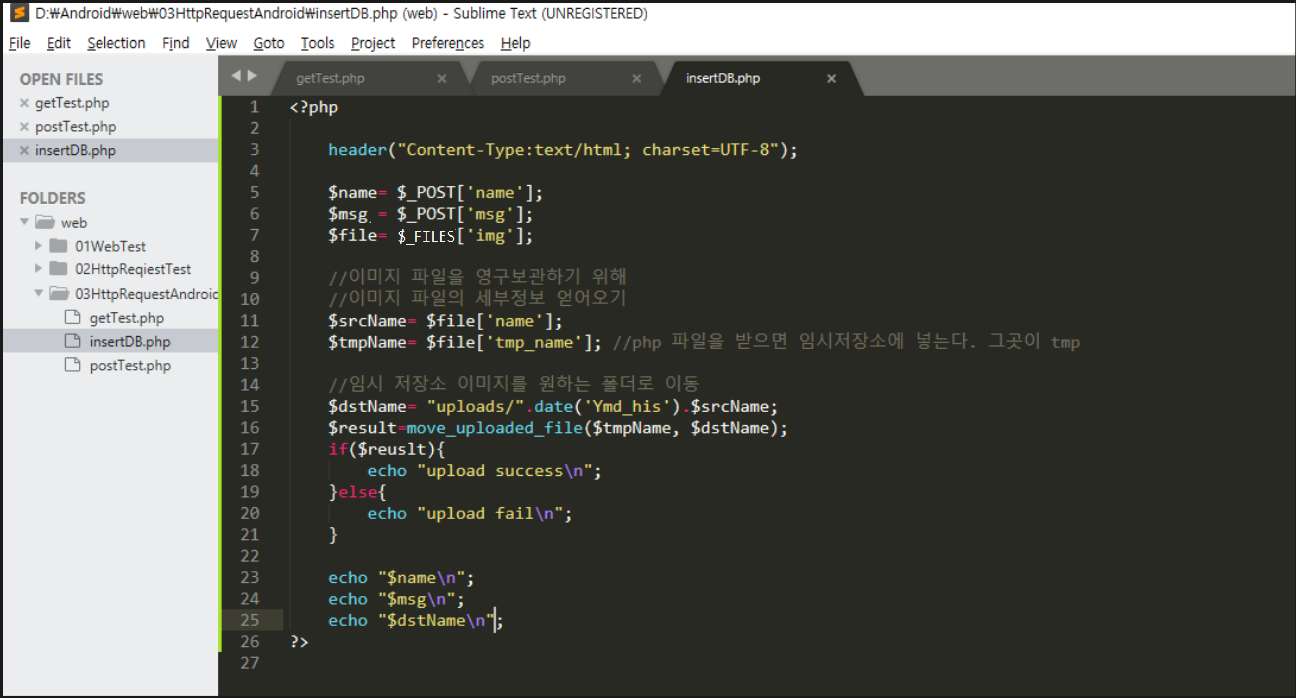
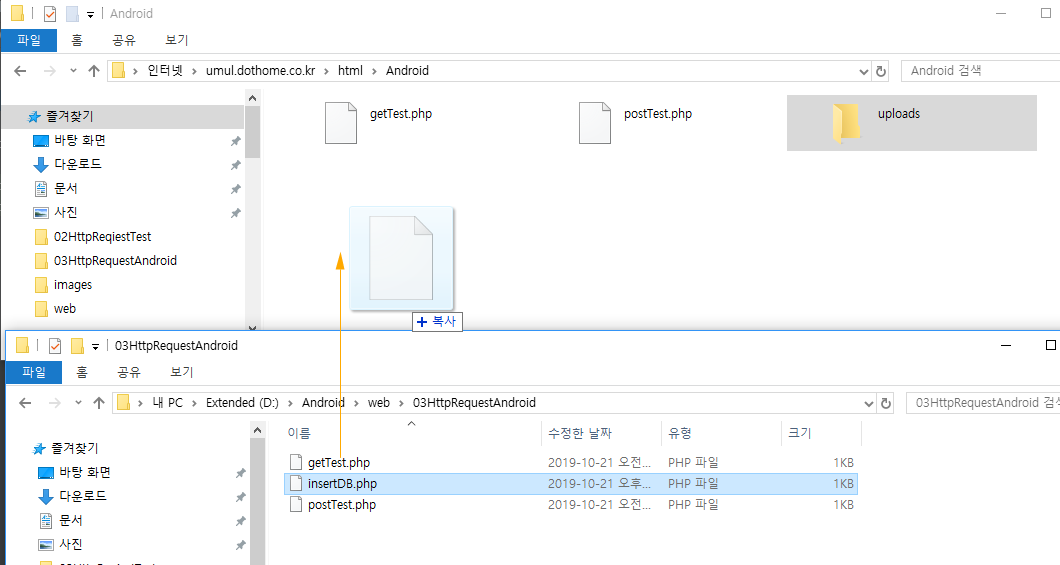
insertDB.php
|
1
2
3
4
5
6
7
8
9
10
11
12
13
14
15
16
17
18
19
20
21
22
23
24
25
26
27
28
|
<?php
header("Content-Type:text/html; charset=UTF-8");
$name= $_POST['name'];
$msg= $_POST['msg'];
$file= $_FILES['img'];
//이미지 파일을 영구보관하기 위해
//이미지 파일의 세부정보 얻어오기
$srcName= $file['name'];
$tmpName= $file['tmp_name']; //php 파일을 받으면 임시저장소에 넣는다. 그곳이 tmp
//임시 저장소 이미지를 원하는 폴더로 이동
$dstName= "uploads/".date('Ymd_his').$srcName;
$result=move_uploaded_file($tmpName, $dstName);
if($result){
echo "upload success\n";
}else{
echo "upload fail\n";
}
echo "$name\n";
echo "$msg\n";
echo "$dstName\n";
?>
|
MainActivity.java
|
1
2
3
4
5
6
7
8
9
10
11
12
13
14
15
16
17
18
19
20
21
22
23
24
25
26
27
28
29
30
31
32
33
34
35
36
37
38
39
40
41
42
43
44
45
46
47
48
49
50
51
52
53
54
55
56
57
58
59
60
61
62
63
64
65
66
67
68
69
70
71
72
73
74
75
76
77
78
79
80
81
82
83
84
85
86
87
88
89
90
91
92
93
94
95
96
97
98
99
100
101
102
103
104
105
106
107
108
109
110
111
112
113
114
115
116
117
118
119
120
121
122
123
124
125
126
127
128
129
130
131
132
133
134
135
136
137
138
139
140
141
142
143
144
145
146
147
148
149
150
151
152
153
|
import androidx.annotation.NonNull;
import androidx.annotation.Nullable;
import android.Manifest;
import android.content.Intent;
import android.database.Cursor;
import android.net.Uri;
import android.os.Build;
import android.os.Bundle;
import android.provider.MediaStore;
import android.view.View;
import android.widget.EditText;
import android.widget.ImageView;
import android.widget.Toast;
import com.android.volley.Request;
import com.android.volley.Response;
public class MainActivity extends AppCompatActivity {
EditText etName, etMsg;
ImageView iv;
String imgPath;
@Override
protected void onCreate(Bundle savedInstanceState) {
super.onCreate(savedInstanceState);
setContentView(R.layout.activity_main);
etName=findViewById(R.id.et_name);
etMsg=findViewById(R.id.et_msg);
iv=findViewById(R.id.iv);
//외부 저장소에 권한 필요, 동적 퍼미션
if(Build.VERSION.SDK_INT>=Build.VERSION_CODES.M){
int permissionResult= checkSelfPermission(Manifest.permission.WRITE_EXTERNAL_STORAGE);
if(permissionResult== PackageManager.PERMISSION_DENIED){
String[] permissions= new String[]{Manifest.permission.WRITE_EXTERNAL_STORAGE};
requestPermissions(permissions,10);
}
}
}
@Override
public void onRequestPermissionsResult(int requestCode, @NonNull String[] permissions, @NonNull int[] grantResults) {
super.onRequestPermissionsResult(requestCode, permissions, grantResults);
switch(requestCode){
case 10:
if(grantResults[0]==PackageManager.PERMISSION_GRANTED){
Toast.makeText(this, "외부 메모리 읽기/쓰기 사용 가능", Toast.LENGTH_SHORT).show();
}else{
Toast.makeText(this, "외부 메모리 읽기/쓰기 제한", Toast.LENGTH_SHORT).show();
}
break;
}
}
public void clickBtn(View view) {
Intent intent= new Intent(Intent.ACTION_PICK);
intent.setType("image/*");
startActivityForResult(intent,10);
}
@Override
protected void onActivityResult(int requestCode, int resultCode, @Nullable Intent data) {
super.onActivityResult(requestCode, resultCode, data);
switch (requestCode){
case 10:
if(resultCode==RESULT_OK){
Toast.makeText(this, "RESULT_OK", Toast.LENGTH_SHORT).show();
Uri uri= data.getData();
if(uri!=null){
iv.setImageURI(uri);
//갤러리앱에서 관리하는 DB정보가 있는데, 그것이 나온다 [실제 파일 경로가 아님!!]
//얻어온 Uri는 Gallery앱의 DB번호임. (content://-----/2854)
//업로드를 하려면 이미지의 절대경로(실제 경로: file:// -------/aaa.png 이런식)가 필요함
//Uri -->절대경로(String)로 변환
imgPath= getRealPathFromUri(uri); //임의로 만든 메소드 (절대경로를 가져오는 메소드)
//이미지 경로 uri 확인해보기
new AlertDialog.Builder(this).setMessage(uri.toString()+"\n"+imgPath).create().show();
}
}else{
Toast.makeText(this, "이미지 선택을 하지 않았습니다.", Toast.LENGTH_SHORT).show();
}
break;
}
}// onActivityResult()..
//Uri -- > 절대경로로 바꿔서 리턴시켜주는 메소드
String getRealPathFromUri(Uri uri){
CursorLoader loader= new CursorLoader(this, uri, proj, null, null, null);
Cursor cursor= loader.loadInBackground();
cursor.moveToFirst();
String result= cursor.getString(column_index);
return result;
}
public void clickUpload(View view) {
//서버로 보낼 데이터
String name= etName.getText().toString();
String msg= etMsg.getText().toString();
//안드로이드에서 보낼 데이터를 받을 php 서버 주소
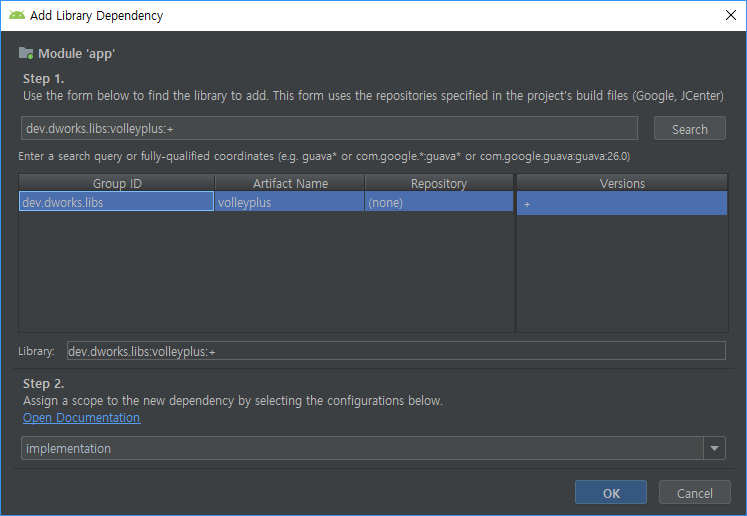
//Volley plus Library를 이용해서
//파일 전송하도록..
//Volley+는 AndroidStudio에서 검색이 안됨 [google 검색 이용]
//파일 전송 요청 객체 생성[결과를 String으로 받음]
SimpleMultiPartRequest smpr= new SimpleMultiPartRequest(Request.Method.POST, serverUrl, new Response.Listener<String>() {
@Override
public void onResponse(String response) {
new AlertDialog.Builder(MainActivity.this).setMessage("응답:"+response).create().show();
}
}, new Response.ErrorListener() {
@Override
public void onErrorResponse(VolleyError error) {
Toast.makeText(MainActivity.this, "ERROR", Toast.LENGTH_SHORT).show();
}
});
//요청 객체에 보낼 데이터를 추가
smpr.addStringParam("name", name);
smpr.addStringParam("msg", msg);
//이미지 파일 추가
smpr.addFile("img", imgPath);
//요청객체를 서버로 보낼 우체통 같은 객체 생성
RequestQueue requestQueue= Volley.newRequestQueue(this);
requestQueue.add(smpr);
}
public void clickLoad(View view) {
}
}
|
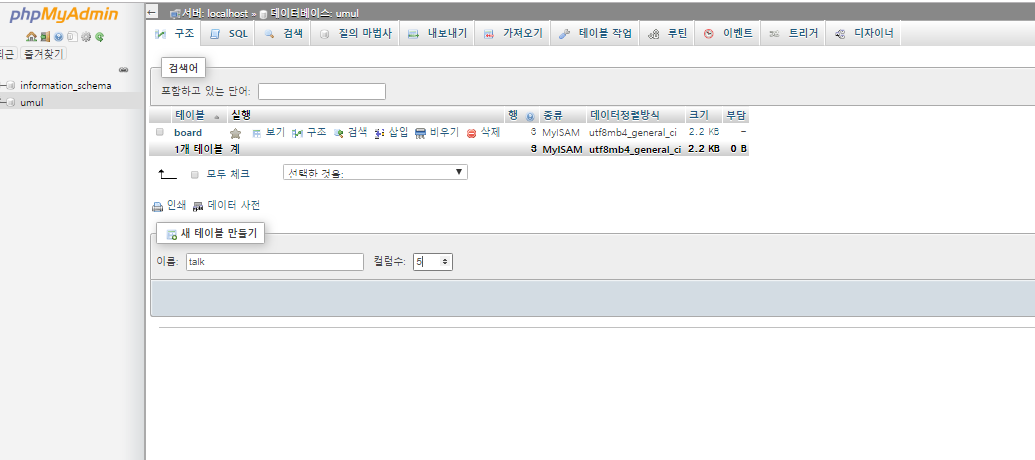
이제 DB에 텍스트와, 이미지(경로)를 입력해보자.
insertDB.php 코드
|
1
2
3
4
5
6
7
8
9
10
11
12
13
14
15
16
17
18
19
20
21
22
23
24
25
26
27
28
29
30
31
32
33
34
35
36
37
38
39
40
41
42
43
44
45
46
47
48
49
50
51
|
<?php
header("Content-Type:text/html; charset=UTF-8");
$name= $_POST['name'];
$msg= $_POST['msg'];
$file= $_FILES['img'];
//이미지 파일을 영구보관하기 위해
//이미지 파일의 세부정보 얻어오기
$srcName= $file['name'];
$tmpName= $file['tmp_name']; //php 파일을 받으면 임시저장소에 넣는다. 그곳이 tmp
//임시 저장소 이미지를 원하는 폴더로 이동
$dstName= "uploads/".date('Ymd_his').$srcName;
$result=move_uploaded_file($tmpName, $dstName);
if($result){
echo "upload success\n";
}else{
echo "upload fail\n";
}
echo "$name\n";
echo "$msg\n";
echo "$dstName\n";
//글 작성 시간 변수
$now= date('Y-m-d H:i:s');
// $name, $msg, $dstName, $now DB에 저장
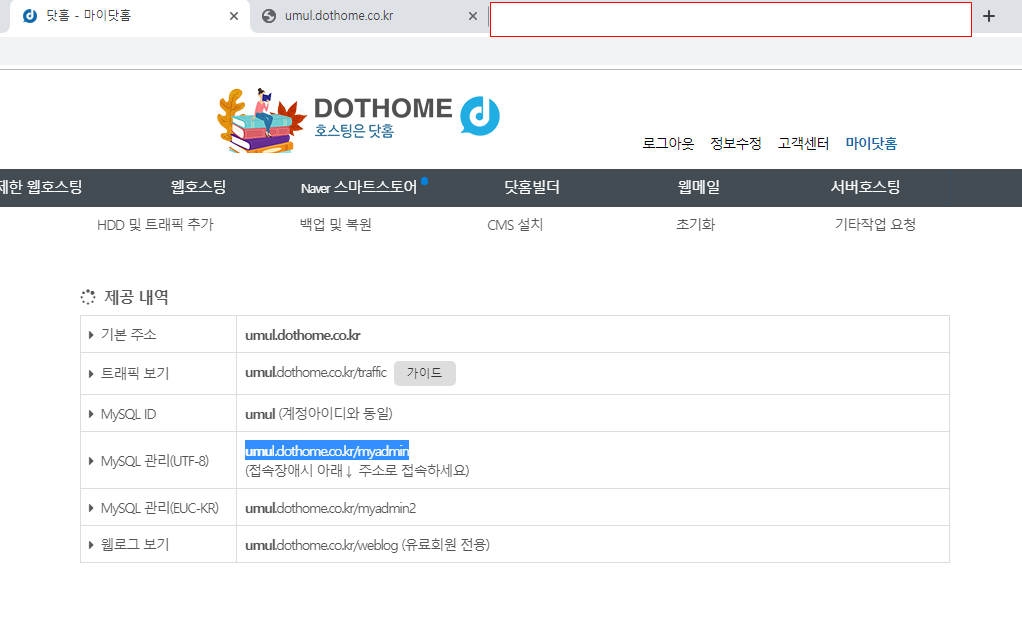
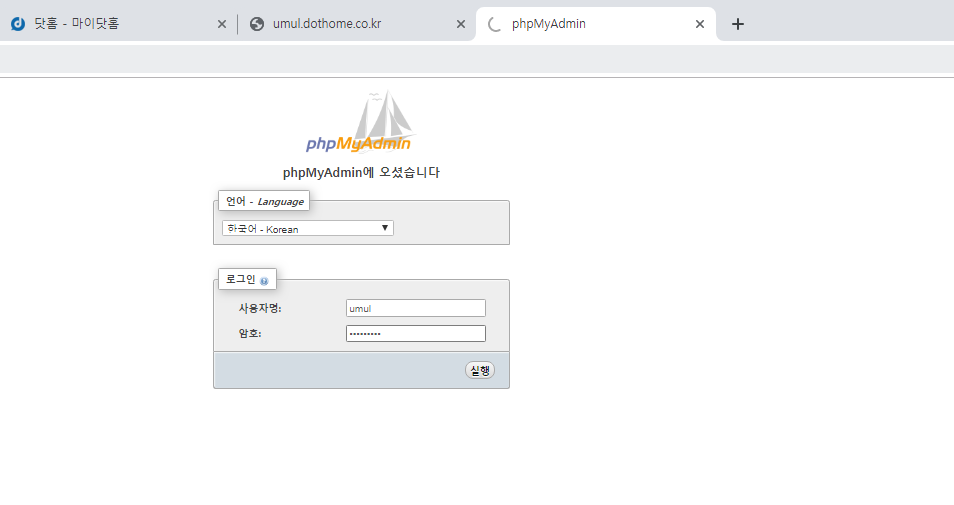
// MySQL에 접속
$conn= mysqli_connect("localhost","닷홈 ID"," 비번 쓰시오","DB명");
//한글 깨짐 방지
mysqli_query($conn, "set names utf8");
//insert하는 쿼리문
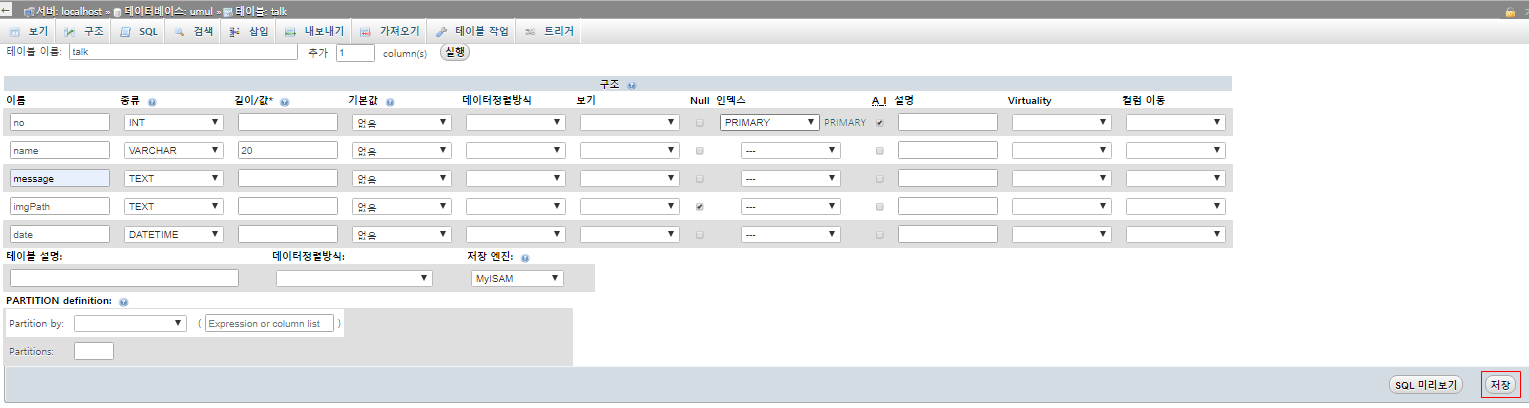
$sql="insert into talk(name, message, imgPath, date) values('$name','$msg','$dstName','$now')";
$result =mysqli_query($conn, $sql); //쿼리를 요청하다.
if($result) echo "insert success \n";
else echo "insert fail \n";
mysqli_close($conn);
?>
|


LOAD DATA 버튼은 다음 장에서 하겠다.
지금까지 코드 복붙용
activity_main.xml 코드
|
1
2
3
4
5
6
7
8
9
10
11
12
13
14
15
16
17
18
19
20
21
22
23
24
25
26
27
28
29
30
31
32
33
34
35
36
37
38
39
40
41
42
43
44
45
|
<?xml version="1.0" encoding="utf-8"?>
xmlns:app="http://schemas.android.com/apk/res-auto"
xmlns:tools="http://schemas.android.com/tools"
android:layout_width="match_parent"
android:layout_height="match_parent"
android:orientation="vertical"
android:padding="16dp"
tools:context=".MainActivity">
<EditText
android:id="@+id/et_name"
android:layout_width="match_parent"
android:layout_height="wrap_content"
android:hint="input name"
android:inputType="text"/>
<EditText
android:id="@+id/et_msg"
android:layout_width="match_parent"
android:layout_height="wrap_content"
android:hint="input message"
android:inputType="textMultiLine"
android:lines="5"
android:gravity="top"/>
<Button
android:layout_width="wrap_content"
android:layout_height="wrap_content"
android:text="select Image"
android:textAllCaps="false"
android:onClick="clickBtn"/>
<ImageView
android:id="@+id/iv"
android:layout_width="match_parent"
android:layout_height="200dp"/>
<Button
android:layout_width="match_parent"
android:layout_height="wrap_content"
android:text="upload data"
android:onClick="clickUpload"/>
<Button
android:layout_width="match_parent"
android:layout_height="wrap_content"
android:text="load data"
android:onClick="clickLoad"/>
</LinearLayout>
|
MainActivity.java 코드
|
1
2
3
4
5
6
7
8
9
10
11
12
13
14
15
16
17
18
19
20
21
22
23
24
25
26
27
28
29
30
31
32
33
34
35
36
37
38
39
40
41
42
43
44
45
46
47
48
49
50
51
52
53
54
55
56
57
58
59
60
61
62
63
64
65
66
67
68
69
70
71
72
73
74
75
76
77
78
79
80
81
82
83
84
85
86
87
88
89
90
91
92
93
94
95
96
97
98
99
100
101
102
103
104
105
106
107
108
109
110
111
112
113
114
115
116
117
118
119
120
121
122
123
124
125
126
127
128
129
130
131
132
133
134
135
136
137
138
139
140
141
142
143
144
145
146
147
148
149
150
151
152
153
154
155
156
157
158
159
160
161
162
163
164
165
166
167
168
169
170
171
172
|
package com.lcw.ex80httprequestdbtest;
import androidx.annotation.NonNull;
import androidx.annotation.Nullable;
import android.Manifest;
import android.content.Intent;
import android.database.Cursor;
import android.net.Uri;
import android.os.Build;
import android.os.Bundle;
import android.provider.MediaStore;
import android.view.View;
import android.widget.EditText;
import android.widget.ImageView;
import android.widget.Toast;
import com.android.volley.Request;
import com.android.volley.Response;
public class MainActivity extends AppCompatActivity {
EditText etName,etMsg;
ImageView iv;
//업로드할 이미지의 절대경로(실제 경로)
String imgPath;
@Override
protected void onCreate(Bundle savedInstanceState) {
super.onCreate(savedInstanceState);
setContentView(R.layout.activity_main);
etName=findViewById(R.id.et_name);
etMsg=findViewById(R.id.et_msg);
iv=findViewById(R.id.iv);
//업로드 하려면 외부저장소 권한 필요
//동적 퍼미션 코드 필요..
//동적퍼미션 작업
if(Build.VERSION.SDK_INT>=Build.VERSION_CODES.M){
int permissionResult= checkSelfPermission(Manifest.permission.WRITE_EXTERNAL_STORAGE);
if(permissionResult== PackageManager.PERMISSION_DENIED){
String[] permissions= new String[]{ Manifest.permission.WRITE_EXTERNAL_STORAGE};
requestPermissions(permissions,10);
}
}else{
//cv.setVisibility(View.VISIBLE);
}
}//onCreate() ..
@Override
public void onRequestPermissionsResult(int requestCode, @NonNull String[] permissions, @NonNull int[] grantResults) {
super.onRequestPermissionsResult(requestCode, permissions, grantResults);
switch (requestCode){
case 10 :
if(grantResults[0]==PackageManager.PERMISSION_GRANTED) //사용자가 허가 했다면
{
Toast.makeText(this, "외부 메모리 읽기/쓰기 사용 가능", Toast.LENGTH_SHORT).show();
}else{//거부했다면
Toast.makeText(this, "외부 메모리 읽기/쓰기 제한", Toast.LENGTH_SHORT).show();
}
break;
}
}
public void clickBtn(View view) {
//갤러리 or 사진 앱 실행하여 사진을 선택하도록..
Intent intent= new Intent(Intent.ACTION_PICK);
intent.setType("image/*");
startActivityForResult(intent,10);
}
@Override
protected void onActivityResult(int requestCode, int resultCode, @Nullable Intent data) {
super.onActivityResult(requestCode, resultCode, data);
switch (requestCode){
case 10:
if(resultCode==RESULT_OK){
//선택한 사진의 경로(Uri)객체 얻어오기
Uri uri= data.getData();
if(uri!=null){
iv.setImageURI(uri);
//갤러리앱에서 관리하는 DB정보가 있는데, 그것이 나온다 [실제 파일 경로가 아님!!]
//얻어온 Uri는 Gallery앱의 DB번호임. (content://-----/2854)
//업로드를 하려면 이미지의 절대경로(실제 경로: file:// -------/aaa.png 이런식)가 필요함
//Uri -->절대경로(String)로 변환
imgPath= getRealPathFromUri(uri); //임의로 만든 메소드 (절대경로를 가져오는 메소드)
//이미지 경로 uri 확인해보기
new AlertDialog.Builder(this).setMessage(uri.toString()+"\n"+imgPath).create().show();
}
}else
{
Toast.makeText(this, "이미지 선택을 하지 않았습니다.", Toast.LENGTH_SHORT).show();
}
break;
}
}//onActivityResult() ..
//Uri -- > 절대경로로 바꿔서 리턴시켜주는 메소드
String getRealPathFromUri(Uri uri){
CursorLoader loader= new CursorLoader(this, uri, proj, null, null, null);
Cursor cursor= loader.loadInBackground();
cursor.moveToFirst();
String result= cursor.getString(column_index);
return result;
}
public void clickUpload(View view) {
//서버로 보낼 데이터
String name= etName.getText().toString();
String msg= etMsg.getText().toString();
//안드로이드에서 보낼 데이터를 받을 php 서버 주소
//Volley plus Library를 이용해서
//파일 전송하도록..
//Volley+는 AndroidStudio에서 검색이 안됨 [google 검색 이용]
//파일 전송 요청 객체 생성[결과를 String으로 받음]
SimpleMultiPartRequest smpr= new SimpleMultiPartRequest(Request.Method.POST, serverUrl, new Response.Listener<String>() {
@Override
public void onResponse(String response) {
new AlertDialog.Builder(MainActivity.this).setMessage("응답:"+response).create().show();
}
}, new Response.ErrorListener() {
@Override
public void onErrorResponse(VolleyError error) {
Toast.makeText(MainActivity.this, "ERROR", Toast.LENGTH_SHORT).show();
}
});
//요청 객체에 보낼 데이터를 추가
smpr.addStringParam("name", name);
smpr.addStringParam("msg", msg);
//이미지 파일 추가
smpr.addFile("img", imgPath);
//요청객체를 서버로 보낼 우체통 같은 객체 생성
RequestQueue requestQueue= Volley.newRequestQueue(this);
requestQueue.add(smpr);
}
public void clickLoad(View view) {
}
}
|
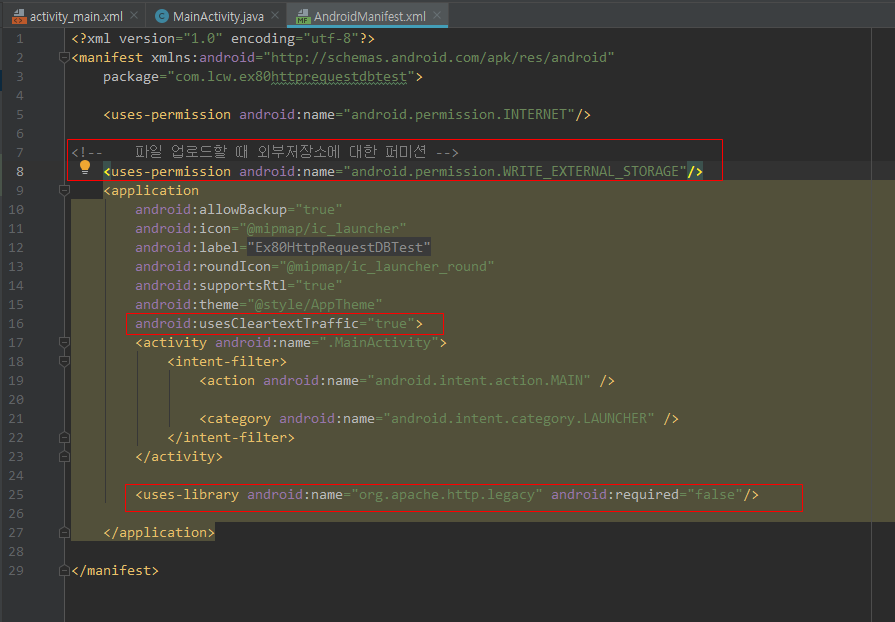
AndroidManifest.xml 코드
|
1
2
3
4
5
6
7
8
9
10
11
12
13
14
15
16
17
18
19
20
21
22
23
24
25
26
27
28
29
30
|
<?xml version="1.0" encoding="utf-8"?>
<uses-permission android:name="android.permission.INTERNET"/>
<!-- 파일 업로드할 때 외부저장소에 대한 퍼미션 -->
<uses-permission android:name="android.permission.WRITE_EXTERNAL_STORAGE"/>
<application
android:allowBackup="true"
android:icon="@mipmap/ic_launcher"
android:label="@string/app_name"
android:roundIcon="@mipmap/ic_launcher_round"
android:supportsRtl="true"
android:theme="@style/AppTheme"
android:usesCleartextTraffic="true">
<activity android:name=".MainActivity">
<intent-filter>
</intent-filter>
</activity>
</application>
</manifest>
|
getTest.php
|
1
2
3
4
5
6
7
8
9
10
11
12
|
<?php
header("Content-Type: text/html; charset=UTF-8");
$name= $_GET['name'];
$message= $_GET['msg'];
echo "이름 : $name \n";
echo "메세지 : $message \n";
?>
|
postTest.php
|
1
2
3
4
5
6
7
8
9
10
11
|
<?php
header("Content-Type: text/html; charset=UTF-8");
$name= $_POST['name'];
$message= $_POST['msg'];
echo "이름 : $name \n";
echo "메세지 : $message \n";
?>
r
|
insertDB.php
|
1
2
3
4
5
6
7
8
9
10
11
12
13
14
15
16
17
18
19
20
21
22
23
24
25
26
27
28
29
30
31
32
33
34
35
36
37
38
39
40
41
42
43
44
45
46
47
48
49
50
51
|
<?php
header("Content-Type:text/html; charset=UTF-8");
$name= $_POST['name'];
$msg= $_POST['msg'];
$file= $_FILES['img'];
//이미지 파일을 영구보관하기 위해
//이미지 파일의 세부정보 얻어오기
$srcName= $file['name'];
$tmpName= $file['tmp_name']; //php 파일을 받으면 임시저장소에 넣는다. 그곳이 tmp
//임시 저장소 이미지를 원하는 폴더로 이동
$dstName= "uploads/".date('Ymd_his').$srcName;
$result=move_uploaded_file($tmpName, $dstName);
if($result){
echo "upload success\n";
}else{
echo "upload fail\n";
}
echo "$name\n";
echo "$msg\n";
echo "$dstName\n";
//글 작성 시간 변수
$now= date('Y-m-d H:i:s');
// $name, $msg, $dstName, $now DB에 저장
// MySQL에 접속
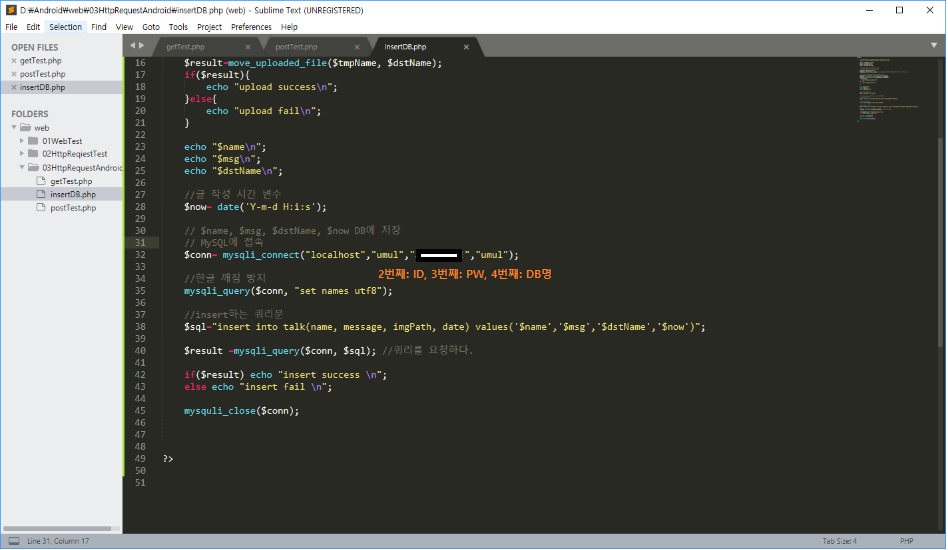
$conn= mysqli_connect("localhost","닷홈 아이디","비번","DB명");
//한글 깨짐 방지
mysqli_query($conn, "set names utf8");
//insert하는 쿼리문
$sql="insert into talk(name, message, imgPath, date) values('$name','$msg','$dstName','$now')";
$result =mysqli_query($conn, $sql); //쿼리를 요청하다.
if($result) echo "insert success \n";
else echo "insert fail \n";
mysqli_close($conn);
?>
|
반응형
'안드로이드 웹앱 콘테츠 개발자 양성(국비지원) > HTML 도메인' 카테고리의 다른 글
| HTTP 서버와 DB 앱 연동 (텍스트,이미지를 GET,POST로 DB까지) 1-2 (7) | 2019.10.22 |
|---|---|
| HTTP 서버와 앱 연동 (Volley 라이브러리를 이용해서 간단하게 구현) (0) | 2019.10.21 |
| HTTP 서버와 앱 연동 (0) | 2019.10.21 |
| HTML(언어 사용 html,css,js, php) 기존 도메인을 이용 GET,POST 방식으로 서버 업로드 1-2 [DB 연동] (1) | 2019.10.18 |
| HTML(언어 사용 html,css,js, php) 기존 도메인을 이용 GET,POST 방식으로 서버 업로드 1-1 (0) | 2019.10.18 |


댓글