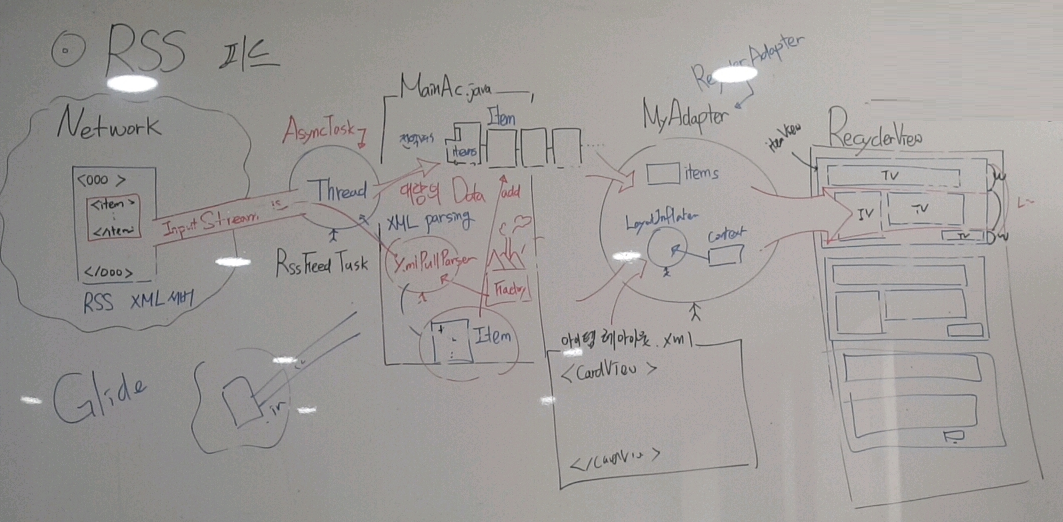
AsyncTask : Therad + runOnUiThread
이번 예제에 리사이클 뷰에 내용을 서버에서 가져와서 보여주는 것이다. (+ WebView도 사용할 것이다.)
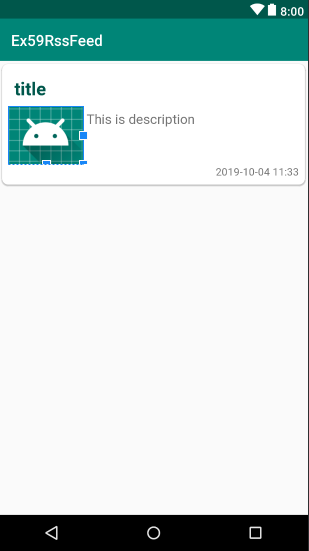
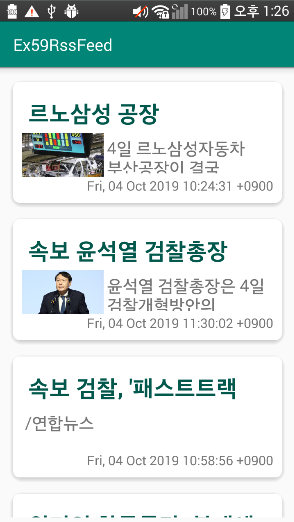
<최종 실행 화면>
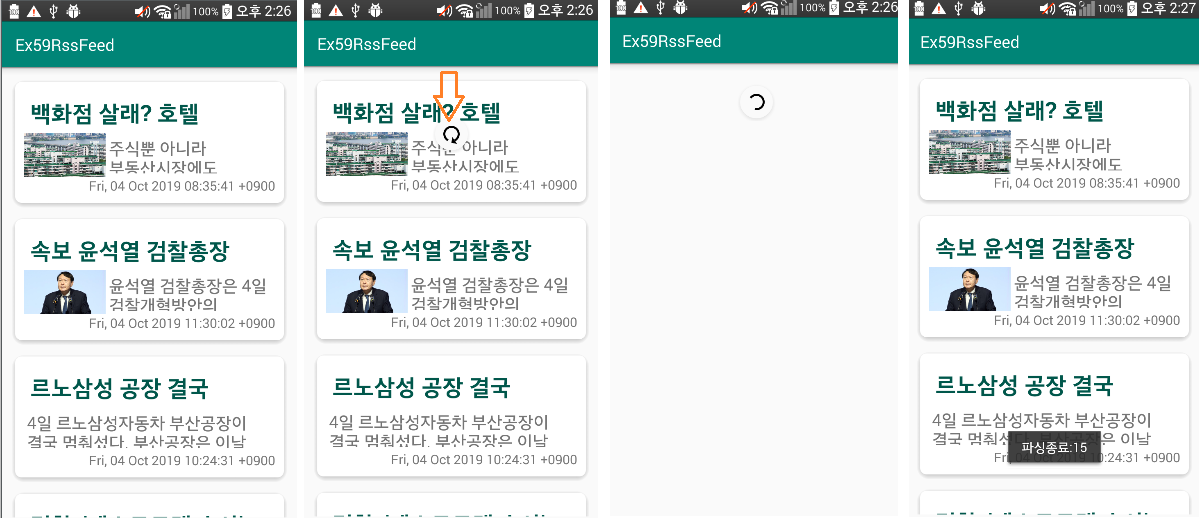
뉴스 xml을 가져와서 화면을 구성하고, 해당 기사를 클릭하면 해당 뉴스 URL로 연결된다.

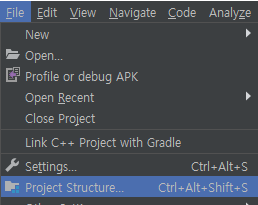
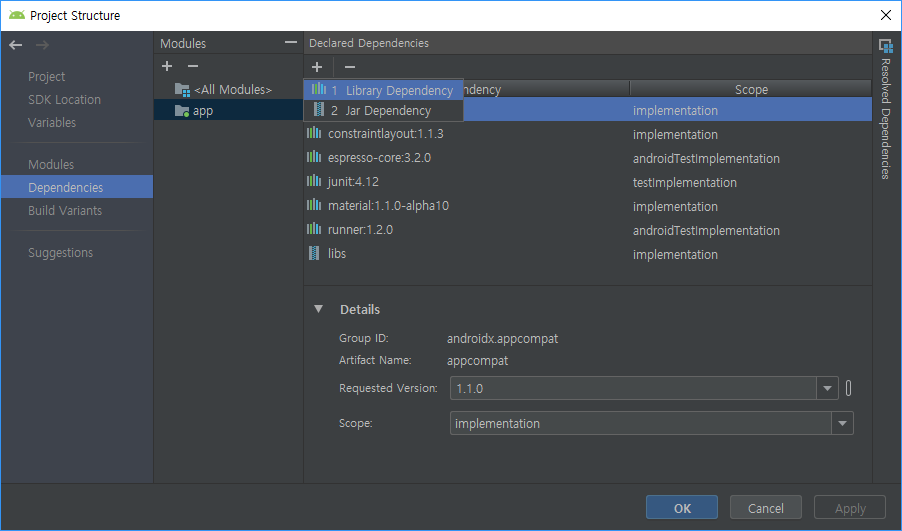
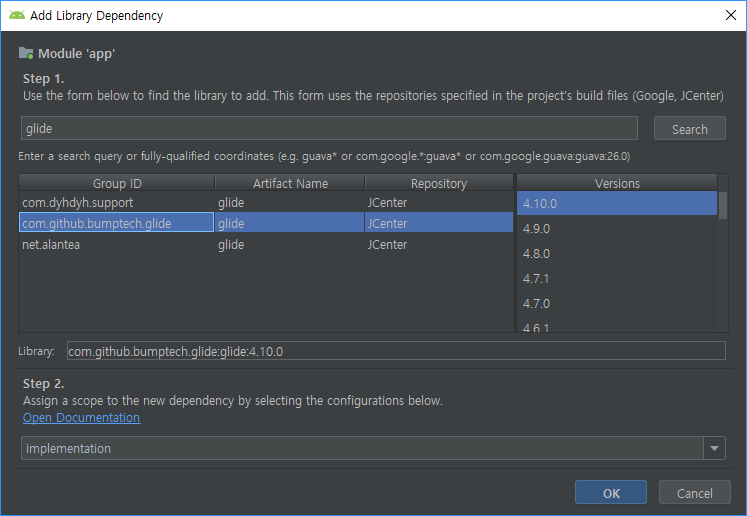
라이브러리 추가

이제 화면 구성을 해보자.
대량의 데이터가 필요하다. (http://rss.hankyung.com/new/news_main.xml을 가져오겠다.)
예제에서는 인터넷에'한국경제 RSS'를 검색해서 가져왔다.


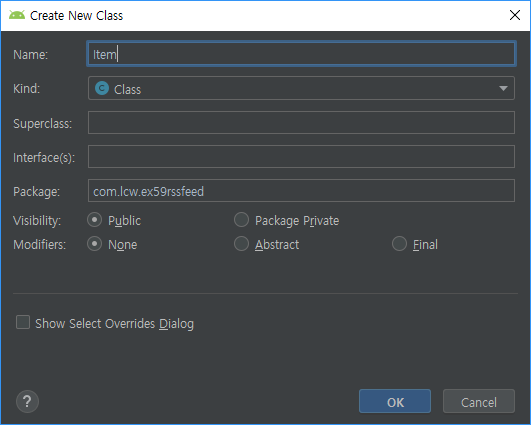
Item.java 코드
|
1
2
3
4
5
6
7
8
9
10
11
12
13
14
15
16
17
18
19
20
21
22
23
24
25
26
27
28
29
30
31
32
33
34
35
36
37
38
39
40
41
42
43
44
45
46
47
48
49
50
51
52
53
54
55
56
57
58
59
60
61
62
63
64
65
|
package com.lcw.ex59rssfeed;
public class Item {
//보통은 객체지향은 정보의 은닉을 해야하기 때문에, private으로 만든다.
String title;
String link;
String desc;
String imgUrl;
String date;
public Item() { //혹시 몰라서 매개변수가 없는 것도 만들었다.
}
public Item(String title, String link, String desc, String imgUrl, String date) {
this.title = title;
this.link = link;
this.desc = desc;
this.imgUrl = imgUrl;
this.date = date;
}
//Getter & Setter Method..
//멤버 변수가 private이면 다른 곳에서 접근하기 위해 Getter & Setter Method 필요하다.
// 자동완성 Alt+Insert 에 Getter & Setter 있다.
public String getTitle() {
return title;
}
public void setTitle(String title) {
this.title = title;
}
public String getLink() {
return link;
}
public void setLink(String link) {
this.link = link;
}
public String getDesc() {
return desc;
}
public void setDesc(String desc) {
this.desc = desc;
}
public String getImgUrl() {
return imgUrl;
}
public void setImgUrl(String imgUrl) {
this.imgUrl = imgUrl;
}
public String getDate() {
return date;
}
public void setDate(String date) {
this.date = date;
}
}
|
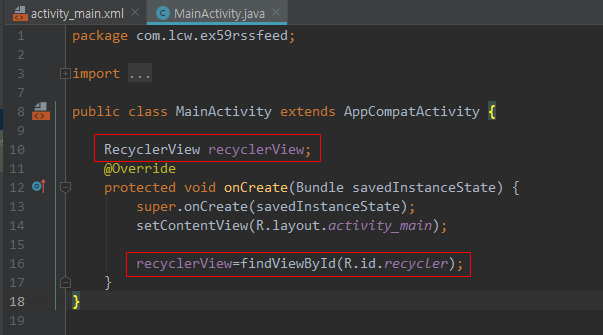
이제 MainActivity.java로 가서 Thread 생성 및 RSS .xml읽어오자.
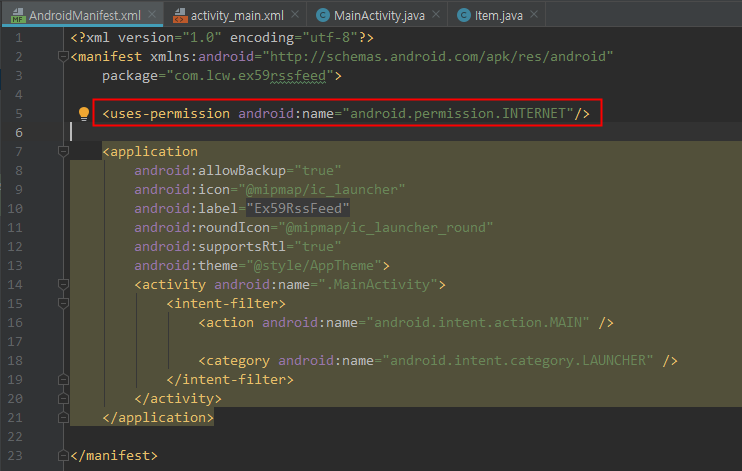
그전에 인터넷 작업은 이 작업이 필수이다.!!!
MainActivity.java 코드
|
1
2
3
4
5
6
7
8
9
10
11
12
13
14
15
16
17
18
19
20
21
22
23
24
25
26
27
28
29
30
31
32
33
34
35
36
37
38
39
40
41
42
43
44
45
46
47
48
49
50
51
52
53
54
55
56
57
58
59
60
61
62
63
64
65
66
67
68
69
70
71
72
73
74
75
76
77
78
79
80
81
82
83
84
85
86
87
88
89
90
91
92
93
94
95
96
97
98
99
100
101
102
103
104
105
106
107
108
109
110
111
112
113
114
115
116
117
118
119
120
121
122
123
124
125
126
127
128
129
130
131
132
133
134
135
136
137
138
139
140
141
142
143
|
package com.lcw.ex59rssfeed;
import android.os.AsyncTask;
import android.os.Bundle;
import android.widget.Toast;
import org.xmlpull.v1.XmlPullParser;
import org.xmlpull.v1.XmlPullParserException;
import org.xmlpull.v1.XmlPullParserFactory;
import java.io.IOException;
import java.io.InputStream;
import java.net.URL;
import java.util.ArrayList;
public class MainActivity extends AppCompatActivity {
RecyclerView recyclerView;
ArrayList<Item> items= new ArrayList<>();
@Override
protected void onCreate(Bundle savedInstanceState) {
super.onCreate(savedInstanceState);
setContentView(R.layout.activity_main);
recyclerView=findViewById(R.id.recycler);
//대량의 데이터 추가 작업
readRss();
}//onCreate Method ..
//rss xml문서 읽어와서 파싱하는 작업 메소드
void readRss(){
try {
//스트림역할하여 데이터 읽어오기 : 인터넷 작업은 반드시 퍼미션 작성해야함.
//Network작업은 반드시 별도의 Thread만 할 수 있다.
//별도의 Thread 객체 생성
RssFeedTask task= new RssFeedTask();
task.execute(url); //doInBackground()메소드가 발동[thread의 start()와 같은 역할]
} catch (MalformedURLException e) { e.printStackTrace();}
}// readRss Method ..
//이너 클래스
class RssFeedTask extends AsyncTask<URL, Void, String>{
//Thread의 run()메소드와 같은 역할
@Override
protected String doInBackground(URL... urls) { //...는 여러개를 받는 의미, 만약 task.execute(url, url2, url3); 보내면 urls[3]로 받는다.
//전달받은 URL 객체
URL url= urls[0];
//해임달(URL)에게 무지개로드(Stream) 열도록..
try {
InputStream is= url.openStream();
//읽어온 xml를 파싱(분석)해주는 객체 생성
XmlPullParserFactory factory= XmlPullParserFactory.newInstance();
XmlPullParser xpp= factory.newPullParser();
//utf-8은 한글도 읽어오기 위한 인코딩 방식
xpp.setInput(is, "utf-8");
int eventType= xpp.getEventType();
Item item= null;
String tagName= null;
while (eventType != XmlPullParser.END_DOCUMENT){
switch (eventType){
case XmlPullParser.START_DOCUMENT:
break;
case XmlPullParser.START_TAG:
tagName=xpp.getName();
if(tagName.equals("item")){
item= new Item();
}else if(tagName.equals("title")){
if(item!=null) item.setTitle(xpp.getText());
}else if(tagName.equals("link")){
if(item!=null) item.setLink(xpp.getText());
}else if(tagName.equals("description")){
if(item!=null) item.setDesc(xpp.getText());
}else if(tagName.equals("image")){
if(item!=null) item.setImgUrl(xpp.getText());
}else if(tagName.equals("pubDate")){
if(item!=null) item.setDate(xpp.getText());
}
break;
case XmlPullParser.TEXT:
break;
case XmlPullParser.END_TAG:
tagName=xpp.getName();
if(tagName.equals("item")){
//읽어온 기사 한개를 대량의 데이터에 추가
items.add(item);
item=null;
//리사이클러의 아답터에게 데이터가
//변경되었다는 것을 통지
}
break;
}
eventType= xpp.next();
}//while
//파싱 작업이 완료되었다!!
//테스트로 Toastㄹ 보여주기, 단 별도 스레드는
//UI작업이 불가! 그래서 runOnUiThread()를 이용했었음.
//이 UI작업을 하는 별도의 메소드로
//결과를 리턴하는 방식을 사용
} catch (IOException e) {e.printStackTrace();} catch (XmlPullParserException e) {e.printStackTrace();}
return "파싱종료"; // 리턴 값은 onPostExecute(String s) s에 전달된다.
}//doIBackground()
//doInBackground메소드가 종료된 후
//UI작업을 위해 자동 실행되는 메소드
//runOnUiThread()와 비슷한 역할
@Override
protected void onPostExecute(String s) { //매개 변수 s에 들어오는 값음 doIBackground()의 return 값이다.
super.onPostExecute(s);
//이 메소드 안에서는 UI변경 작업 가능
}
}//RssFeedTask class
}//MainActivity class ..
|
<현재 실행 화면>
URL 주소에서 데이터를 잘 가져 왔다면 Toast가 나올 것이다.
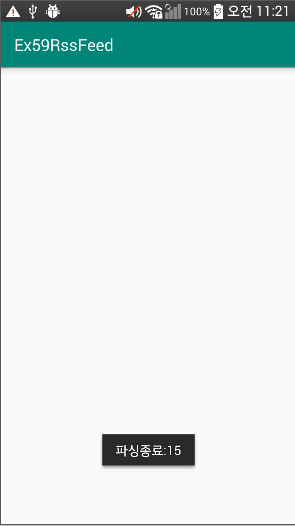
이제 화면에 보여주도록 하자. (화면 구성 레이아웃, 어댑터 필요)

|
1
2
3
4
5
6
7
8
9
10
11
12
13
14
15
16
17
18
19
20
21
22
23
24
25
26
27
28
29
30
31
32
33
34
35
36
37
38
39
40
41
42
43
44
45
46
47
48
49
50
51
52
53
54
55
56
57
|
<?xml version="1.0" encoding="utf-8"?>
android:layout_width="match_parent"
android:layout_height="160dp"
xmlns:app="http://schemas.android.com/apk/res-auto"
app:cardCornerRadius="8dp"
android:layout_margin="4dp"
app:cardBackgroundColor="#FFFFFF"
app:cardElevation="4dp"
app:contentPadding="8dp">
<LinearLayout
android:layout_width="match_parent"
android:layout_height="match_parent"
android:orientation="vertical">
<TextView
android:id="@+id/tv_tile"
android:layout_width="match_parent"
android:layout_height="wrap_content"
android:text="title"
android:textSize="24sp"
android:textColor="@color/colorPrimaryDark"
android:maxLines="1"
android:padding="8dp"
android:textStyle="bold"/>
<LinearLayout
android:layout_width="match_parent"
android:layout_height="wrap_content"
android:layout_weight="1"
android:orientation="horizontal">
<ImageView
android:id="@+id/iv"
android:layout_width="100dp"
android:layout_height="match_parent"
android:src="@mipmap/ic_launcher"
android:scaleType="centerCrop"/>
<TextView
android:id="@+id/tv_desc"
android:layout_width="match_parent"
android:layout_height="match_parent"
android:text="This is description"
android:textSize="18sp"
android:padding="4dp"/>
</LinearLayout>
<TextView
android:id="@+id/tv_date"
android:layout_width="wrap_content"
android:layout_height="wrap_content"
android:text="2019-10-04 11:33"
android:layout_gravity="right"/>
</LinearLayout>
|
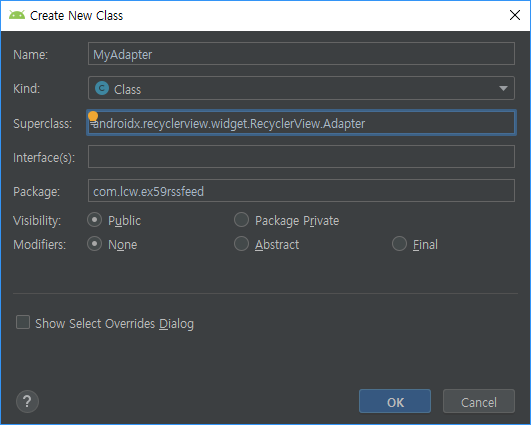
이제 어댑터를 만들자.

이미지 사용때 Glide를 사용하므로, 미리 라이브러이도 추가하자.
Myadater.java
|
1
2
3
4
5
6
7
8
9
10
11
12
13
14
15
16
17
18
19
20
21
22
23
24
25
26
27
28
29
30
31
32
33
34
35
36
37
38
39
40
41
42
43
44
45
46
47
48
49
50
51
52
53
54
55
56
57
58
59
60
61
62
63
64
65
66
67
68
69
70
71
72
73
74
75
76
77
78
79
80
81
82
83
|
package com.lcw.ex59rssfeed;
import android.content.Context;
import android.view.LayoutInflater;
import android.view.View;
import android.view.ViewGroup;
import android.widget.ImageView;
import android.widget.TextView;
import androidx.annotation.NonNull;
import com.bumptech.glide.Glide;
import java.util.ArrayList;
public class MyAdapter extends RecyclerView.Adapter {
ArrayList<Item> items;
Context context;
public MyAdapter(ArrayList<Item> items, Context context) {
this.items = items;
this.context = context;
}
@NonNull
@Override
public RecyclerView.ViewHolder onCreateViewHolder(@NonNull ViewGroup parent, int viewType) {
VH vh= new VH(itemView);
return vh;
}
@Override
public void onBindViewHolder(@NonNull RecyclerView.ViewHolder holder, int position) {
VH vh= (VH)holder;
//현재번째(position) 아이템 얻어오기
Item item= items.get(position);
vh.tvTitle.setText(item.getTitle());
//이미지는 없을 수도 있음.
if(item.getImgUrl()==null){
}else{
//네트워크에 있는 이미지를 보여주려면
//별도의 Thread가 필요한데 이를 편하게
//해주는 Library사용(Glide library)
}
}
@Override
public int getItemCount() {
return items.size();
}
//이너클래스
class VH extends RecyclerView.ViewHolder{
TextView tvTitle, tvDesc, tvDate;
ImageView iv;
public VH(@NonNull View itemView) {
super(itemView);
tvTitle=itemView.findViewById(R.id.tv_title);
tvDesc=itemView.findViewById(R.id.tv_desc);
tvDate=itemView.findViewById(R.id.tv_date);
iv=itemView.findViewById(R.id.iv);
}
}
}
|
이제 어댑터를 적용해보자. (MainActivity.java로 가자)
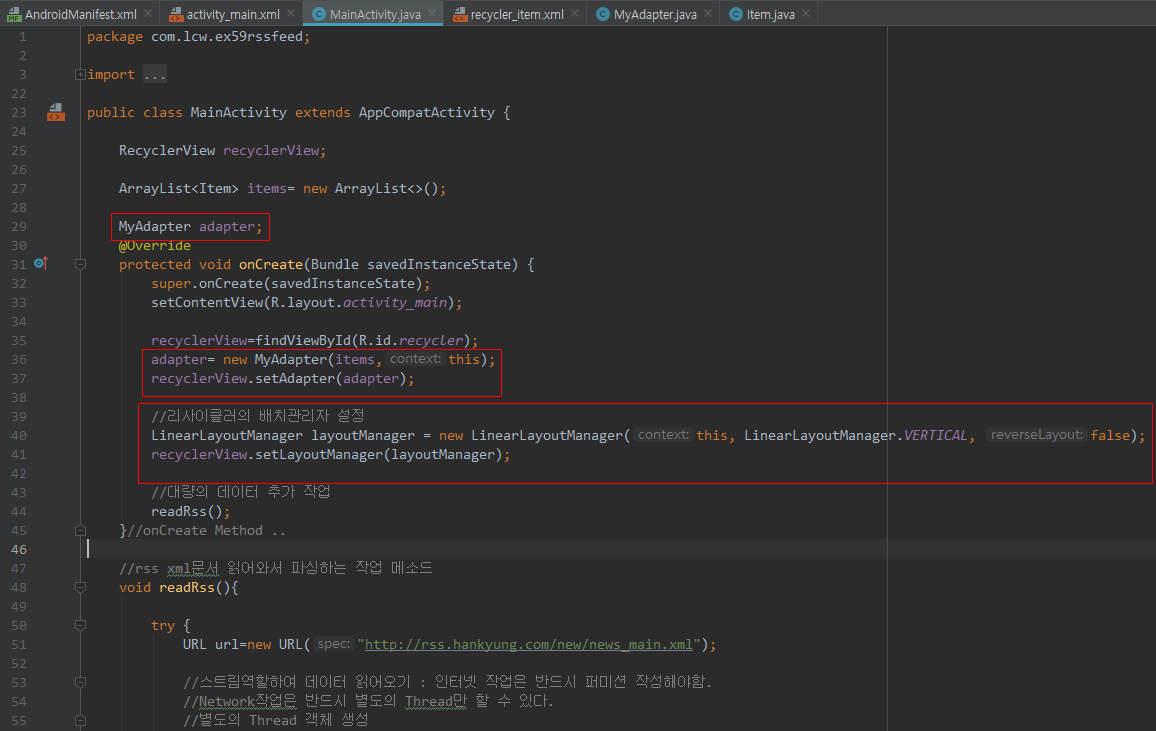
하지만 여기서 문제는 데이터가 많으면.... 데이터를 다 읽고 화면을 띄운다.
MainActivity.java를 약간 수정한다.
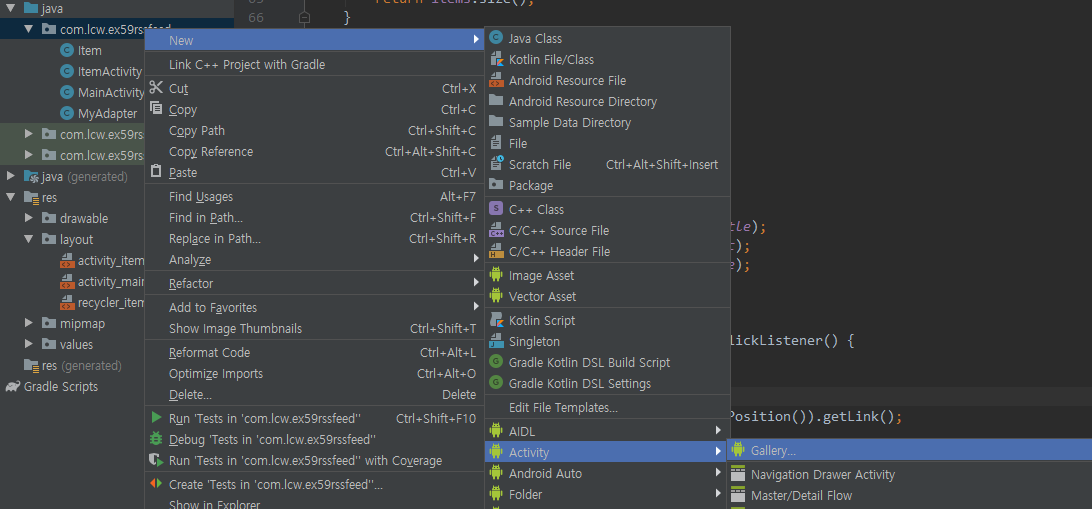
이제 목록을 클릭했을 때 기사로 가는 반응하기
<최종 실행 화면>
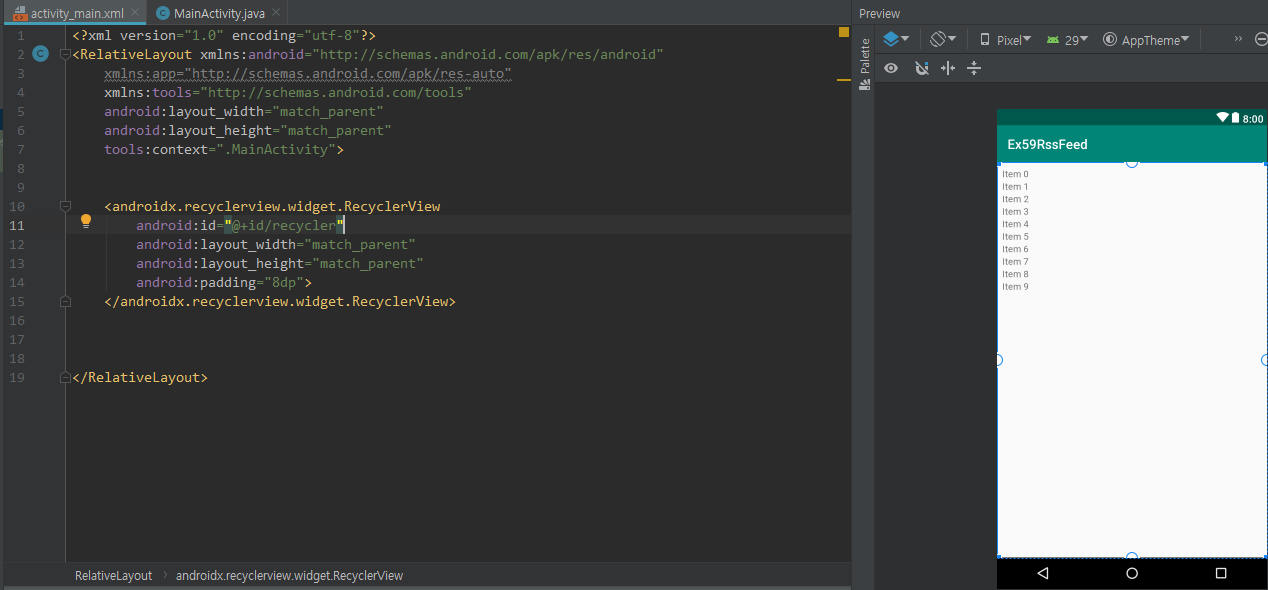
activity_main.xml
|
1
2
3
4
5
6
7
8
9
10
11
12
13
14
15
16
17
18
19
20
|
<?xml version="1.0" encoding="utf-8"?>
xmlns:app="http://schemas.android.com/apk/res-auto"
xmlns:tools="http://schemas.android.com/tools"
android:layout_width="match_parent"
android:layout_height="match_parent"
tools:context=".MainActivity">
android:id="@+id/recycler"
android:layout_width="match_parent"
android:layout_height="match_parent"
android:padding="8dp"
>
</RelativeLayout>
|
MainActivity.java
|
1
2
3
4
5
6
7
8
9
10
11
12
13
14
15
16
17
18
19
20
21
22
23
24
25
26
27
28
29
30
31
32
33
34
35
36
37
38
39
40
41
42
43
44
45
46
47
48
49
50
51
52
53
54
55
56
57
58
59
60
61
62
63
64
65
66
67
68
69
70
71
72
73
74
75
76
77
78
79
80
81
82
83
84
85
86
87
88
89
90
91
92
93
94
95
96
97
98
99
100
101
102
103
104
105
106
107
108
109
110
111
112
113
114
115
116
117
118
119
120
121
122
123
124
125
126
127
128
129
130
131
132
133
134
135
136
137
138
139
140
141
142
143
144
145
146
147
148
149
150
151
152
153
154
155
156
157
158
159
160
161
162
163
164
165
166
167
168
169
170
171
172
173
174
175
|
package com.lcw.ex59rssfeed;
import android.os.AsyncTask;
import android.os.Bundle;
import android.util.Log;
import android.widget.LinearLayout;
import android.widget.Toast;
import org.xmlpull.v1.XmlPullParser;
import org.xmlpull.v1.XmlPullParserException;
import org.xmlpull.v1.XmlPullParserFactory;
import java.io.IOException;
import java.io.InputStream;
import java.net.URL;
import java.util.ArrayList;
public class MainActivity extends AppCompatActivity {
RecyclerView recyclerView;
ArrayList<Item> items= new ArrayList<>();
MyAdapter adapter;
@Override
protected void onCreate(Bundle savedInstanceState) {
super.onCreate(savedInstanceState);
setContentView(R.layout.activity_main);
recyclerView=findViewById(R.id.recycler);
adapter= new MyAdapter(items,this);
recyclerView.setAdapter(adapter);
//리사이클러의 배치관리자 설정
LinearLayoutManager layoutManager = new LinearLayoutManager(this, LinearLayoutManager.VERTICAL, false);
recyclerView.setLayoutManager(layoutManager);
//대량의 데이터 추가 작업
readRss();
}//onCreate Method ..
//rss xml문서 읽어와서 파싱하는 작업 메소드
void readRss(){
try {
//실디바이스 중에서 oreo버전 이상에서는 보안강화로 인해 https만 허용하도록 함..
//스트림역할하여 데이터 읽어오기 : 인터넷 작업은 반드시 퍼미션 작성해야함.
//Network작업은 반드시 별도의 Thread만 할 수 있다.
//별도의 Thread 객체 생성
RssFeedTask task= new RssFeedTask();
task.execute(url); //doInBackground()메소드가 발동[thread의 start()와 같은 역할]
} catch (MalformedURLException e) { e.printStackTrace();}
}// readRss Method ..
//이너 클래스
class RssFeedTask extends AsyncTask<URL, Void, String>{
//Thread의 run()메소드와 같은 역할
@Override
protected String doInBackground(URL... urls) { //...는 여러개를 받는 의미, 만약 task.execute(url, url2, url3); 보내면 urls[3]로 받는다.
//전달받은 URL 객체
URL url= urls[0];
//해임달(URL)에게 무지개로드(Stream) 열도록..
try {
InputStream is= url.openStream();
//읽어온 xml를 파싱(분석)해주는 객체 생성
XmlPullParserFactory factory= XmlPullParserFactory.newInstance();
XmlPullParser xpp= factory.newPullParser();
//utf-8은 한글도 읽어오기 위한 인코딩 방식
xpp.setInput(is, "utf-8");
int eventType= xpp.getEventType();
Item item= null;
String tagName= null;
while (eventType != XmlPullParser.END_DOCUMENT){
switch (eventType){
case XmlPullParser.START_DOCUMENT:
break;
case XmlPullParser.START_TAG:
tagName=xpp.getName();
Log.i("TAG", tagName);
if(tagName.equals("item")){
item= new Item();
}else if(tagName.equals("title")){
if(item!=null) item.setTitle(xpp.getText());
}else if(tagName.equals("link")){
if(item!=null) item.setLink(xpp.getText());
}else if(tagName.equals("description")){
if(item!=null) item.setDesc(xpp.getText());
}else if(tagName.equals("image")){
if(item!=null) item.setImgUrl(xpp.getText());
}else if(tagName.equals("pubDate")){
if(item!=null) item.setDate(xpp.getText());
}
break;
case XmlPullParser.TEXT:
break;
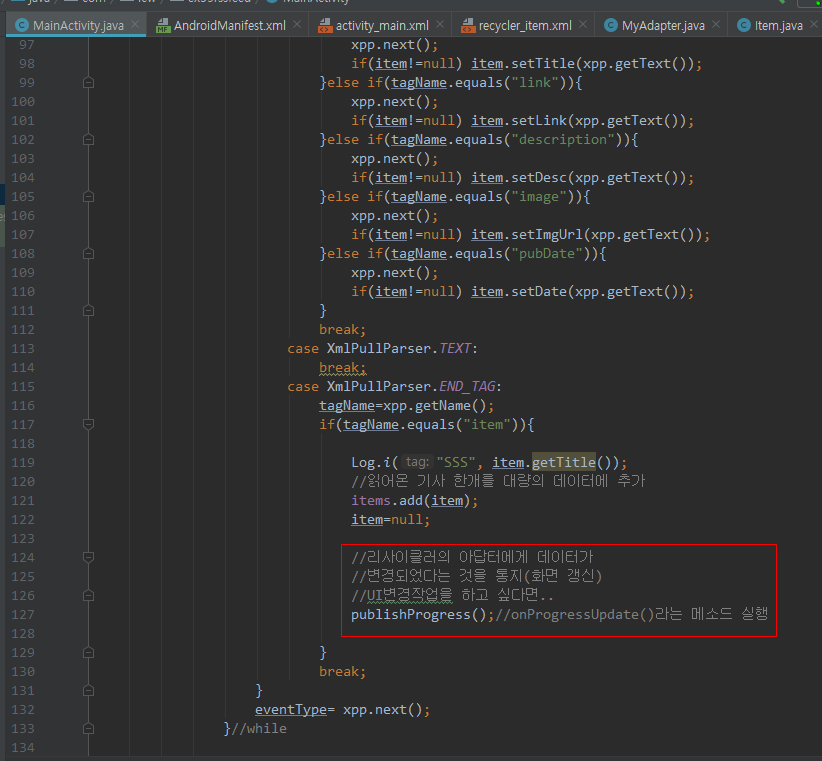
case XmlPullParser.END_TAG:
tagName=xpp.getName();
if(tagName.equals("item")){
Log.i("SSS", item.getTitle());
//읽어온 기사 한개를 대량의 데이터에 추가
items.add(item);
item=null;
//리사이클러의 아답터에게 데이터가
//변경되었다는 것을 통지(화면 갱신)
//UI변경작업을 하고 싶다면..
publishProgress();//onProgressUpdate()라는 메소드 실행
}
break;
}
eventType= xpp.next();
}//while
//파싱 작업이 완료되었다!!
//테스트로 Toastㄹ 보여주기, 단 별도 스레드는
//UI작업이 불가! 그래서 runOnUiThread()를 이용했었음.
//이 UI작업을 하는 별도의 메소드로
//결과를 리턴하는 방식을 사용
} catch (IOException e) {e.printStackTrace();} catch (XmlPullParserException e) {e.printStackTrace();}
return "파싱종료"; // 리턴 값은 onPostExecute(String s) s에 전달된다.
}//doInBackground()
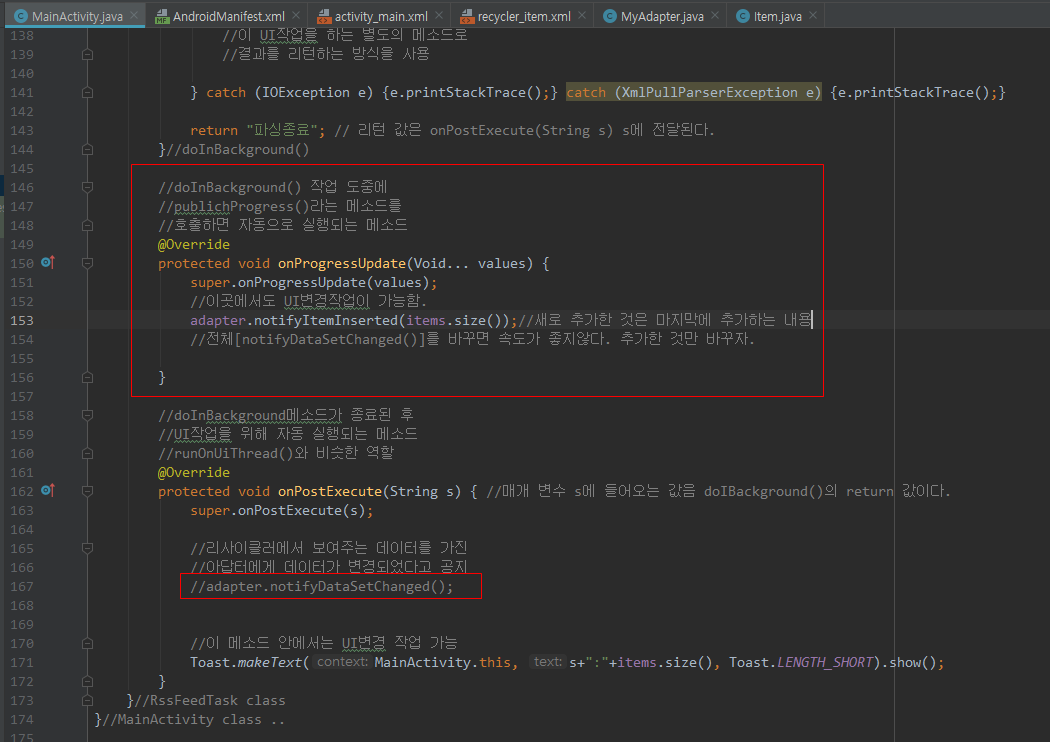
//doInBackground() 작업 도중에
//publichProgress()라는 메소드를
//호출하면 자동으로 실행되는 메소드
@Override
protected void onProgressUpdate(Void... values) {
super.onProgressUpdate(values);
//이곳에서도 UI변경작업이 가능함.
adapter.notifyItemInserted(items.size());//새로 추가한 것은 마지막에 추가하는 내용
//전체[notifyDataSetChanged()]를 바꾸면 속도가 좋지않다. 추가한 것만 바꾸자.
}
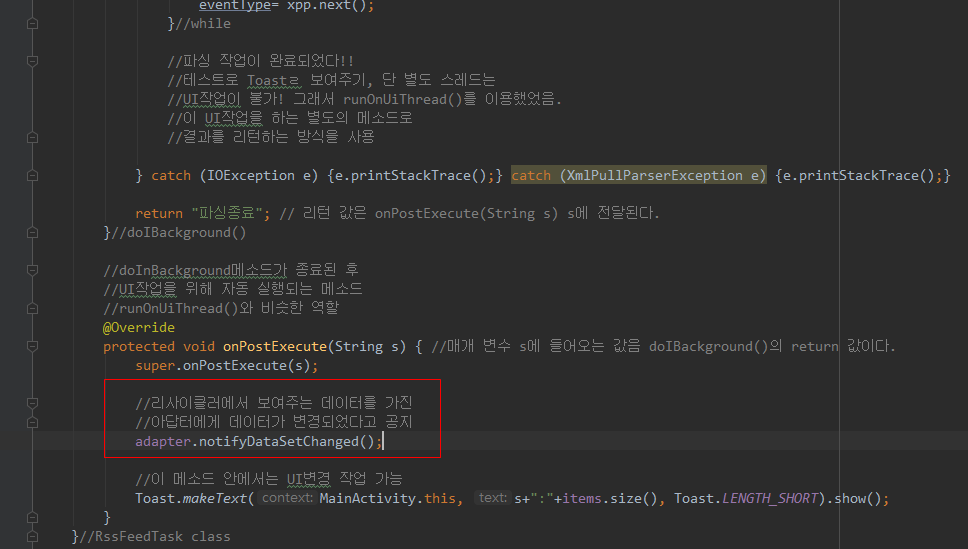
//doInBackground메소드가 종료된 후
//UI작업을 위해 자동 실행되는 메소드
//runOnUiThread()와 비슷한 역할
@Override
protected void onPostExecute(String s) { //매개 변수 s에 들어오는 값음 doIBackground()의 return 값이다.
super.onPostExecute(s);
//리사이클러에서 보여주는 데이터를 가진
//아답터에게 데이터가 변경되었다고 공지
//adapter.notifyDataSetChanged();
//이 메소드 안에서는 UI변경 작업 가능
}
}//RssFeedTask class
}//MainActivity class ..
|
Item.java
|
1
2
3
4
5
6
7
8
9
10
11
12
13
14
15
16
17
18
19
20
21
22
23
24
25
26
27
28
29
30
31
32
33
34
35
36
37
38
39
40
41
42
43
44
45
46
47
48
49
50
51
52
53
54
55
56
57
58
59
60
61
62
63
64
65
|
package com.lcw.ex59rssfeed;
public class Item {
//보통은 객체지향은 정보의 은닉을 해야하기 때문에, private으로 만든다.
String title;
String link;
String desc;
String imgUrl;
String date;
public Item() { //혹시 몰라서 매개변수가 없는 것도 만들었다.
}
public Item(String title, String link, String desc, String imgUrl, String date) {
this.title = title;
this.link = link;
this.desc = desc;
this.imgUrl = imgUrl;
this.date = date;
}
//Getter & Setter Method..
//멤버 변수가 private이면
public String getTitle() {
return title;
}
public void setTitle(String title) {
this.title = title;
}
public String getLink() {
return link;
}
public void setLink(String link) {
this.link = link;
}
public String getDesc() {
return desc;
}
public void setDesc(String desc) {
this.desc = desc;
}
public String getImgUrl() {
return imgUrl;
}
public void setImgUrl(String imgUrl) {
this.imgUrl = imgUrl;
}
public String getDate() {
return date;
}
public void setDate(String date) {
this.date = date;
}
}
|
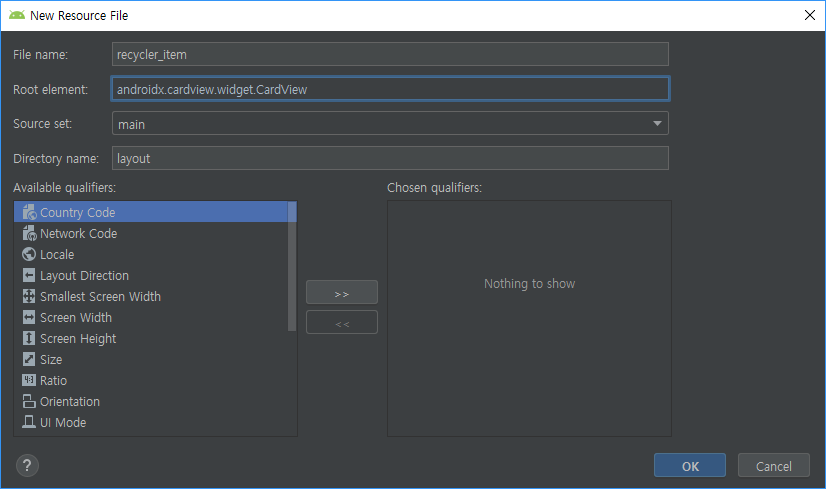
recycler_item.xml
|
1
2
3
4
5
6
7
8
9
10
11
12
13
14
15
16
17
18
19
20
21
22
23
24
25
26
27
28
29
30
31
32
33
34
35
36
37
38
39
40
41
42
43
44
45
46
47
48
49
50
51
52
53
54
55
56
57
|
<?xml version="1.0" encoding="utf-8"?>
android:layout_width="match_parent"
android:layout_height="160dp"
xmlns:app="http://schemas.android.com/apk/res-auto"
app:cardCornerRadius="8dp"
android:layout_margin="4dp"
app:cardBackgroundColor="#FFFFFF"
app:cardElevation="4dp"
app:contentPadding="8dp">
<LinearLayout
android:layout_width="match_parent"
android:layout_height="match_parent"
android:orientation="vertical">
<TextView
android:id="@+id/tv_title"
android:layout_width="match_parent"
android:layout_height="wrap_content"
android:text="title"
android:textSize="24sp"
android:textColor="@color/colorPrimaryDark"
android:maxLines="1"
android:padding="8dp"
android:textStyle="bold"/>
<LinearLayout
android:layout_width="match_parent"
android:layout_height="wrap_content"
android:layout_weight="1"
android:orientation="horizontal">
<ImageView
android:id="@+id/iv"
android:layout_width="100dp"
android:layout_height="match_parent"
android:src="@mipmap/ic_launcher"
android:scaleType="centerCrop"/>
<TextView
android:id="@+id/tv_desc"
android:layout_width="match_parent"
android:layout_height="match_parent"
android:text="This is description"
android:textSize="18sp"
android:padding="4dp"/>
</LinearLayout>
<TextView
android:id="@+id/tv_date"
android:layout_width="wrap_content"
android:layout_height="wrap_content"
android:text="2019-10-04 11:33"
android:layout_gravity="right"/>
</LinearLayout>
|
MyAdapter.java
|
1
2
3
4
5
6
7
8
9
10
11
12
13
14
15
16
17
18
19
20
21
22
23
24
25
26
27
28
29
30
31
32
33
34
35
36
37
38
39
40
41
42
43
44
45
46
47
48
49
50
51
52
53
54
55
56
57
58
59
60
61
62
63
64
65
66
67
68
69
70
71
72
73
74
75
76
77
78
79
80
81
82
83
84
85
86
87
88
89
90
91
92
93
94
95
96
97
98
99
100
|
package com.lcw.ex59rssfeed;
import android.content.Context;
import android.content.Intent;
import android.view.LayoutInflater;
import android.view.View;
import android.view.ViewGroup;
import android.widget.ImageView;
import android.widget.TextView;
import androidx.annotation.NonNull;
import com.bumptech.glide.Glide;
import java.util.ArrayList;
public class MyAdapter extends RecyclerView.Adapter {
ArrayList<Item> items;
Context context;
public MyAdapter(ArrayList<Item> items, Context context) {
this.items = items;
this.context = context;
}
@NonNull
@Override
public RecyclerView.ViewHolder onCreateViewHolder(@NonNull ViewGroup parent, int viewType) {
VH vh= new VH(itemView);
return vh;
}
@Override
public void onBindViewHolder(@NonNull RecyclerView.ViewHolder holder, int position) {
VH vh= (VH)holder;
//현재번째(position) 아이템 얻어오기
Item item= items.get(position);
vh.tvTitle.setText(item.getTitle());
//이미지는 없을 수도 있음.
if(item.getImgUrl()==null){
}else{
//네트워크에 있는 이미지를 보여주려면
//별도의 Thread가 필요한데 이를 편하게
//해주는 Library사용(Glide library)
}
}
@Override
public int getItemCount() {
return items.size();
}
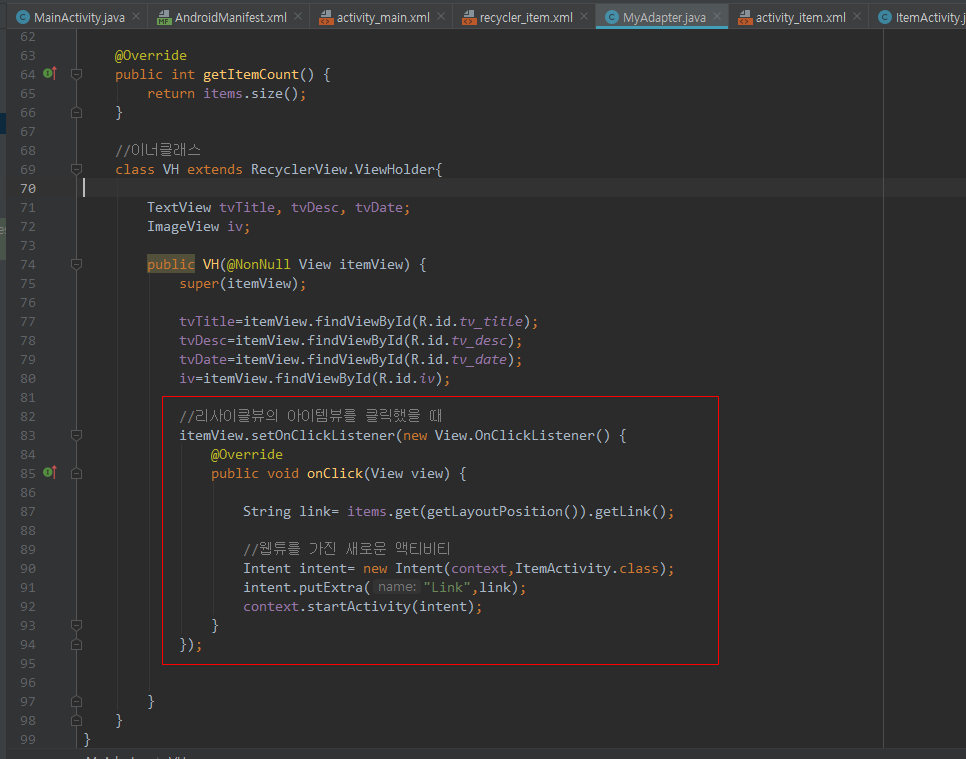
//이너클래스
class VH extends RecyclerView.ViewHolder{
TextView tvTitle, tvDesc, tvDate;
ImageView iv;
public VH(@NonNull View itemView) {
super(itemView);
tvTitle=itemView.findViewById(R.id.tv_title);
tvDesc=itemView.findViewById(R.id.tv_desc);
tvDate=itemView.findViewById(R.id.tv_date);
iv=itemView.findViewById(R.id.iv);
//리사이클뷰의 아이템뷰를 클릭했을 때
itemView.setOnClickListener(new View.OnClickListener() {
@Override
public void onClick(View view) {
//웹튜를 가진 새로운 액티비티
Intent intent= new Intent(context,ItemActivity.class);
intent.putExtra("Link",link);
context.startActivity(intent);
}
});
}
}
}
|
AndroidManifest.xml
|
1
2
3
4
5
6
7
8
9
10
11
12
13
14
15
16
17
18
19
20
21
22
23
24
|
<?xml version="1.0" encoding="utf-8"?>
<uses-permission android:name="android.permission.INTERNET" />
<application
android:allowBackup="true"
android:icon="@mipmap/ic_launcher"
android:label="@string/app_name"
android:roundIcon="@mipmap/ic_launcher_round"
android:supportsRtl="true"
android:theme="@style/AppTheme">
<activity android:name=".ItemActivity"></activity>
<activity android:name=".MainActivity">
<intent-filter>
</intent-filter>
</activity>
</application>
</manifest>
|
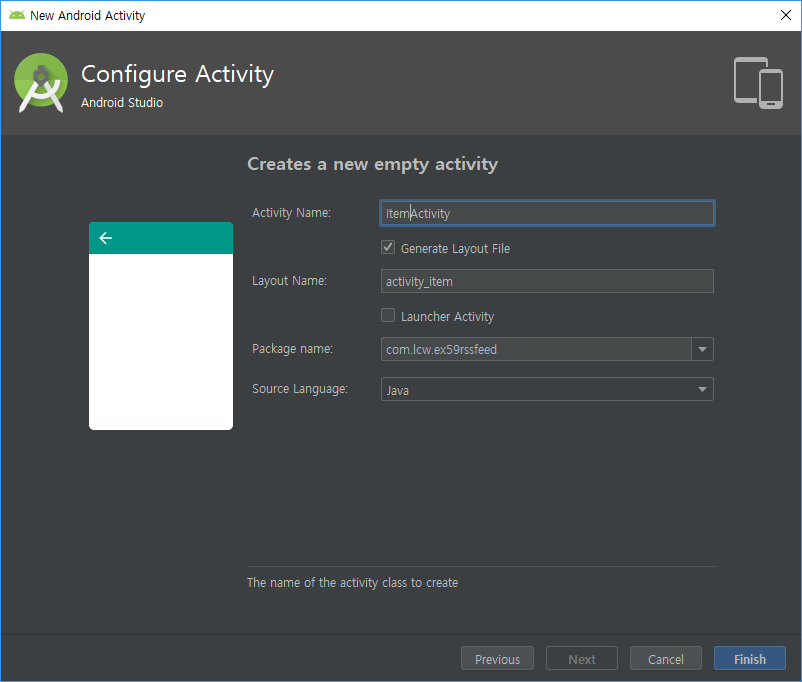
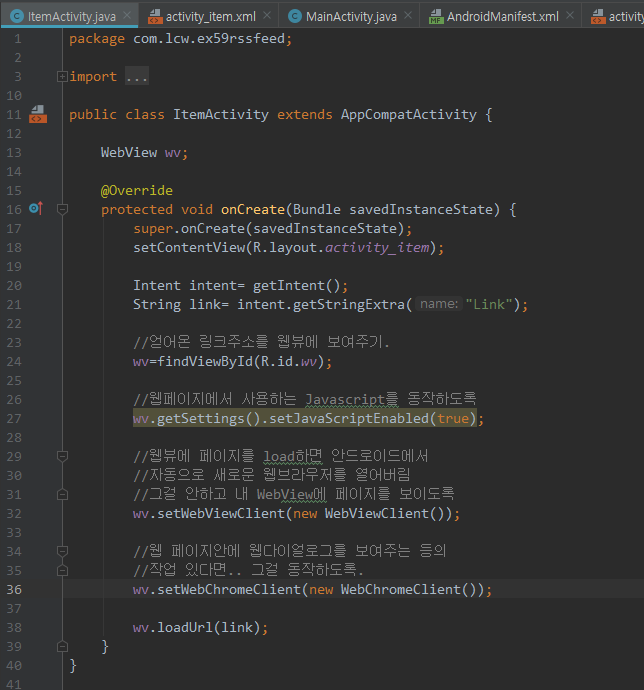
ItemActivity.java
|
1
2
3
4
5
6
7
8
9
10
11
12
13
14
15
16
17
18
19
20
21
22
23
24
25
26
27
28
29
30
31
32
33
34
35
36
37
38
39
40
41
|
package com.lcw.ex59rssfeed;
import android.content.Intent;
import android.os.Bundle;
import android.webkit.WebView;
public class ItemActivity extends AppCompatActivity {
WebView wv;
@Override
protected void onCreate(Bundle savedInstanceState) {
super.onCreate(savedInstanceState);
setContentView(R.layout.activity_item);
Intent intent= getIntent();
String link= intent.getStringExtra("Link");
//얻어온 링크주소를 웹뷰에 보여주기.
wv=findViewById(R.id.wv);
//웹페이지에서 사용하는 Javascript를 동작하도록
wv.getSettings().setJavaScriptEnabled(true);
//웹뷰에 페이지를 load하면 안드로이드에서
//자동으로 새로운 웹브라우저를 열어버림
//그걸 안하고 내 WebView에 페이지를 보이도록
wv.setWebViewClient(new WebViewClient());
//웹 페이지안에 웹다이얼로그를 보여주는 등의
//작업 있다면.. 그걸 동작하도록.
wv.setWebChromeClient(new WebChromeClient());
wv.loadUrl(link);
}
}
|
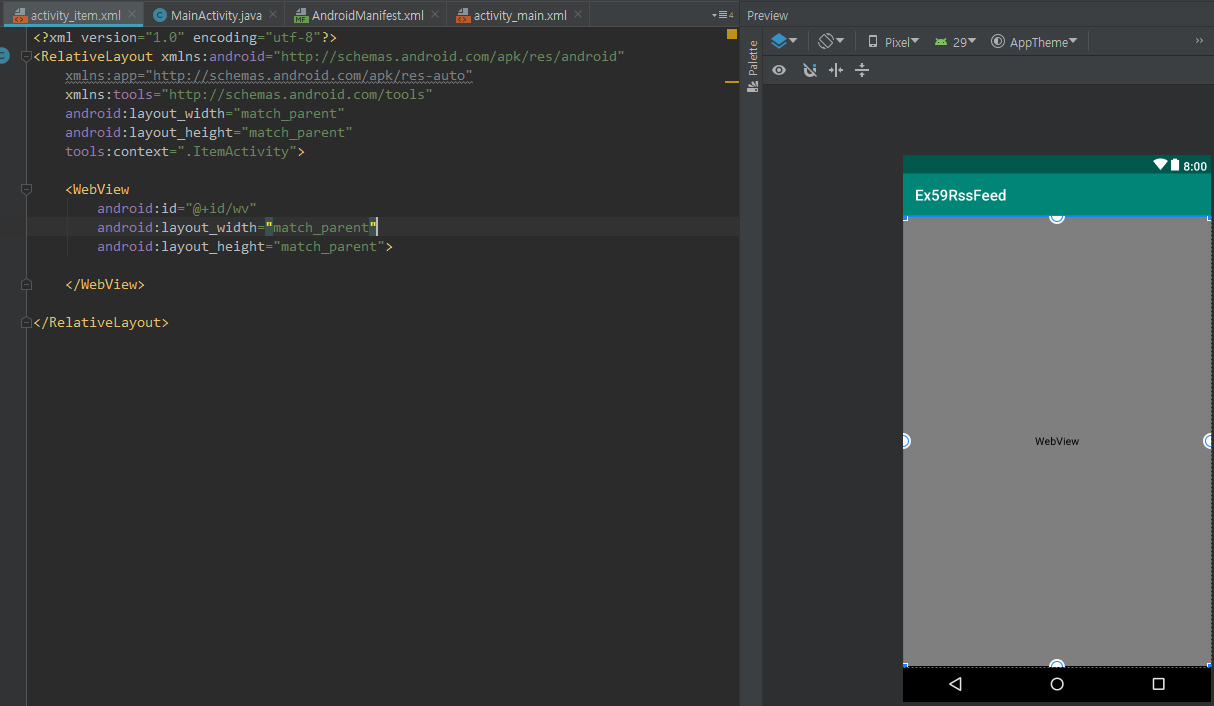
activity_item.xml
|
1
2
3
4
5
6
7
8
9
10
11
12
13
14
15
16
|
<?xml version="1.0" encoding="utf-8"?>
xmlns:app="http://schemas.android.com/apk/res-auto"
xmlns:tools="http://schemas.android.com/tools"
android:layout_width="match_parent"
android:layout_height="match_parent"
tools:context=".ItemActivity">
<WebView
android:id="@+id/wv"
android:layout_width="match_parent"
android:layout_height="match_parent">
</WebView>
</RelativeLayout>
|
추가로 스와이프 적용하기
스와이프를 사용하기 위해서 라이브러리 추가
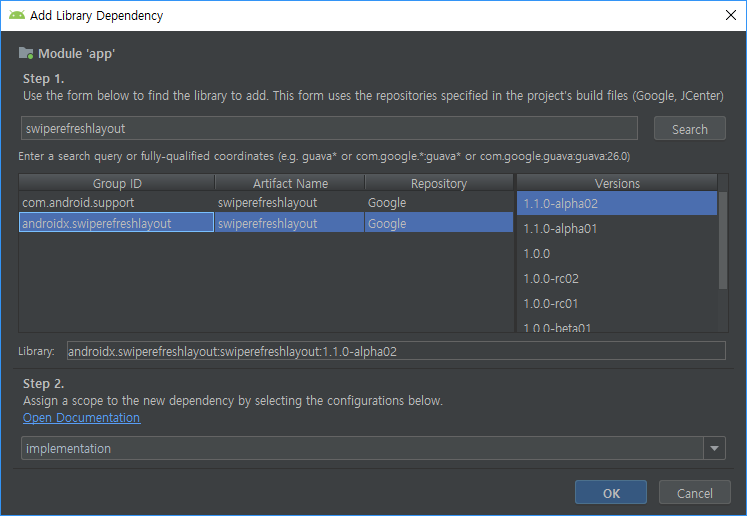
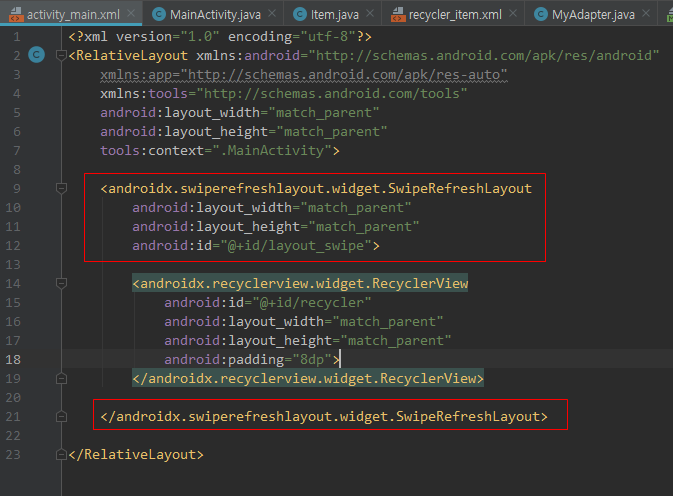
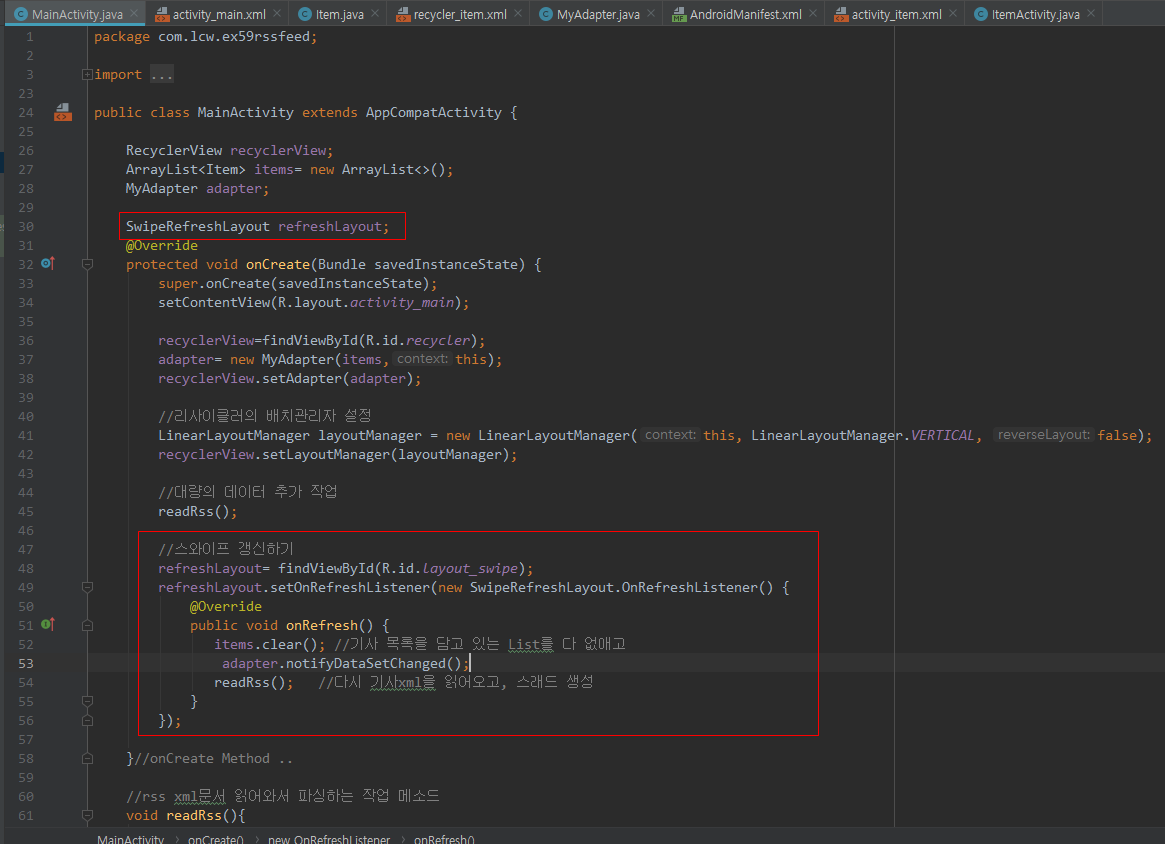
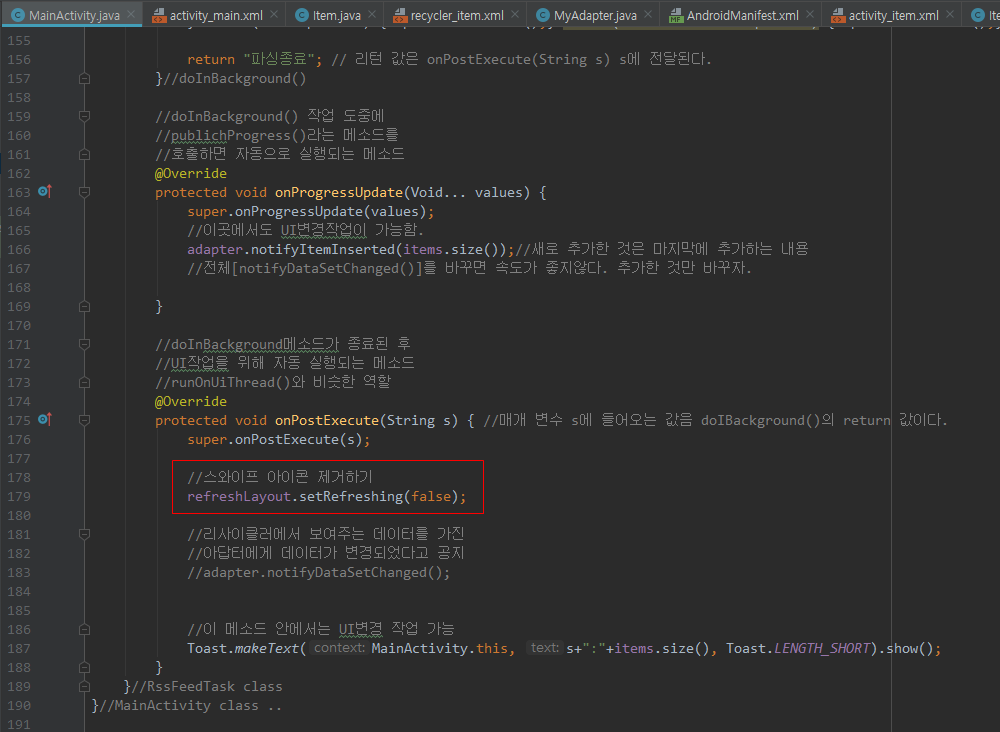
이러면 스와이프도 적용이 된다.
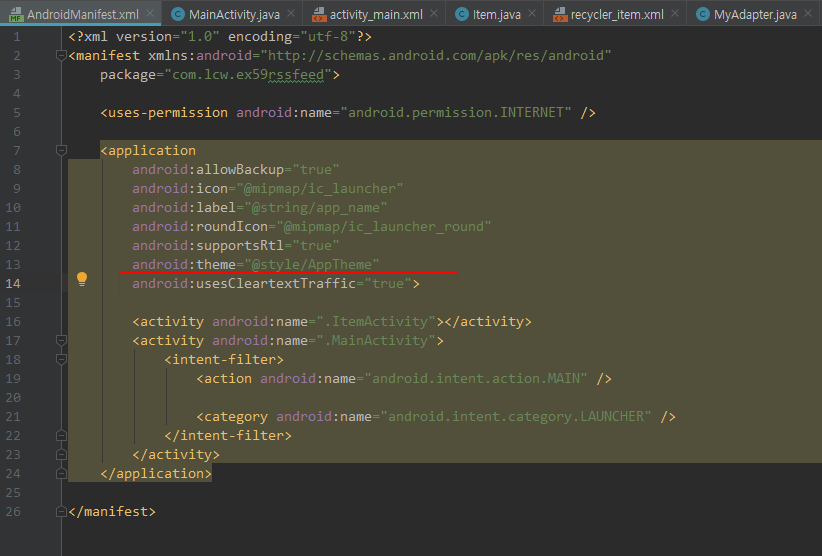
※만약에 자신의 핸드폰 버젼이 높으면 http라는 URL은 작동이 안될 것이다.
(보안 강화로 https만 사용하도록 업데이트됨.)
그러면 가져온 xml이 https 이거나, 굳이 http로 사용하겠다면 아래와 같은 방법을 쓰자.
'안드로이드 웹앱 콘테츠 개발자 양성(국비지원) > Adapter View' 카테고리의 다른 글
| Android Studio Material Design 그외 4 (RecyclerView 2-2) 많이 사용됨! [중요!!] (0) | 2019.10.02 |
|---|---|
| Android Studio Material Design 그외 4 (RecyclerView 2-1) 많이 사용됨! [중요!!] (0) | 2019.10.02 |
| Android Studio Material Design 그외 4(RecyclerView ) (0) | 2019.10.01 |
| Android Studio Material Design 그외 4(RecyclerView 하기 전 이야기) (0) | 2019.10.01 |
| Android Studio ViewPager (0) | 2019.09.25 |


댓글