반응형
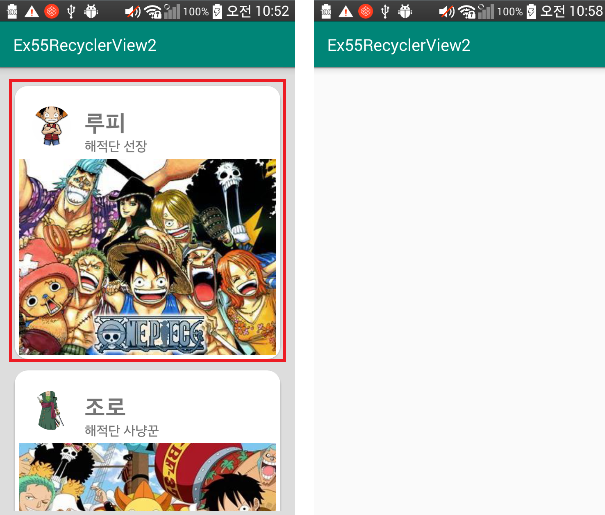
이 전 시간에 목록을 만들고 터치하면 새로운 창이 나오도록 했다.
이후 내용은
새로운 창으로갈때 데이터 넘겨주기
MyAdapter.java 추가

이제 새로운 창(activity_detail.xml)으로 가보자.

이제 새로운 창(DetailActivity.java)으로 가보자.


이제 첫 화면에서 목록을 터치했을 때, 변환하는 효과를 넣자.
새로운 창을 띄우는 것은 MyAdapter이기 때문에

그리고 DetailActivity.java 코드 추가

사진을 gif로도 가능하다.
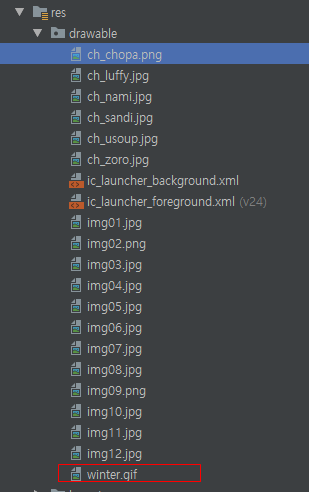

gif 파일도 가능하다.

이제 처음 화면 버튼을 추가해보자. 리사이클 위에 리니어에 버튼 4개


나머지 기능들도 구현해보자


activity_detail.xml
|
1
2
3
4
5
6
7
8
9
10
11
12
13
14
|
<?xml version="1.0" encoding="utf-8"?>
<RelativeLayout xmlns:android="http://schemas.android.com/apk/res/android"
xmlns:app="http://schemas.android.com/apk/res-auto"
xmlns:tools="http://schemas.android.com/tools"
android:layout_width="match_parent"
android:layout_height="match_parent"
tools:context=".DetailActivity">
<ImageView
android:id="@+id/iv"
android:layout_width="match_parent"
android:layout_height="wrap_content"/>
</RelativeLayout>
|
activity_main.xml
|
1
2
3
4
5
6
7
8
9
10
11
12
13
14
15
16
17
18
19
20
21
22
23
24
25
26
27
28
29
30
31
32
33
34
35
36
37
38
39
40
41
42
43
44
45
46
47
48
49
|
<?xml version="1.0" encoding="utf-8"?>
xmlns:app="http://schemas.android.com/apk/res-auto"
xmlns:tools="http://schemas.android.com/tools"
android:layout_width="match_parent"
android:layout_height="match_parent"
android:orientation="vertical"
tools:context=".MainActivity">
<LinearLayout
android:layout_width="match_parent"
android:layout_height="wrap_content"
android:orientation="horizontal">
<Button
android:layout_width="wrap_content"
android:layout_height="wrap_content"
android:text="ADD"
android:onClick="clickAdd"/>
<Button
android:layout_width="wrap_content"
android:layout_height="wrap_content"
android:text="Del"
android:onClick="clickDel"/>
<Button
android:layout_width="wrap_content"
android:layout_height="wrap_content"
android:text="Linear"
android:onClick="clickLinear"/>
<Button
android:layout_width="wrap_content"
android:layout_height="wrap_content"
android:text="Grid"
android:onClick="clickGrid"/>
</LinearLayout>
android:id="@+id/recycler"
android:layout_width="match_parent"
android:layout_height="match_parent"
android:padding="16dp"
app:layoutManager="androidx.recyclerview.widget.LinearLayoutManager"
android:orientation="vertical"
android:background="#DDDDDD">
</LinearLayout>
|
DetailActivity.java
|
1
2
3
4
5
6
7
8
9
10
11
12
13
14
15
16
17
18
19
20
21
22
23
24
25
26
27
28
29
30
31
32
33
34
35
36
37
38
39
40
41
|
package com.lcw.ex55recyclerview2;
import android.content.Intent;
import android.os.Build;
import android.os.Bundle;
import android.widget.ImageView;
import com.bumptech.glide.Glide;
public class DetailActivity extends AppCompatActivity {
ImageView iv;
@Override
protected void onCreate(Bundle savedInstanceState) {
super.onCreate(savedInstanceState);
setContentView(R.layout.activity_detail);
Intent intent= getIntent();
String name= intent.getStringExtra("Name");
int imgId= intent.getIntExtra("Img",R.drawable.img01);
// 두번째 파라미터는 없을때 보여줄 데이터인데, 0쓰면 에러날거 같아서 아무 이미지나 넣음.( 공백 이미지를 권유)
//name을 액션바에 title로 설정
getSupportActionBar().setTitle(name);
//imgId를 이미지뷰에 보여주기
iv=findViewById(R.id.iv);
Glide.with(this).load(imgId).into(iv);
//iv에게 Transition(전환)의 Pair를 위한 이름 부여
if(Build.VERSION.SDK_INT>=Build.VERSION_CODES.LOLLIPOP){
iv.setTransitionName("IMG");
}
}
}
|
여기서 추가해도 안해도 되는 것을 해보자.
(Grid로 바꿔보면 서로 간격이 너무 좁다, 그리고 그냥 광고 같이 이미지를 띄우기)


MainActivity.java에 저것만 써주자.


이제 애니메이션 효과 주기를 해보자.


<애니메이션 효과 실행 화면>

반응형
'안드로이드 웹앱 콘테츠 개발자 양성(국비지원) > Adapter View' 카테고리의 다른 글
| Android Studio RSS 피드 Recycler View(다른 서버에서 데이터 가져와서 보여주기) (0) | 2019.10.04 |
|---|---|
| Android Studio Material Design 그외 4 (RecyclerView 2-1) 많이 사용됨! [중요!!] (0) | 2019.10.02 |
| Android Studio Material Design 그외 4(RecyclerView ) (0) | 2019.10.01 |
| Android Studio Material Design 그외 4(RecyclerView 하기 전 이야기) (0) | 2019.10.01 |
| Android Studio ViewPager (0) | 2019.09.25 |


댓글