◎Material Design : Gogle 디자인 가이드 라인
①Navigation Drawer
②Toolbar
③AppBar Layout, TabLayout
④Floating Action Button, SnackBar - Toast와 비슷하지만 업그레이드 된거라 생각하면 됨.
⑤CoordinatorLayout, NestedScrollView
⑥CollapsingToolbarLayout - 무너질 수 있는 툴바
⑦RecyclerView - 배치 관리자를 사용하는데 3가지가 있다.(Linear, Grid, Staggerd Grid ) Layout Manager가 있다.
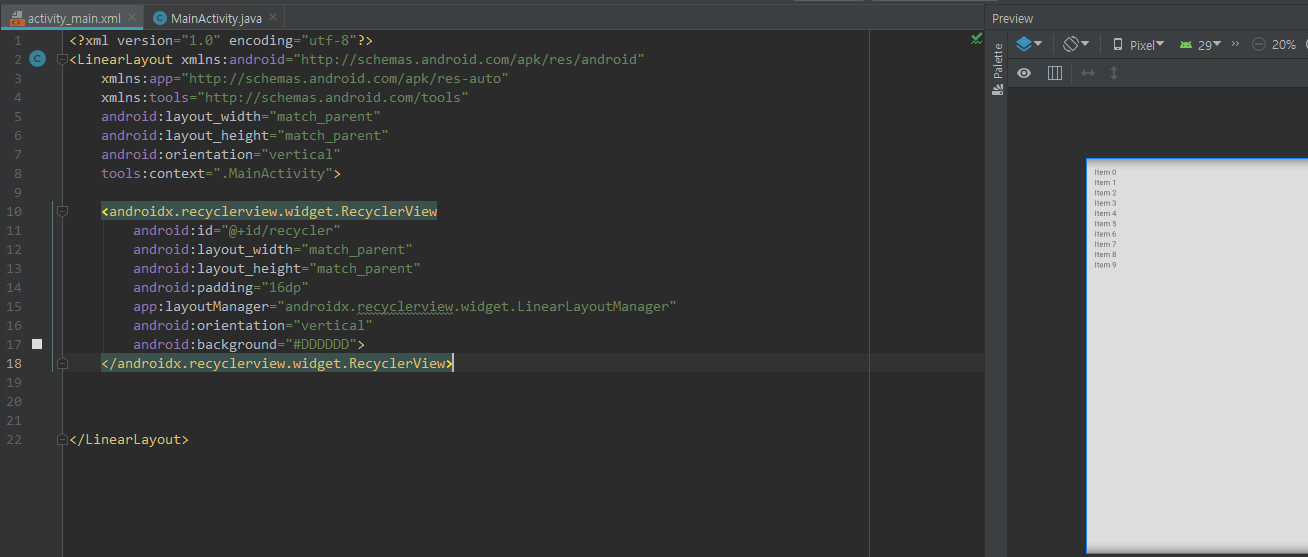
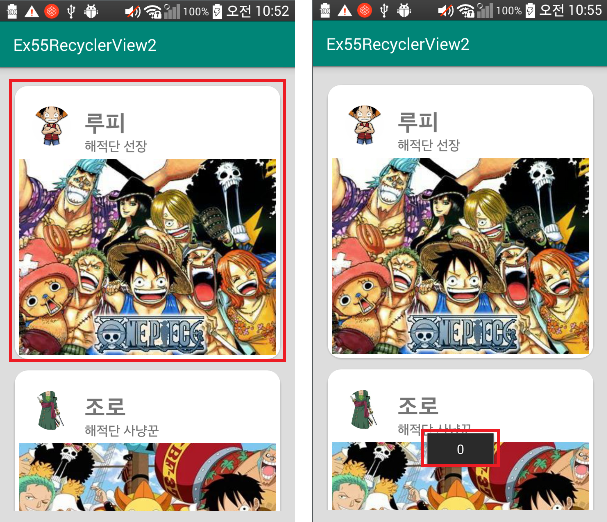
<실행 화면>
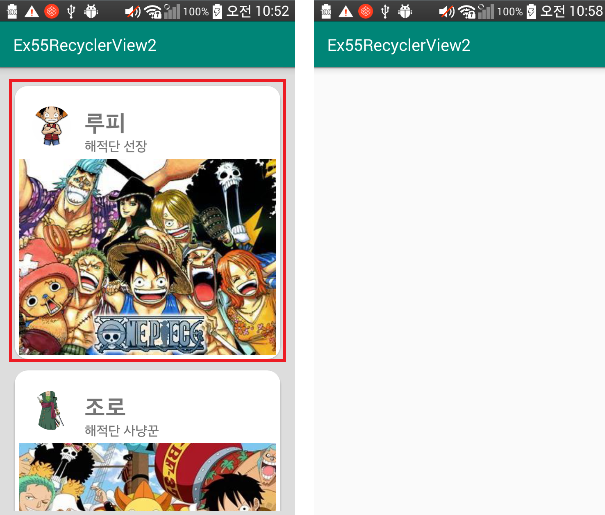
이번 예제에서는 Linear Layout Manager를사용해보았다.
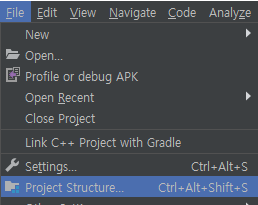
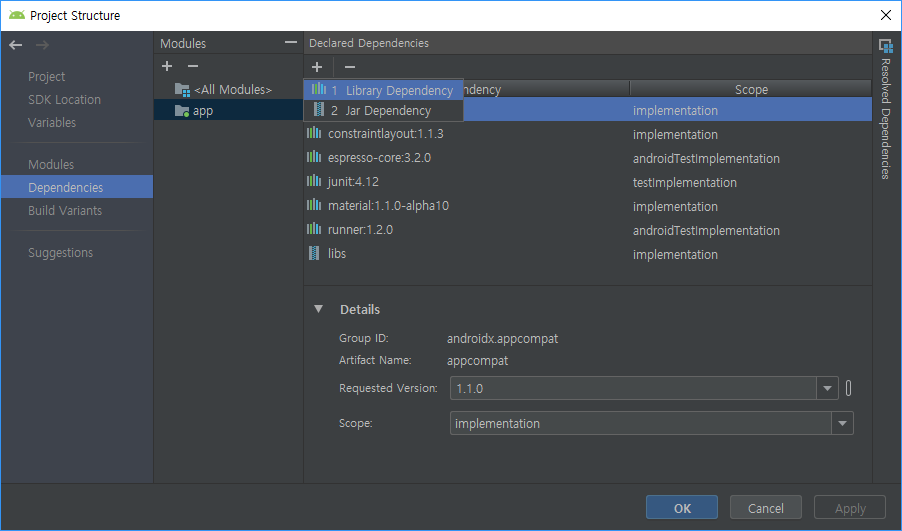
세개의 라이브러리 추가하자. (material, cardview, recyclerview)
material 라이브러리만 추가하면 cardview, recyclerview 라이브러리가 포함되어 있다. (material만 추가하면 됨.)


화면 구성을 해보자
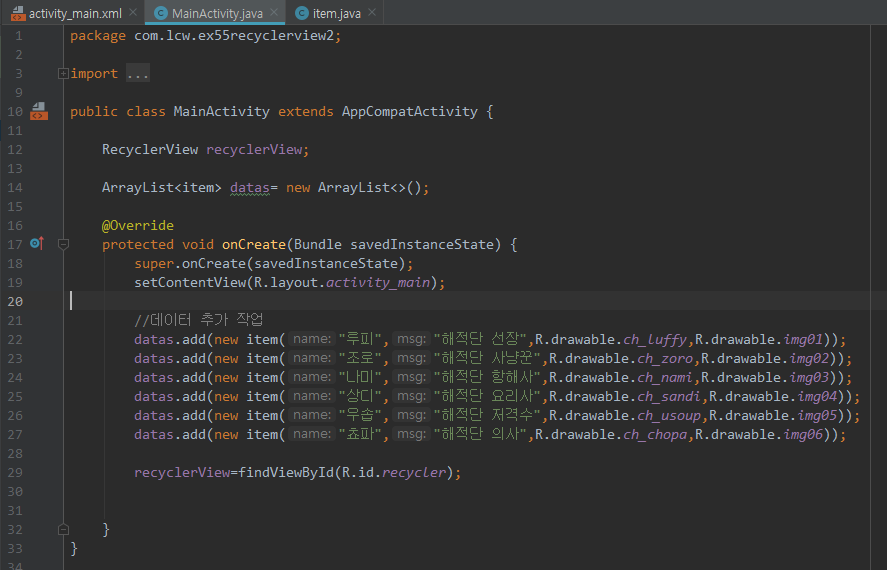
대량의 데이터 만들자.

이미지 우선 추가하고
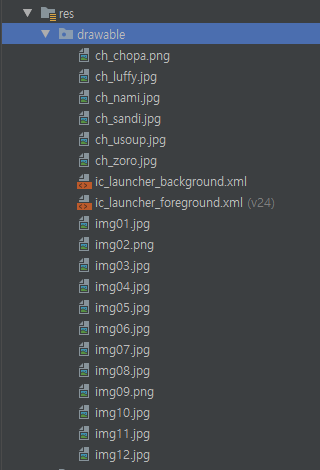
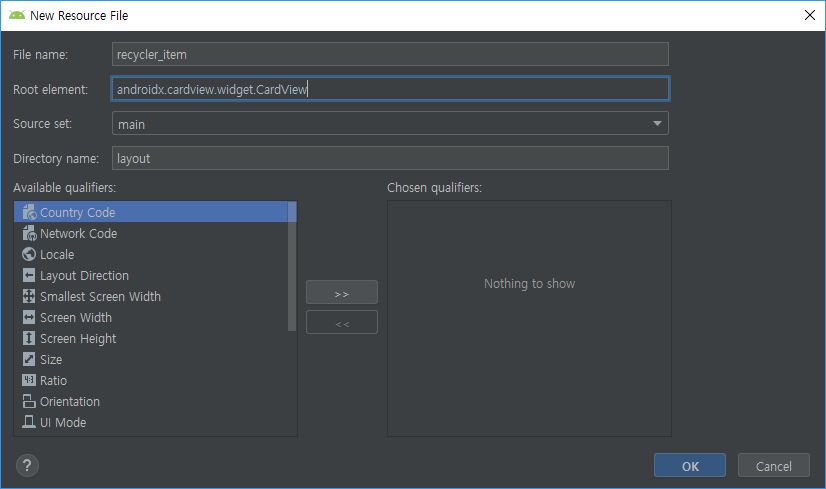
레이아웃 만들자.

레이아웃 카드뷰 구성은 (동그란 이미지+ 배경 이미지 / 텍스트 네임, 텍스트 직위)
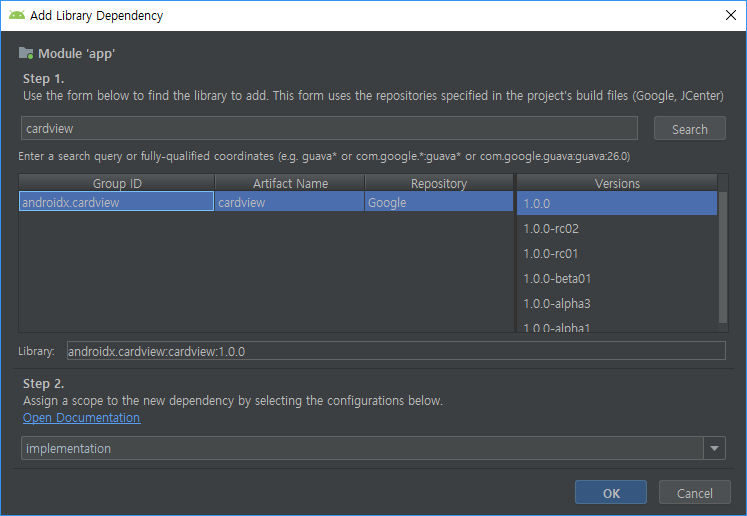
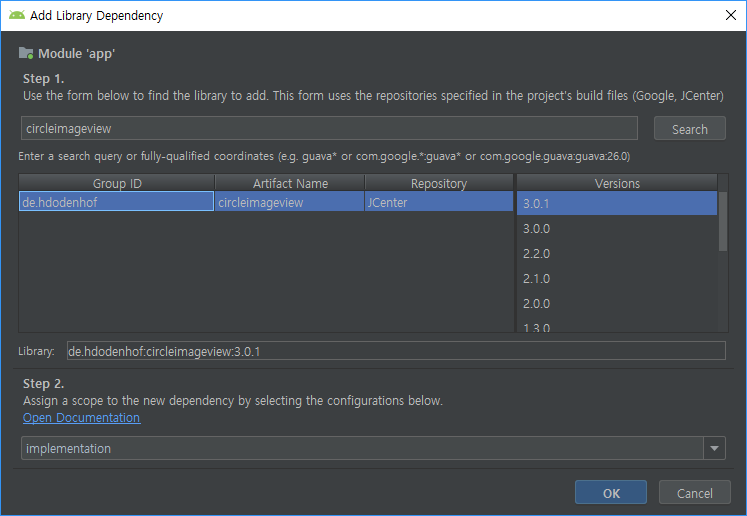
카드 구성에 동그란 이미지를 사용하기 때문에 라이브러리 추가를 하자.
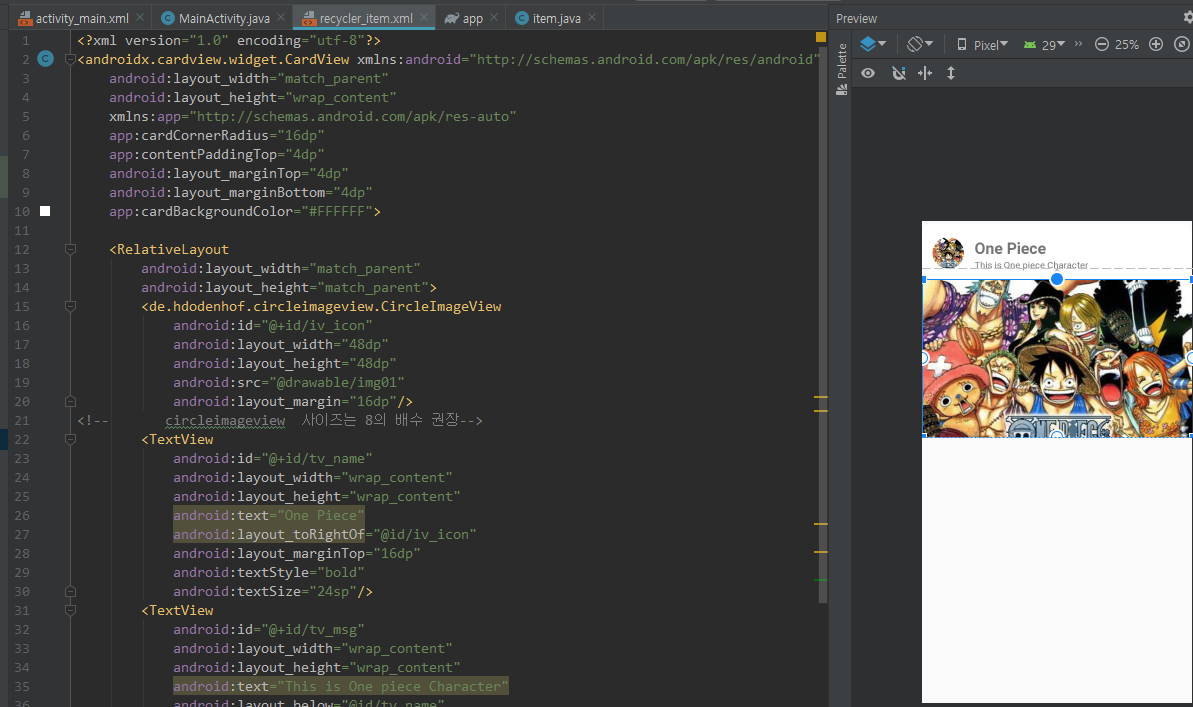
recycler_item.xml
|
1
2
3
4
5
6
7
8
9
10
11
12
13
14
15
16
17
18
19
20
21
22
23
24
25
26
27
28
29
30
31
32
33
34
35
36
37
38
39
40
41
42
43
44
45
46
47
|
<?xml version="1.0" encoding="utf-8"?>
android:layout_width="match_parent"
android:layout_height="wrap_content"
xmlns:app="http://schemas.android.com/apk/res-auto"
app:cardCornerRadius="16dp"
app:contentPaddingTop="4dp"
android:layout_marginTop="4dp"
android:layout_marginBottom="4dp"
app:cardBackgroundColor="#FFFFFF">
<RelativeLayout
android:layout_width="match_parent"
android:layout_height="match_parent">
<de.hdodenhof.circleimageview.CircleImageView
android:id="@+id/iv_icon"
android:layout_width="48dp"
android:layout_height="48dp"
android:src="@drawable/img01"
android:layout_margin="16dp"/>
<!-- circleimageview 사이즈는 8의 배수 권장-->
<TextView
android:id="@+id/tv_name"
android:layout_width="wrap_content"
android:layout_height="wrap_content"
android:text="One Piece"
android:layout_toRightOf="@id/iv_icon"
android:layout_marginTop="16dp"
android:textStyle="bold"
android:textSize="24sp"/>
<TextView
android:id="@+id/tv_msg"
android:layout_width="wrap_content"
android:layout_height="wrap_content"
android:text="This is One piece Character"
android:layout_below="@id/tv_name"
android:layout_toRightOf="@id/iv_icon"/>
<ImageView
android:id="@+id/iv_img"
android:layout_width="match_parent"
android:layout_height="240dp"
android:src="@drawable/img01"
android:layout_below="@id/iv_icon"
android:scaleType="centerCrop"/>
</RelativeLayout>
|
어댑터 만들자

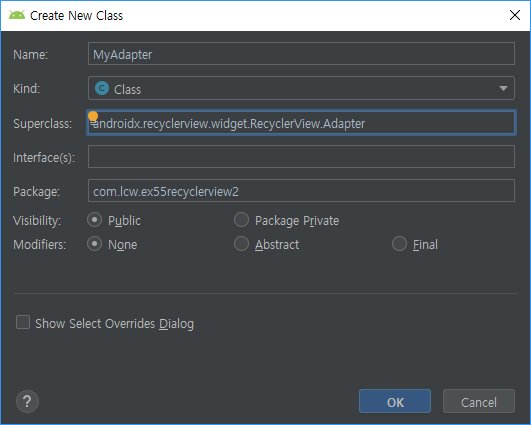
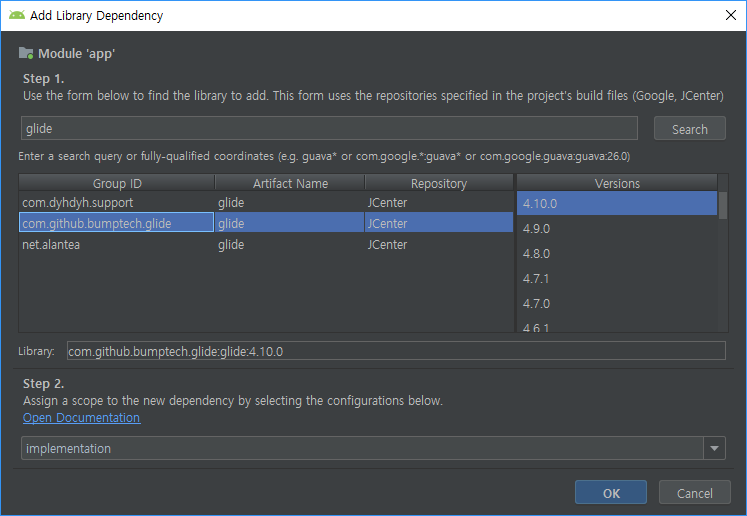
그림 이미지가 워낙 사이즈가 커서 라이브러리(Picasso, Glide)를 추가해서 이미지 작업이 필요하다.
[예제에서는 Glide 사용]
MyAdapter.java
|
1
2
3
4
5
6
7
8
9
10
11
12
13
14
15
16
17
18
19
20
21
22
23
24
25
26
27
28
29
30
31
32
33
34
35
36
37
38
39
40
41
42
43
44
45
46
47
48
49
50
51
52
53
54
55
56
57
58
59
60
61
62
63
64
65
66
67
68
69
70
71
72
73
74
75
76
77
78
79
80
81
82
|
package com.lcw.ex55recyclerview2;
import android.content.Context;
import android.view.LayoutInflater;
import android.view.View;
import android.view.ViewGroup;
import android.widget.ImageView;
import android.widget.TextView;
import androidx.annotation.NonNull;
import org.w3c.dom.Text;
import java.util.ArrayList;
import de.hdodenhof.circleimageview.CircleImageView;
public class MyAdapter extends RecyclerView.Adapter {
ArrayList<item> datas;
Context context;
public MyAdapter(ArrayList<item> datas, Context context) {
this.datas = datas;
this.context = context;
}
@NonNull
@Override
public RecyclerView.ViewHolder onCreateViewHolder(@NonNull ViewGroup parent, int viewType) {
LayoutInflater inflater=LayoutInflater.from(context);
View itemView=inflater.inflate(R.layout.recycler_item,parent,false);
VH vh=new VH(itemView); // itemView가 가지고 있는 카드뷰가 전달됨
return vh;
}
@Override
public void onBindViewHolder(@NonNull RecyclerView.ViewHolder holder, int position) {
VH vh=(VH)holder; //명시적 다운 캐스팅
item ite= datas.get(position);
//이미지가 너무 크면 OOM(Out of Memory)에러 발생
//이를 방지하기 위해 Library(Picasso, Glide)사용
}
@Override
public int getItemCount() {
return datas.size();
}
//이너클래스 : 아이템뷰를 보관하는 클래스
class VH extends RecyclerView.ViewHolder{
CircleImageView ivIcon;
TextView tvName;
TextView tvMsg;
ImageView ivImg;
public VH(@NonNull View itemView) {
super(itemView);
ivIcon=itemView.findViewById(R.id.iv_icon);
tvName=itemView.findViewById(R.id.tv_name);
tvMsg=itemView.findViewById(R.id.tv_msg);
ivImg=itemView.findViewById(R.id.iv_img);
}
}
}
|
이제 화면에 보여보자.

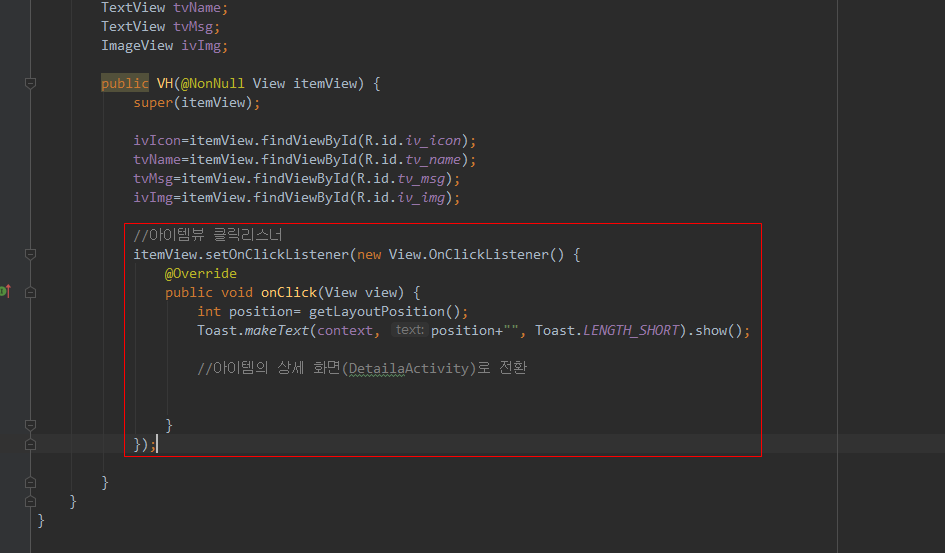
이제 목록을 눌렀을때 반응해보자.
MyAdapter.java로 가서 추가
이제 눌렀을 때 새로운 화면을 띄우겠다. (새로운 창 만들기)
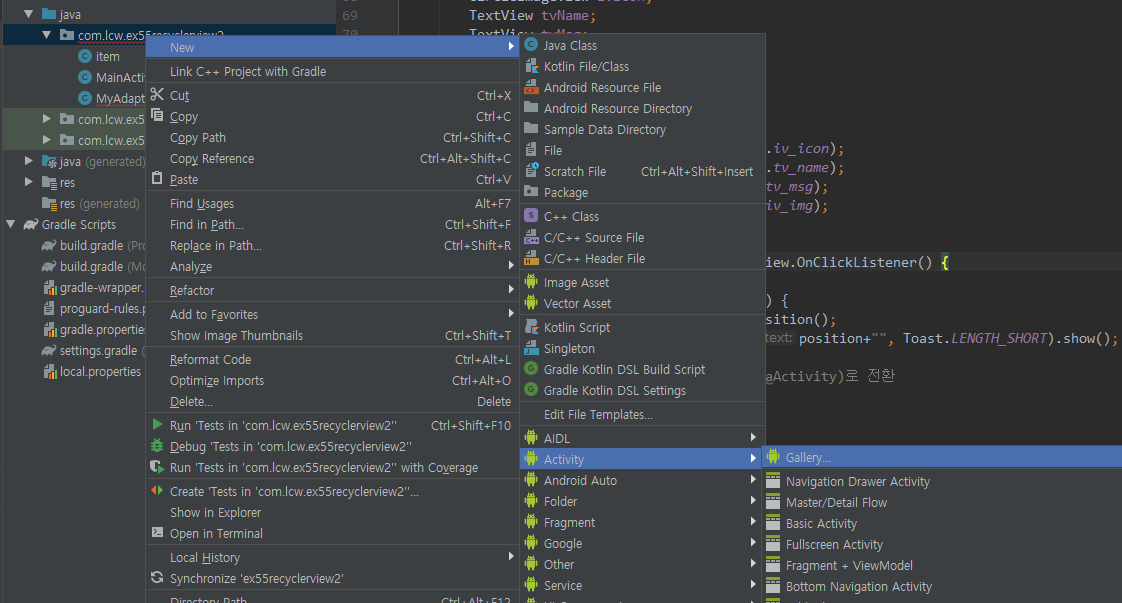
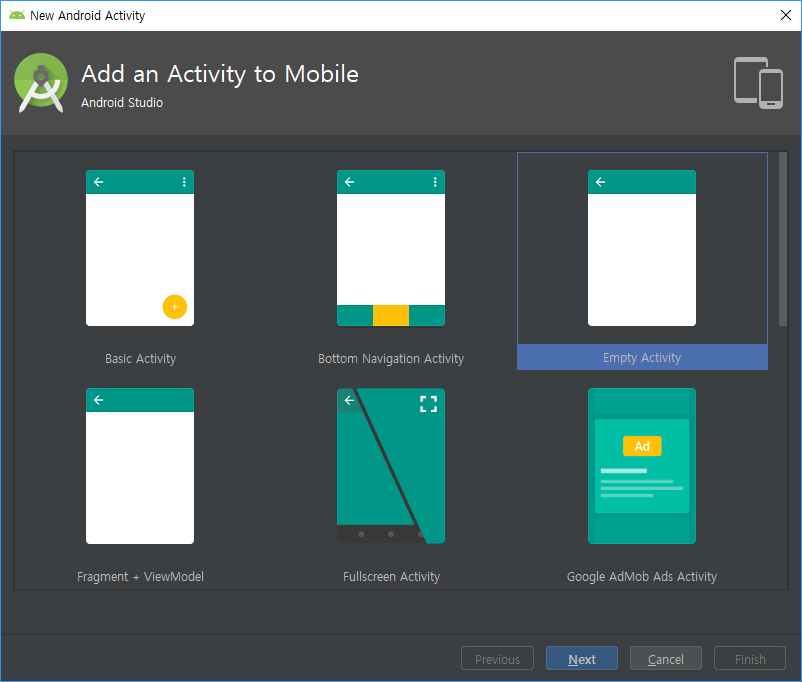
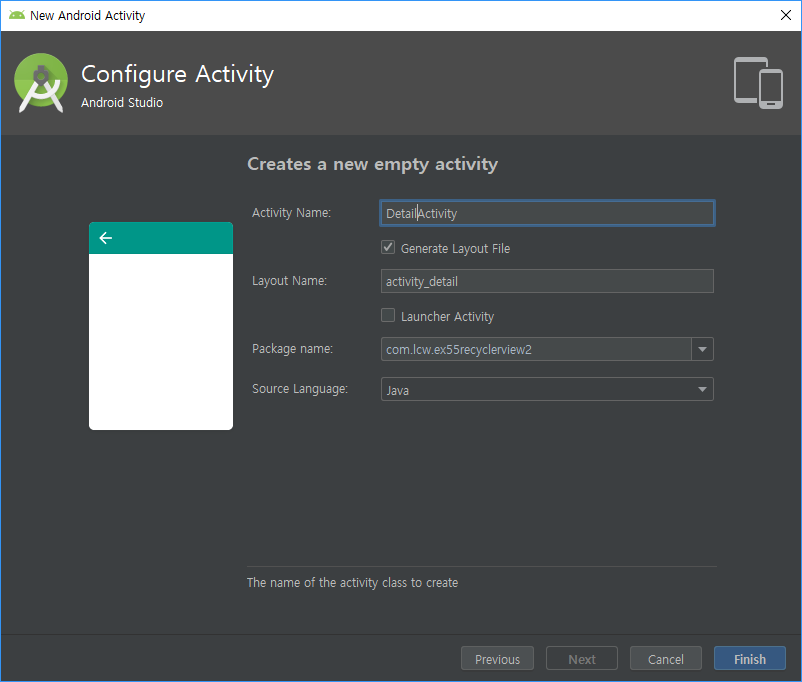
MyAdapter.java로 가서 추가
이후 내용은 다음에... 우선 지금까지 작성된 코드는 밑에 있다.
MyAdapter.java
|
1
2
3
4
5
6
7
8
9
10
11
12
13
14
15
16
17
18
19
20
21
22
23
24
25
26
27
28
29
30
31
32
33
34
35
36
37
38
39
40
41
42
43
44
45
46
47
48
49
50
51
52
53
54
55
56
57
58
59
60
61
62
63
64
65
66
67
68
69
70
71
72
73
74
75
76
77
78
79
80
81
82
83
84
85
86
87
88
89
90
91
92
93
94
95
96
97
98
99
100
|
package com.lcw.ex55recyclerview2;
import android.content.Context;
import android.content.Intent;
import android.view.LayoutInflater;
import android.view.View;
import android.view.ViewGroup;
import android.widget.ImageView;
import android.widget.TextView;
import android.widget.Toast;
import androidx.annotation.NonNull;
import com.bumptech.glide.Glide;
import org.w3c.dom.Text;
import java.util.ArrayList;
import de.hdodenhof.circleimageview.CircleImageView;
public class MyAdapter extends RecyclerView.Adapter {
ArrayList<item> datas;
Context context;
public MyAdapter(ArrayList<item> datas, Context context) {
this.datas = datas;
this.context = context;
}
@NonNull
@Override
public RecyclerView.ViewHolder onCreateViewHolder(@NonNull ViewGroup parent, int viewType) {
LayoutInflater inflater=LayoutInflater.from(context);
View itemView=inflater.inflate(R.layout.recycler_item,parent,false);
VH vh=new VH(itemView); // itemView가 가지고 있는 카드뷰가 전달됨
return vh;
}
@Override
public void onBindViewHolder(@NonNull RecyclerView.ViewHolder holder, int position) {
VH vh=(VH)holder; //명시적 다운 캐스팅
item ite= datas.get(position);
//이미지가 너무 크면 OOM(Out of Memory)에러 발생
//이를 방지하기 위해 Library(Picasso, Glide)사용
}
@Override
public int getItemCount() {
return datas.size();
}
//이너클래스 : 아이템뷰를 보관하는 클래스
class VH extends RecyclerView.ViewHolder{
CircleImageView ivIcon;
TextView tvName;
TextView tvMsg;
ImageView ivImg;
public VH(@NonNull View itemView) {
super(itemView);
ivIcon=itemView.findViewById(R.id.iv_icon);
tvName=itemView.findViewById(R.id.tv_name);
tvMsg=itemView.findViewById(R.id.tv_msg);
ivImg=itemView.findViewById(R.id.iv_img);
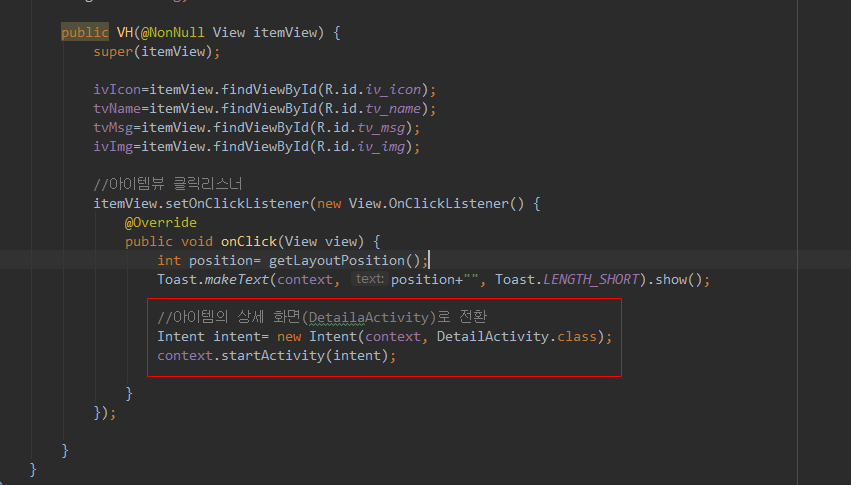
//아이템뷰 클릭리스너
itemView.setOnClickListener(new View.OnClickListener() {
@Override
public void onClick(View view) {
int position= getLayoutPosition();
//Toast.makeText(context, position+"", Toast.LENGTH_SHORT).show();
//아이템의 상세 화면(DetailaActivity)로 전환
Intent intent= new Intent(context, DetailActivity.class);
context.startActivity(intent);
}
});
}
}
}
|
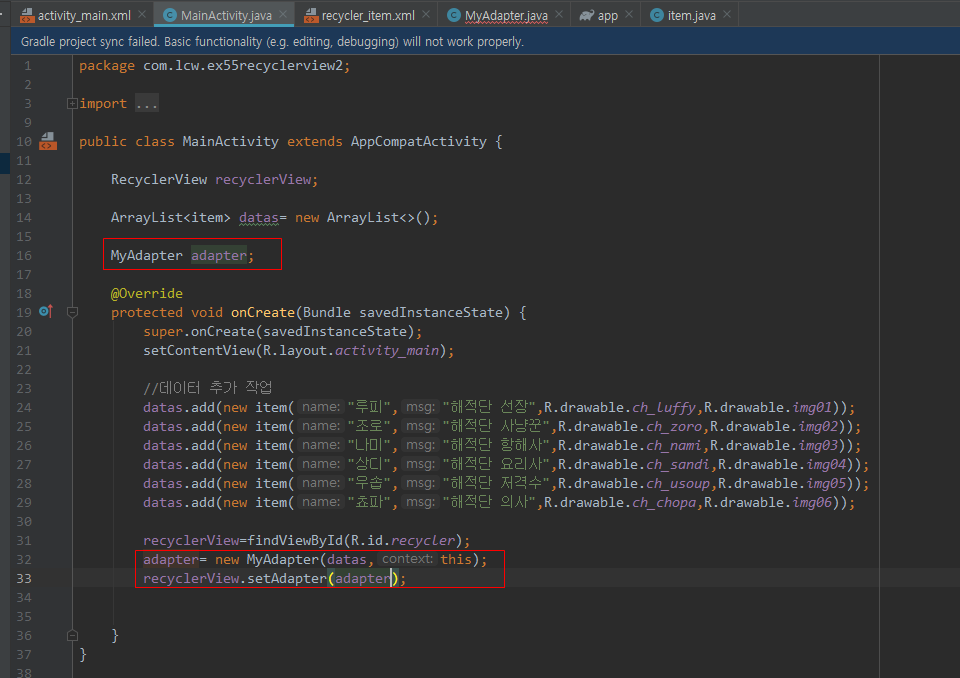
MainActivity.java
|
1
2
3
4
5
6
7
8
9
10
11
12
13
14
15
16
17
18
19
20
21
22
23
24
25
26
27
28
29
30
31
32
33
34
35
36
37
38
|
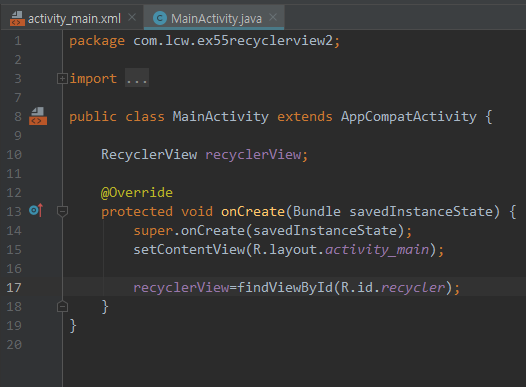
package com.lcw.ex55recyclerview2;
import android.os.Bundle;
import java.util.ArrayList;
public class MainActivity extends AppCompatActivity {
RecyclerView recyclerView;
ArrayList<item> datas= new ArrayList<>();
MyAdapter adapter;
@Override
protected void onCreate(Bundle savedInstanceState) {
super.onCreate(savedInstanceState);
setContentView(R.layout.activity_main);
//데이터 추가 작업
datas.add(new item("루피","해적단 선장",R.drawable.ch_luffy,R.drawable.img01));
datas.add(new item("조로","해적단 사냥꾼",R.drawable.ch_zoro,R.drawable.img02));
datas.add(new item("나미","해적단 항해사",R.drawable.ch_nami,R.drawable.img03));
datas.add(new item("상디","해적단 요리사",R.drawable.ch_sandi,R.drawable.img04));
datas.add(new item("우솝","해적단 저격수",R.drawable.ch_usoup,R.drawable.img05));
datas.add(new item("쵸파","해적단 의사",R.drawable.ch_chopa,R.drawable.img06));
recyclerView=findViewById(R.id.recycler);
adapter= new MyAdapter(datas,this);
recyclerView.setAdapter(adapter);
}
}
|
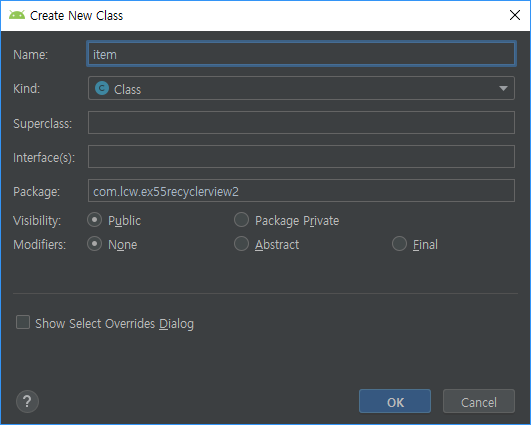
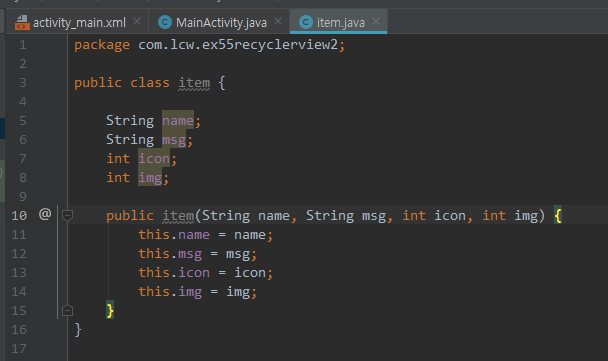
item.java
|
1
2
3
4
5
6
7
8
9
10
11
12
13
14
15
16
17
|
package com.lcw.ex55recyclerview2;
public class item {
String name;
String msg;
int icon;
int img;
public item(String name, String msg, int icon, int img) {
this.name = name;
this.msg = msg;
this.icon = icon;
this.img = img;
}
}
|
activity_main.xml
|
1
2
3
4
5
6
7
8
9
10
11
12
13
14
15
16
17
18
19
20
21
22
|
<?xml version="1.0" encoding="utf-8"?>
xmlns:app="http://schemas.android.com/apk/res-auto"
xmlns:tools="http://schemas.android.com/tools"
android:layout_width="match_parent"
android:layout_height="match_parent"
android:orientation="vertical"
tools:context=".MainActivity">
android:id="@+id/recycler"
android:layout_width="match_parent"
android:layout_height="match_parent"
android:padding="16dp"
app:layoutManager="androidx.recyclerview.widget.LinearLayoutManager"
android:orientation="vertical"
android:background="#DDDDDD">
</LinearLayout>
|
recycler_item.xml
|
1
2
3
4
5
6
7
8
9
10
11
12
13
14
15
16
17
18
19
20
21
22
23
24
25
26
27
28
29
30
31
32
33
34
35
36
37
38
39
40
41
42
43
44
45
46
47
|
<?xml version="1.0" encoding="utf-8"?>
android:layout_width="match_parent"
android:layout_height="wrap_content"
xmlns:app="http://schemas.android.com/apk/res-auto"
app:cardCornerRadius="16dp"
app:contentPaddingTop="4dp"
android:layout_marginTop="4dp"
android:layout_marginBottom="4dp"
app:cardBackgroundColor="#FFFFFF">
<RelativeLayout
android:layout_width="match_parent"
android:layout_height="match_parent">
<de.hdodenhof.circleimageview.CircleImageView
android:id="@+id/iv_icon"
android:layout_width="48dp"
android:layout_height="48dp"
android:src="@drawable/img01"
android:layout_margin="16dp"/>
<!-- circleimageview 사이즈는 8의 배수 권장-->
<TextView
android:id="@+id/tv_name"
android:layout_width="wrap_content"
android:layout_height="wrap_content"
android:text="One Piece"
android:layout_toRightOf="@id/iv_icon"
android:layout_marginTop="16dp"
android:textStyle="bold"
android:textSize="24sp"/>
<TextView
android:id="@+id/tv_msg"
android:layout_width="wrap_content"
android:layout_height="wrap_content"
android:text="This is One piece Character"
android:layout_below="@id/tv_name"
android:layout_toRightOf="@id/iv_icon"/>
<ImageView
android:id="@+id/iv_img"
android:layout_width="match_parent"
android:layout_height="240dp"
android:src="@drawable/img01"
android:layout_below="@id/iv_icon"
android:scaleType="centerCrop"/>
</RelativeLayout>
|
'안드로이드 웹앱 콘테츠 개발자 양성(국비지원) > Adapter View' 카테고리의 다른 글
| Android Studio RSS 피드 Recycler View(다른 서버에서 데이터 가져와서 보여주기) (0) | 2019.10.04 |
|---|---|
| Android Studio Material Design 그외 4 (RecyclerView 2-2) 많이 사용됨! [중요!!] (0) | 2019.10.02 |
| Android Studio Material Design 그외 4(RecyclerView ) (0) | 2019.10.01 |
| Android Studio Material Design 그외 4(RecyclerView 하기 전 이야기) (0) | 2019.10.01 |
| Android Studio ViewPager (0) | 2019.09.25 |


댓글