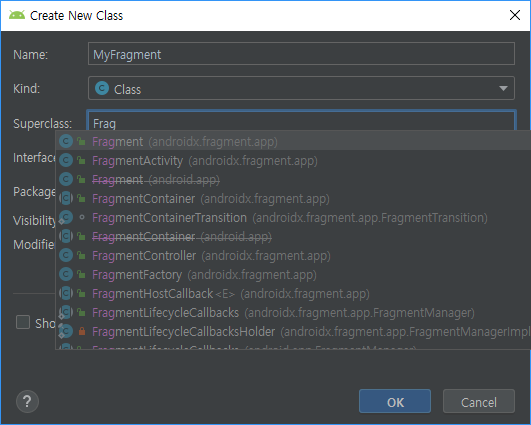
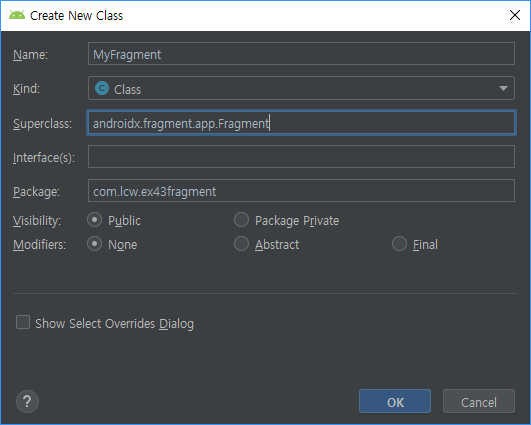
●Fragment(View+Activity)
기존의 View는 .xml로 화면을 구성하고, 제어하는 id를 MainActivity에서 제어를 했다.
그러나 그 뷰들이 많고 id도 20..30...40개씩 있다고 생각하면 MainActivity에서 id 참조 변수가 어마어마하다....
코드는 만들 수 있다. 하지만 나중에 유지 보수가 힘들 것이다.
그래서 한 View(.xml)에 관련 코드를 따로 하나의 .java에서 제어하는 방식을 생각한 것이다.
[1개 .xml -> 1개 .java]
맨 아래 fragment(.java , .xml)에 화면(TextView+Button)을 따로 구성해서 붙일 것이다.
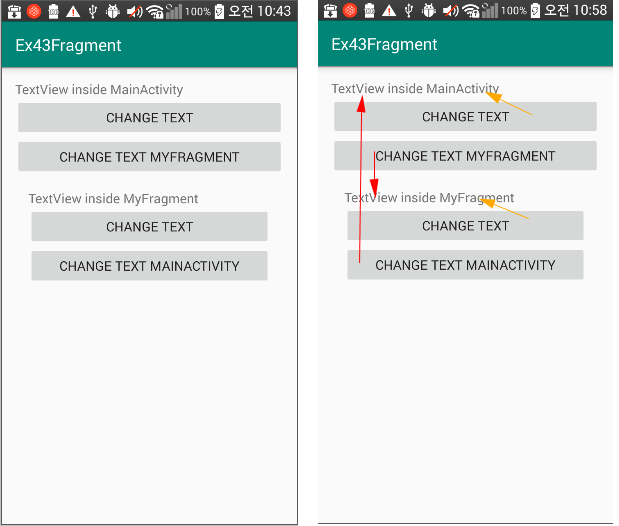
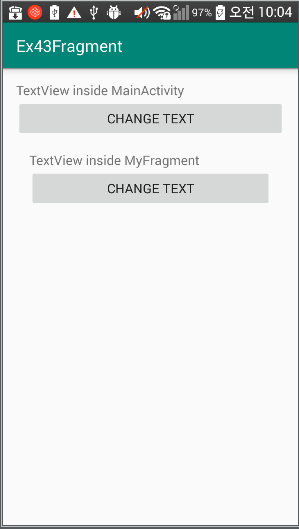
<최종 화면>
다른 클래스의 TextView를 제어한다. (Main <-> Fragment)
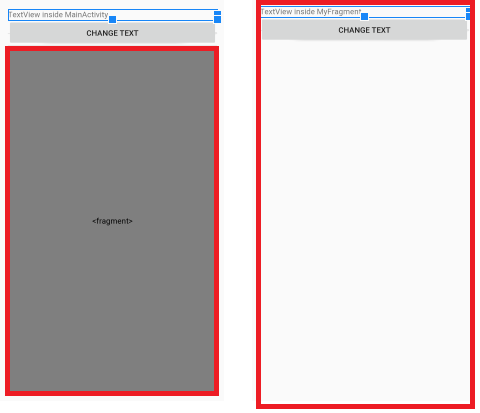
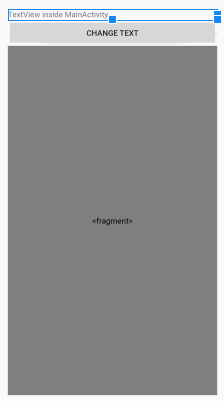
아래 사진과 같은 메인먼저 구성해보자.

activity_main.xml 코드
|
1
2
3
4
5
6
7
8
9
10
11
12
13
14
15
16
17
18
19
20
21
22
23
24
25
26
27
28
|
<?xml version="1.0" encoding="utf-8"?>
xmlns:app="http://schemas.android.com/apk/res-auto"
xmlns:tools="http://schemas.android.com/tools"
android:layout_width="match_parent"
android:layout_height="match_parent"
android:orientation="vertical"
android:padding="16dp"
tools:context=".MainActivity">
<TextView
android:id="@+id/tv"
android:layout_width="match_parent"
android:layout_height="wrap_content"
android:text="TextView inside MainActivity"/>
<Button
android:layout_width="match_parent"
android:layout_height="wrap_content"
android:text="change Text"
android:onClick="clickBtn"/>
<fragment
android:id="@+id/frag"
android:layout_width="match_parent"
android:layout_height="match_parent"/>
</LinearLayout>
|
맨 아래 fragment(.java , .xml)에 화면(TextView+Button)을 따로 구성해서 붙일 것이다.

MyFragment.java 코드
|
1
2
3
4
5
6
7
8
9
10
11
12
13
14
15
16
17
18
19
20
21
22
23
24
25
26
27
28
29
30
31
32
33
|
package com.lcw.ex43fragment;
import android.os.Bundle;
import android.view.LayoutInflater;
import android.view.View;
import android.view.ViewGroup;
import androidx.annotation.NonNull;
import androidx.annotation.Nullable;
public class MyFragment extends Fragment {
//프레그먼트가 보여줄 View(화면)을
//만들어 내는 작업을 하는 메소드
//마치 Activity의 onCreate같은.. 역할
//화면에 보여질때 자동으로 실행되는 콜백메소드
@Nullable
@Override
public View onCreateView(@NonNull LayoutInflater inflater, @Nullable ViewGroup container, @Nullable Bundle savedInstanceState) {
//보여질 뷰객체를 생성(부풀리다.)
View view=inflater.inflate(R.layout.fragment_my,container,false); //container <-부모 사이즈를 주고 , false=아직 붙이지 않는다.
//생성된 뷰를 리턴해주면 Activity에 보여짐
return view;
}
}
|
이제 fragment_my.xml을 만들어보자

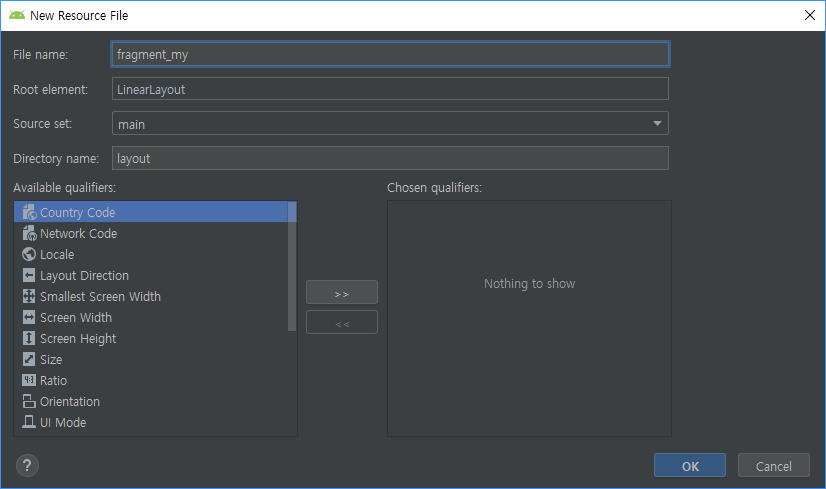
fragment_my.xml코드
|
1
2
3
4
5
6
7
8
9
10
11
12
13
14
15
16
17
18
19
|
<?xml version="1.0" encoding="utf-8"?>
android:orientation="vertical"
android:layout_width="match_parent"
android:layout_height="match_parent"
android:padding="16dp">
<TextView
android:id="@+id/tv"
android:layout_width="match_parent"
android:layout_height="wrap_content"
android:text="TextView inside MyFragment"/>
<Button
android:id="@+id/btn"
android:layout_width="match_parent"
android:layout_height="wrap_content"
android:text="change text"/>
</LinearLayout>
|
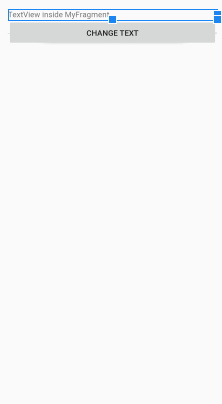
이렇게 작성하였으면, 기능은 없지만 화면은 보여질 것이다.
잘 보인다면! 이제 기능을 하는 추가 코드를 넣어 완성해보자!!
(단, 추가 버튼 기능: Main에서 Fragment의 TextView 제어
Fragment에서 Main TextView 제어)
<최종 코드>
activity_main.xml 코드
|
1
2
3
4
5
6
7
8
9
10
11
12
13
14
15
16
17
18
19
20
21
22
23
24
25
26
27
28
29
30
31
32
33
34
35
36
37
|
<?xml version="1.0" encoding="utf-8"?>
xmlns:app="http://schemas.android.com/apk/res-auto"
xmlns:tools="http://schemas.android.com/tools"
android:layout_width="match_parent"
android:layout_height="match_parent"
android:orientation="vertical"
android:padding="16dp"
tools:context=".MainActivity">
<TextView
android:id="@+id/tv"
android:layout_width="match_parent"
android:layout_height="wrap_content"
android:text="TextView inside MainActivity"/>
<Button
android:layout_width="match_parent"
android:layout_height="wrap_content"
android:text="change Text"
android:onClick="clickBtn"/>
<Button
android:layout_width="match_parent"
android:layout_height="wrap_content"
android:text="change text MyFragment"
android:onClick="clickBtn2"/>
<!-- XML에 프레그먼트를 추가하는 방식은 권장하지 않음.-->
<!-- XML에 태그문으로 추가하면 나중에 제거하는 것이 불가능함.-->
<fragment
android:id="@+id/frag"
android:name="com.lcw.ex43fragment.MyFragment"
android:layout_width="match_parent"
android:layout_height="match_parent"/>
</LinearLayout>
|
MainActivity.java 코드
|
1
2
3
4
5
6
7
8
9
10
11
12
13
14
15
16
17
18
19
20
21
22
23
24
25
26
27
28
29
30
31
32
33
34
35
36
37
38
39
40
|
package com.lcw.ex43fragment;
import android.os.Bundle;
import android.view.View;
import android.widget.TextView;
public class MainActivity extends AppCompatActivity {
TextView tv;
MyFragment myFragment;
FragmentManager fragmentManager;
@Override
protected void onCreate(Bundle savedInstanceState) {
super.onCreate(savedInstanceState);
setContentView(R.layout.activity_main);
tv=findViewById(R.id.tv);
//Fragment를 관리하는 관리자객체를 얻어오기
fragmentManager= getSupportFragmentManager();
//id를 이용해서 Fragment 참조하기
myFragment= (MyFragment) fragmentManager.findFragmentById(R.id.frag);
}
public void clickBtn(View view) {
tv.setText("aaa");
}
public void clickBtn2(View view) {
//MyFragment의 TextView의 글씨 변경
myFragment.tv.setText("kkk");
}
}
|
fragment_my.xml코드
|
1
2
3
4
5
6
7
8
9
10
11
12
13
14
15
16
17
18
19
20
21
22
23
24
|
<?xml version="1.0" encoding="utf-8"?>
android:orientation="vertical"
android:layout_width="match_parent"
android:layout_height="match_parent"
android:padding="16dp">
<TextView
android:id="@+id/tv"
android:layout_width="match_parent"
android:layout_height="wrap_content"
android:text="TextView inside MyFragment"/>
<Button
android:id="@+id/btn"
android:layout_width="match_parent"
android:layout_height="wrap_content"
android:text="change text"/>
<Button
android:id="@+id/btn2"
android:layout_width="match_parent"
android:layout_height="wrap_content"
android:text="change text MainActivity"/>
</LinearLayout>
|
MyFragment.java 코드
|
1
2
3
4
5
6
7
8
9
10
11
12
13
14
15
16
17
18
19
20
21
22
23
24
25
26
27
28
29
30
31
32
33
34
35
36
37
38
39
40
41
42
43
44
45
46
47
48
49
50
51
52
53
54
55
56
57
58
59
60
|
package com.lcw.ex43fragment;
import android.os.Bundle;
import android.view.LayoutInflater;
import android.view.View;
import android.view.ViewGroup;
import android.widget.Button;
import android.widget.TextView;
import androidx.annotation.NonNull;
import androidx.annotation.Nullable;
public class MyFragment extends Fragment {
TextView tv;
Button btn;
Button btn2;
//프레그먼트가 보여줄 View(화면)을
//만들어 내는 작업을 하는 메소드
//마치 Activity의 onCreate같은.. 역할
//화면에 보여질때 자동으로 실행되는 콜백메소드
@Nullable
@Override
public View onCreateView(@NonNull LayoutInflater inflater, @Nullable ViewGroup container, @Nullable Bundle savedInstanceState) {
//보여질 뷰객체를 생성(부풀리다.)
View view=inflater.inflate(R.layout.fragment_my,container,false); //container <-부모 사이즈를 주고 , false=아직 붙이지 않는다.
tv=view.findViewById(R.id.tv);
btn=view.findViewById(R.id.btn);
btn.setOnClickListener(new View.OnClickListener() {
@Override
public void onClick(View view) {
tv.setText("bbb");
}
});
btn2=view.findViewById(R.id.btn2);
btn2.setOnClickListener(new View.OnClickListener() {
@Override
public void onClick(View view) {
//MainActivity의 TextView의 글씨 변경
//이 프레그먼트를 보여주는 Activity를
//얻어와서 참조하기
//MainActivity activity=(MainActivity) MyFragment.this.getActivity();
MainActivity activity=(MainActivity) getActivity(); // 아웃터 클래스의 멤버는 인너클래스에서 마음대로 사용할 수 있다. 그래서 윗줄이랑 같은 의미
activity.tv.setText("!!!!!!!!");
}
});
//생성된 뷰를 리턴해주면 Activity에 보여짐
return view;
}
}
|
'안드로이드 웹앱 콘테츠 개발자 양성(국비지원) > Fragment' 카테고리의 다른 글
| Android Studio(화면) PreferenceFragment (설정화면 & 저장) (4) | 2019.10.29 |
|---|---|
| Android Studio Fragment + Pager 2 (0) | 2019.09.26 |
| Android Studio Fragment + Pager 1 (0) | 2019.09.26 |
| Android Studio Fragment 2(View+Activity) (0) | 2019.09.26 |


댓글