반응형
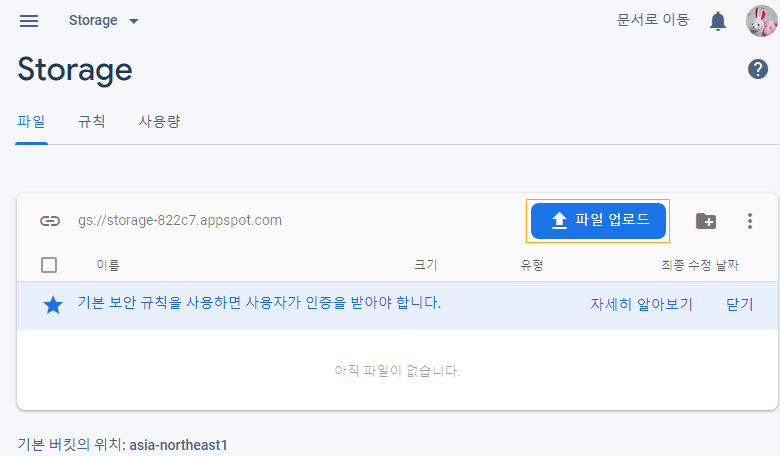
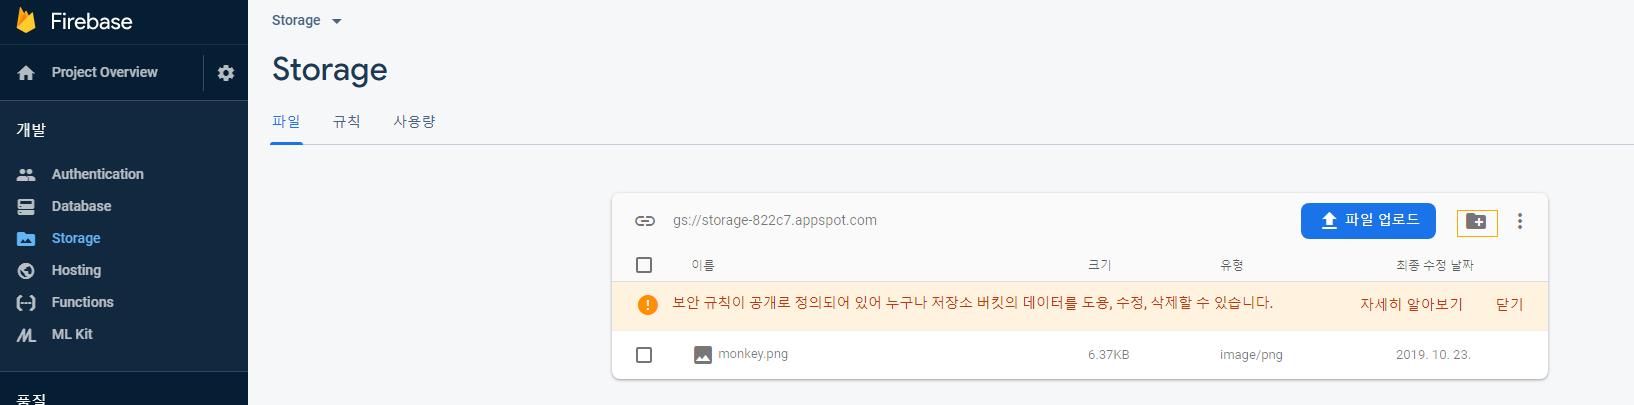
이번 예제는 Firebase를 이용하여 Cloud Storage를 만들고 거기에 이미지 업로드를 시키는 예제이다.
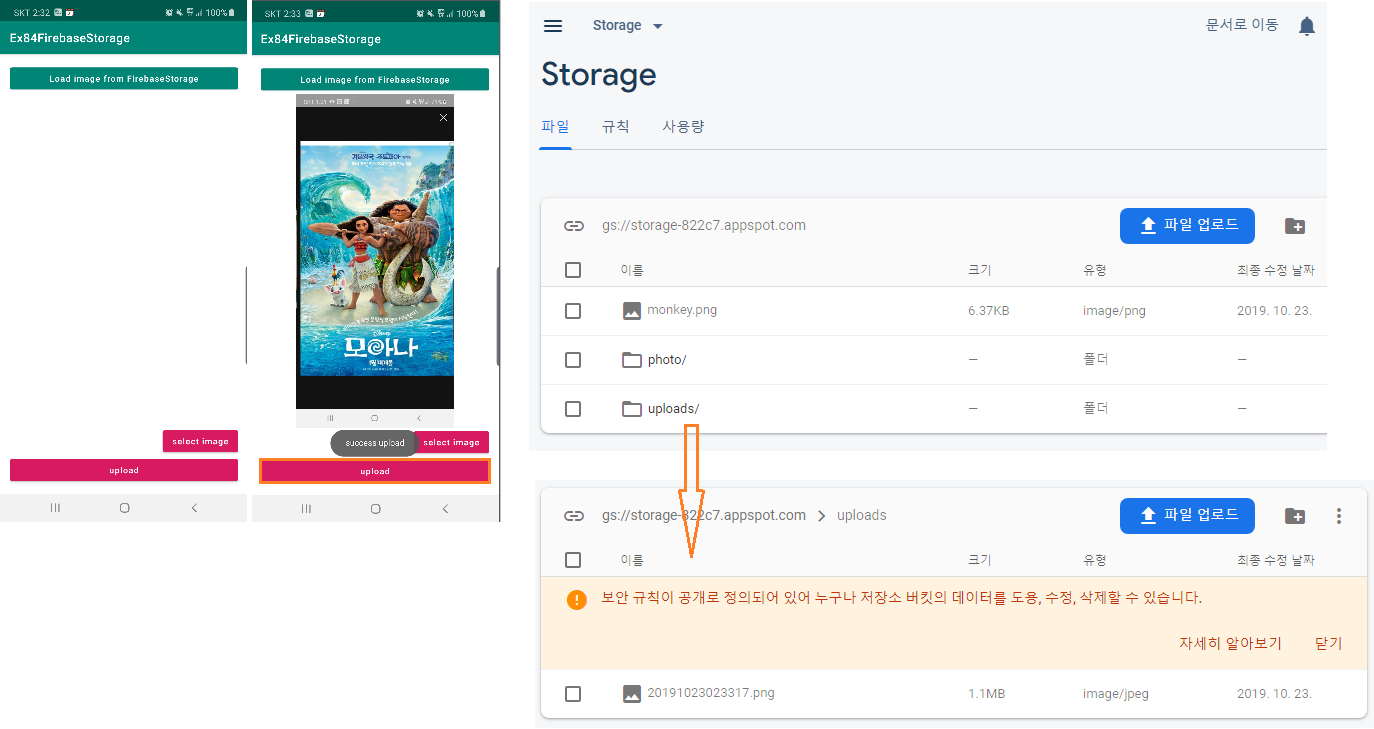
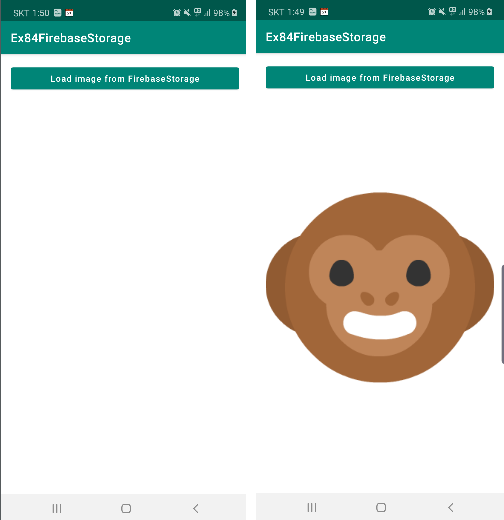
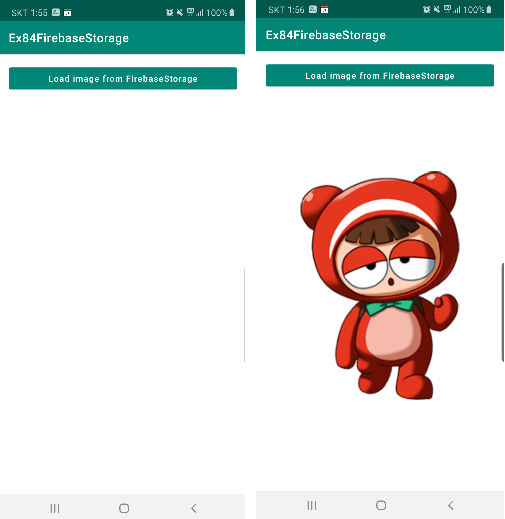
<최종 실행 화면 및 서버에 이미지 업로드>
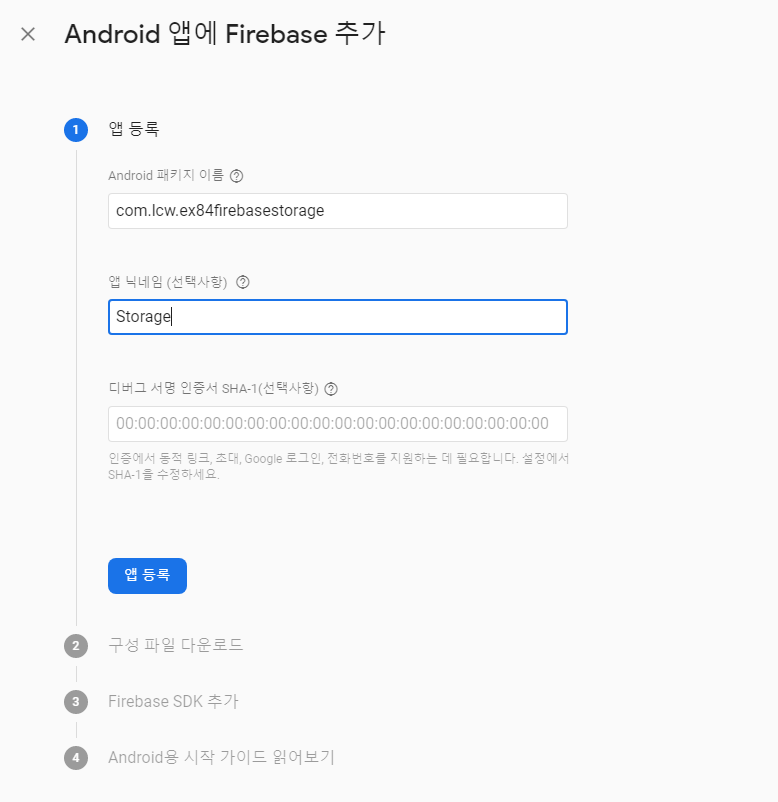
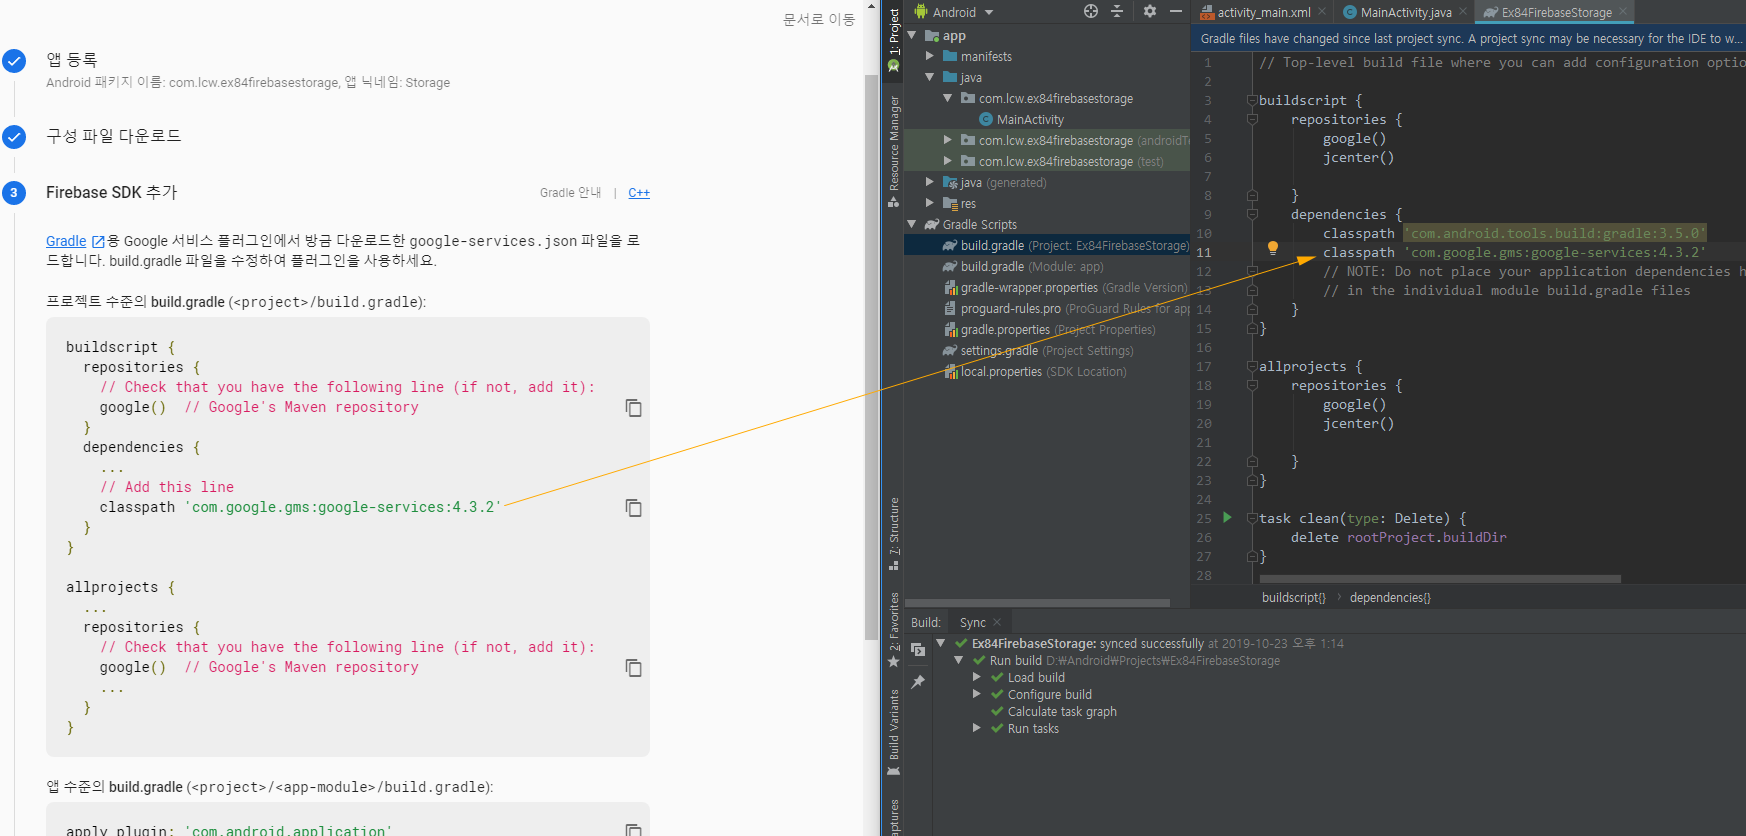
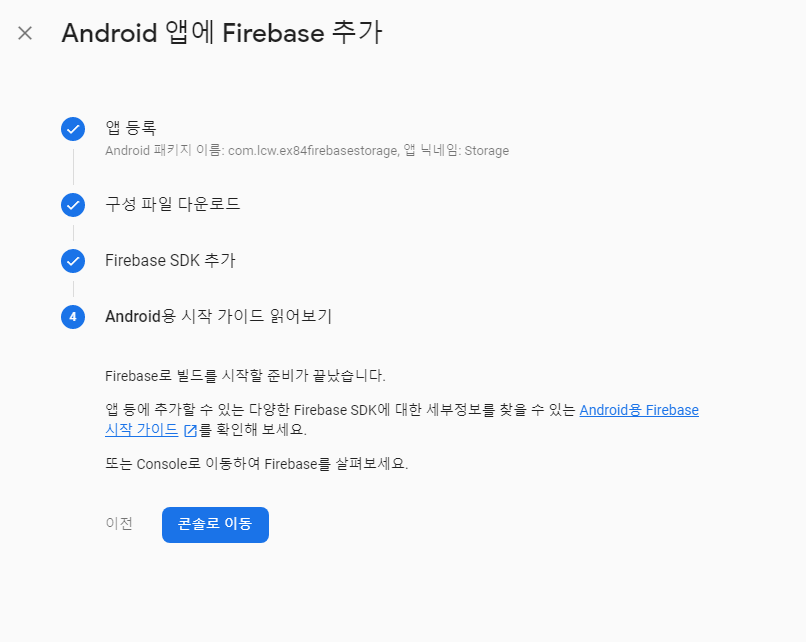
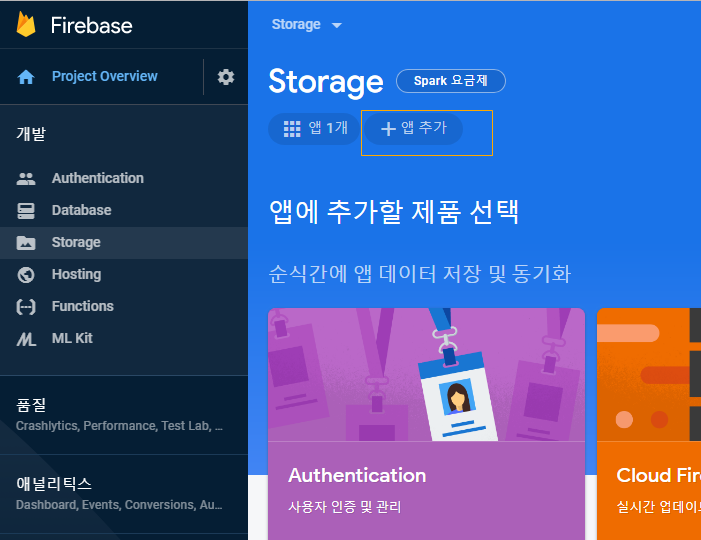
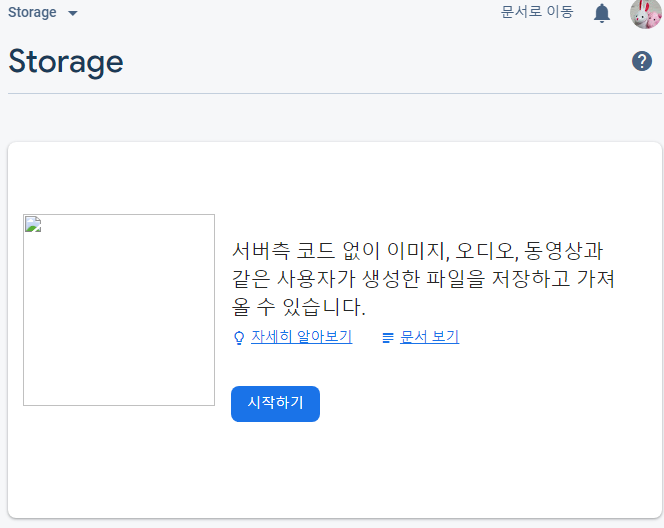
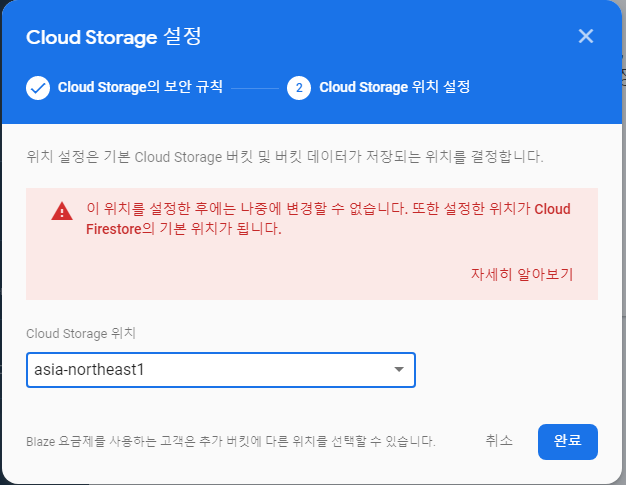
우선 Firebase 홈페이지를 들어가자.
Firebase
Firebase는 고품질 앱을 빠르게 개발하고 비즈니스를 성장시키는 데 도움이 되는 Google의 모바일 플랫폼입니다.
firebase.google.com

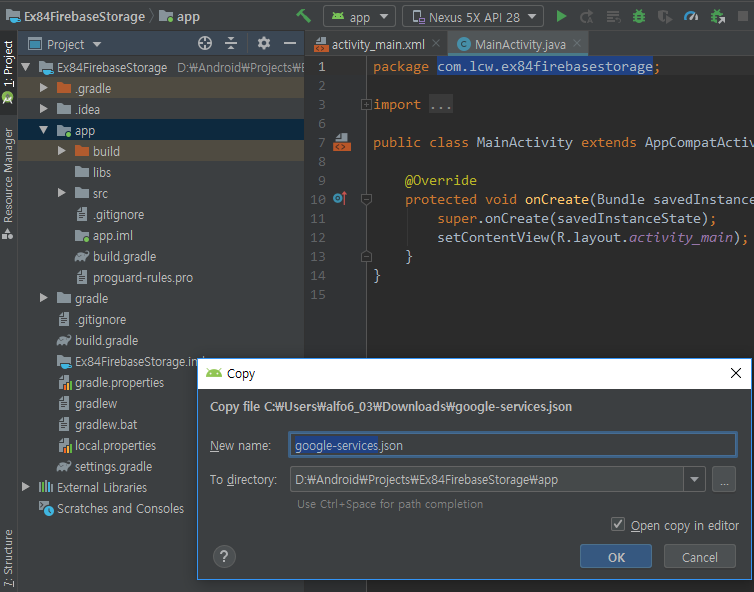
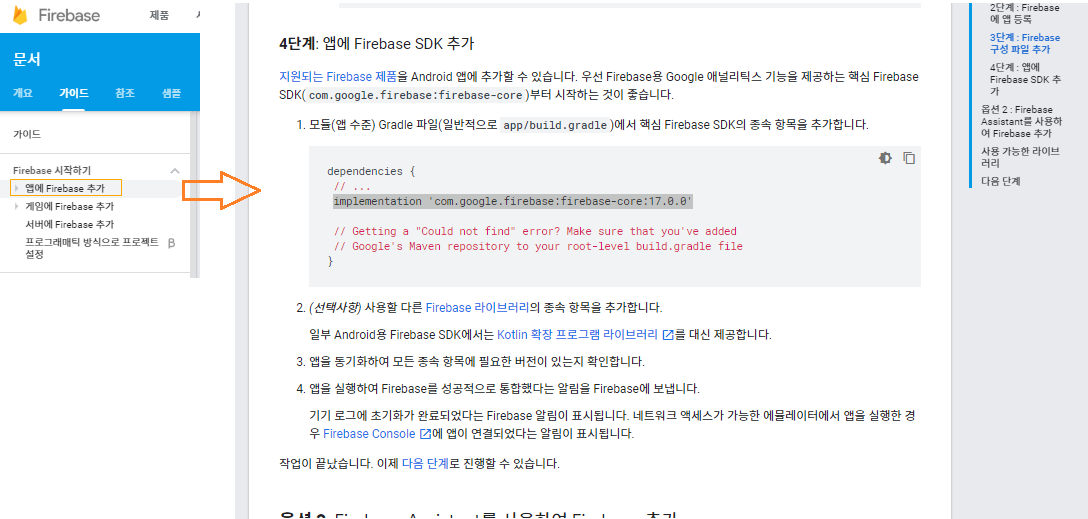

라이브러리 추가 ->
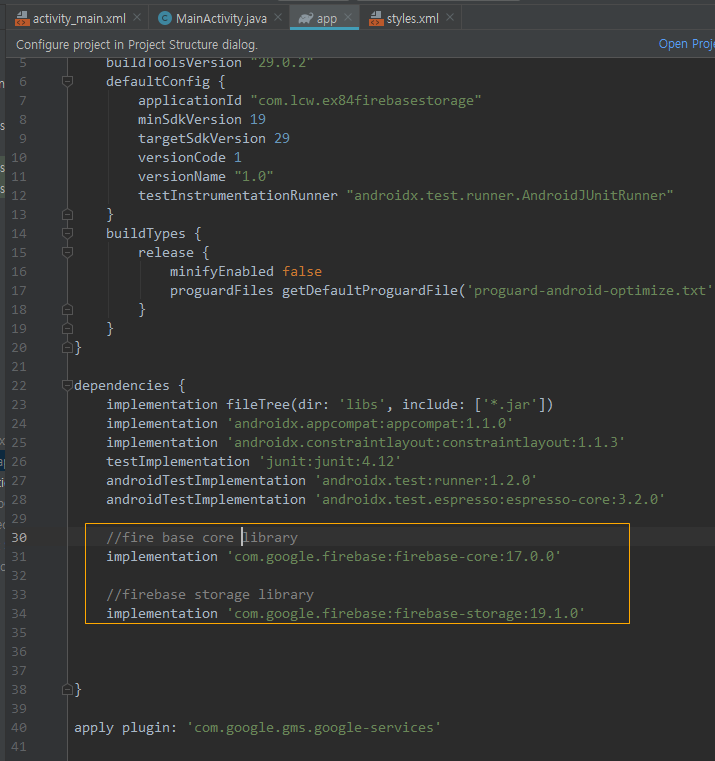
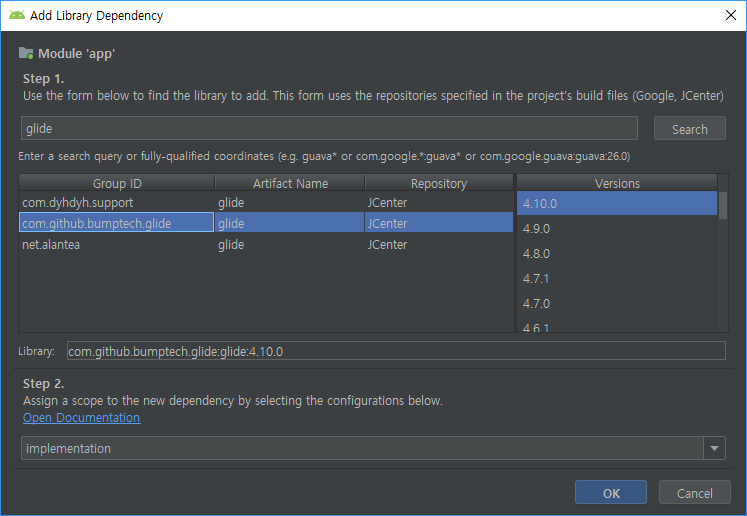
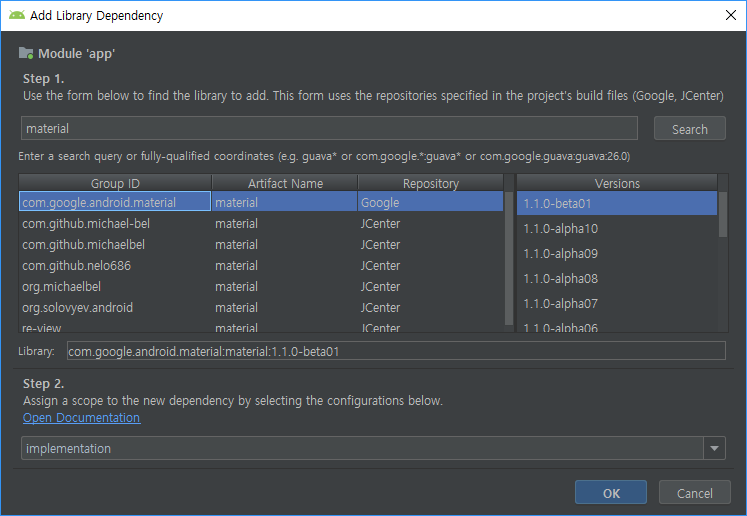
네트워크에 관련된 이미지를 작업할 것이기 때문에 glide가 필요하고, 버튼을 조금 예쁜 것을 사용하기 위해 material을 추가 하자.
아래 코드를 작성하고 실행하면, Storage 이미지를 불러올 것이다.

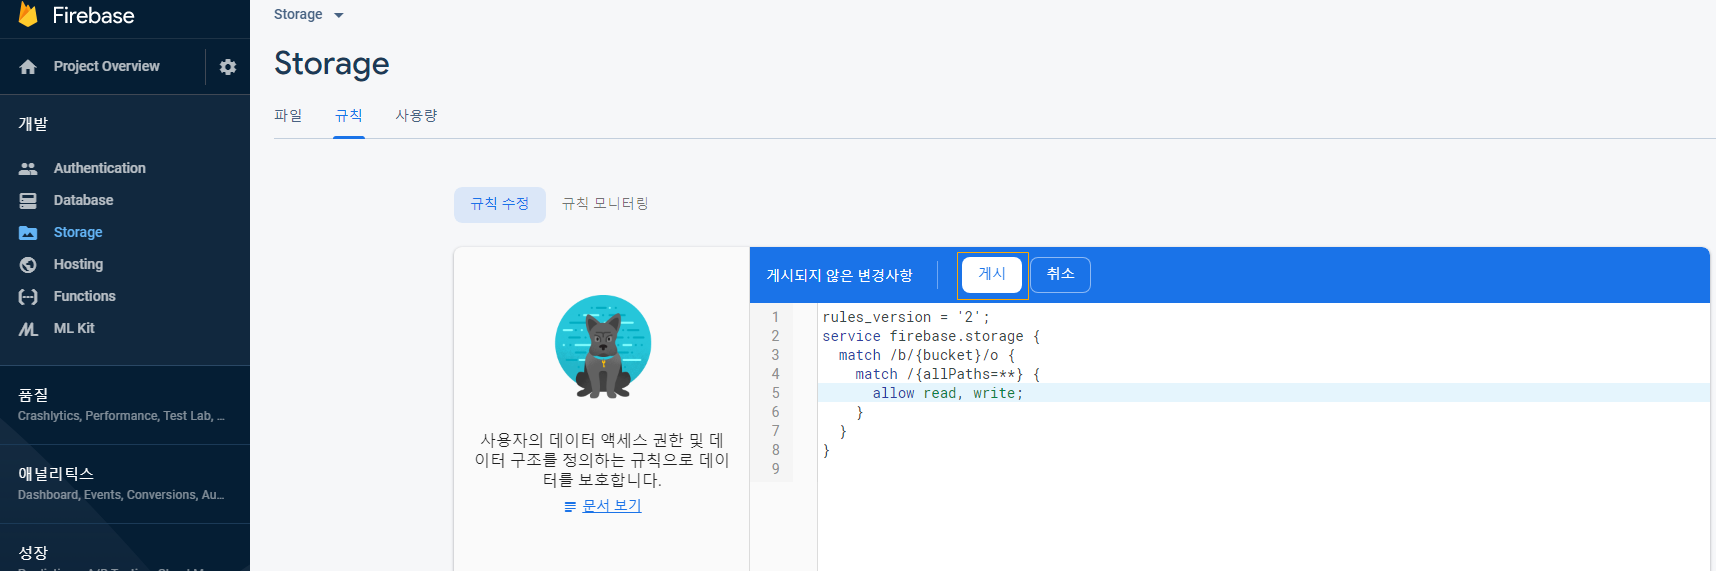
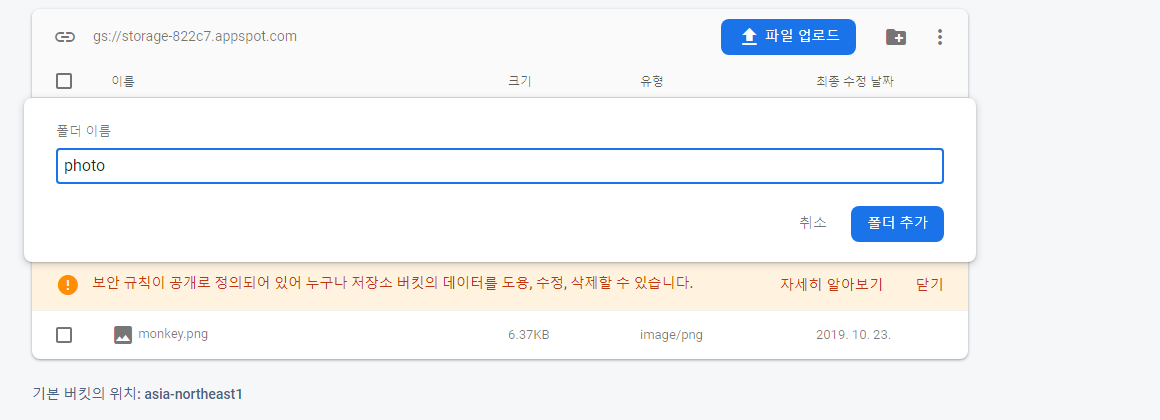
이제 폴더를 만들어서 거기에 이미지를 넣어보자. ( 보통 관리하려면 폴더를 만들기 때문에)
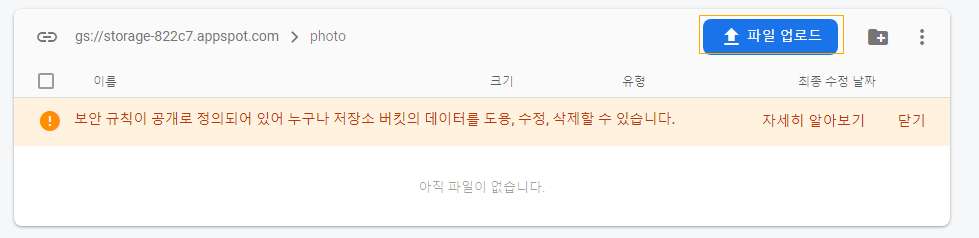
이제 하위 폴더를 하나더 만들고, 거기에 여러 이미지를 넣을 것이다.
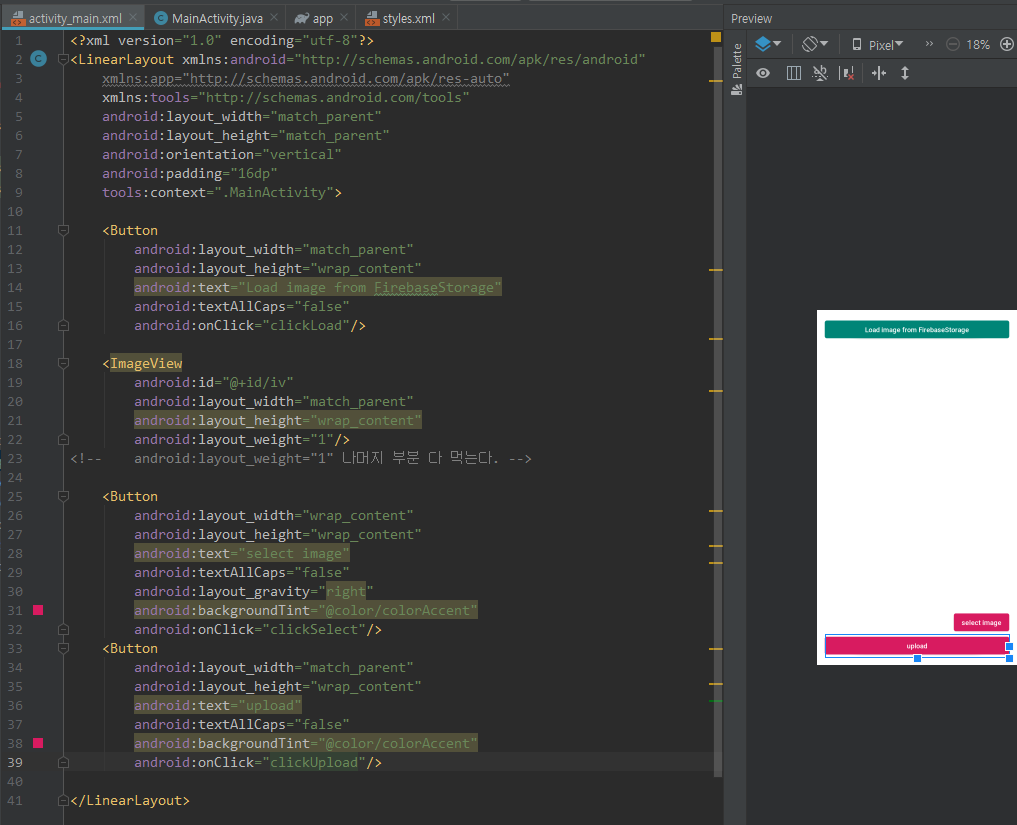
[이미지를 선택 버튼과 업로드 버튼을 만든다.]
|
1
2
3
4
5
6
7
8
9
10
11
12
13
14
15
16
17
18
19
20
21
22
23
24
25
26
27
28
29
30
31
32
33
34
35
36
37
38
39
40
41
42
43
44
45
46
47
48
49
50
51
52
53
54
55
56
57
58
59
60
61
62
63
64
65
66
67
68
69
70
71
72
73
74
75
76
77
78
79
80
81
82
83
84
85
|
package com.lcw.ex84firebasestorage;
import androidx.annotation.Nullable;
import android.content.Intent;
import android.net.Uri;
import android.os.Bundle;
import android.view.View;
import android.widget.ImageView;
import com.bumptech.glide.Glide;
public class MainActivity extends AppCompatActivity {
ImageView iv;
//업로드할 이미지 파일의 경로 Uri
Uri imgUri;
@Override
protected void onCreate(Bundle savedInstanceState) {
super.onCreate(savedInstanceState);
setContentView(R.layout.activity_main);
iv=findViewById(R.id.iv);
}
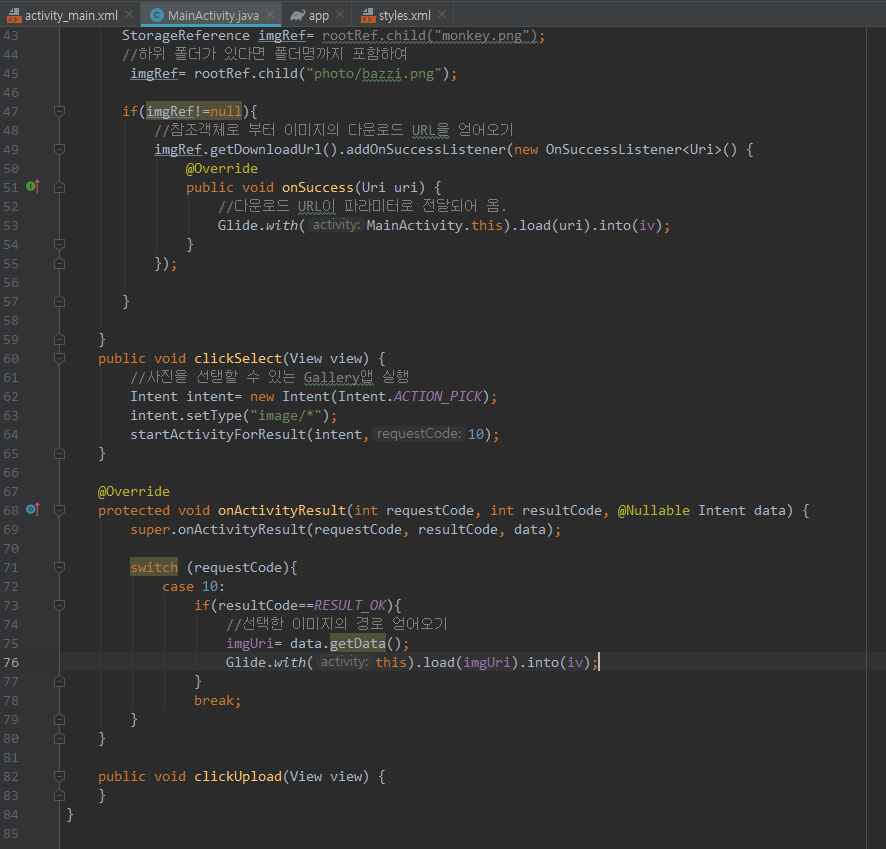
public void clickLoad(View view) {
//Firebase Storage에 저장되어 있는 이미지 파일 읽어오기
//1. Firebase Storeage관리 객체 얻어오기
FirebaseStorage firebaseStorage= FirebaseStorage.getInstance();
//2. 최상위노드 참조 객체 얻어오기
StorageReference rootRef= firebaseStorage.getReference();
//읽어오길 원하는 파일의 참조객체 얻어오기
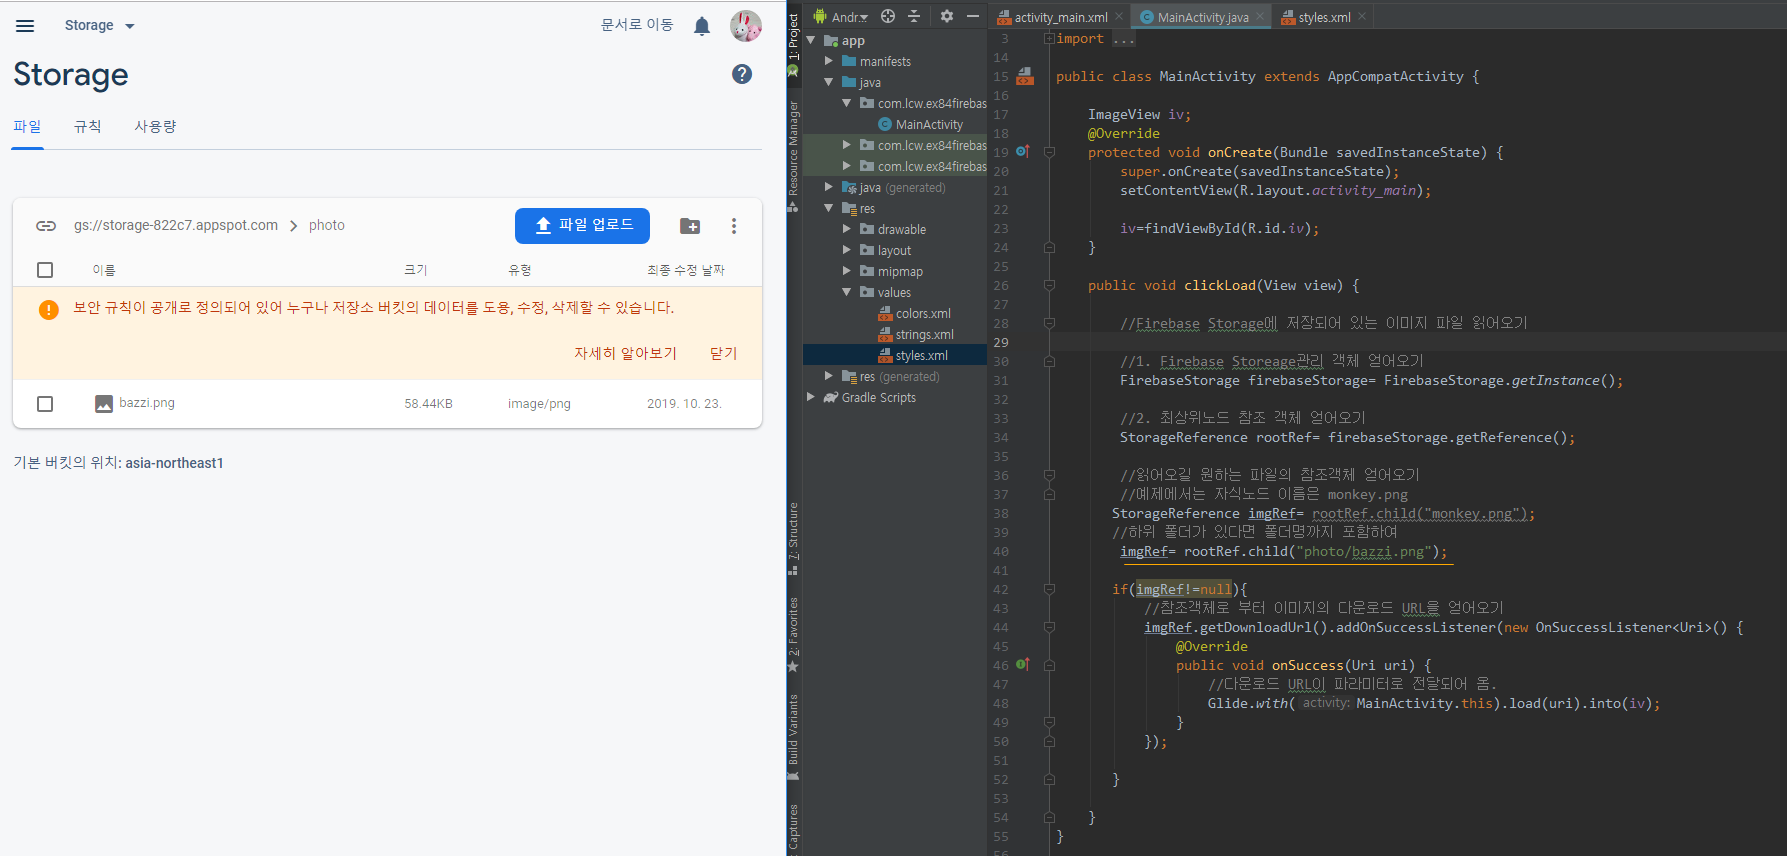
//예제에서는 자식노드 이름은 monkey.png
//하위 폴더가 있다면 폴더명까지 포함하여
if(imgRef!=null){
//참조객체로 부터 이미지의 다운로드 URL을 얻어오기
imgRef.getDownloadUrl().addOnSuccessListener(new OnSuccessListener<Uri>() {
@Override
public void onSuccess(Uri uri) {
//다운로드 URL이 파라미터로 전달되어 옴.
Glide.with(MainActivity.this).load(uri).into(iv);
}
});
}
}
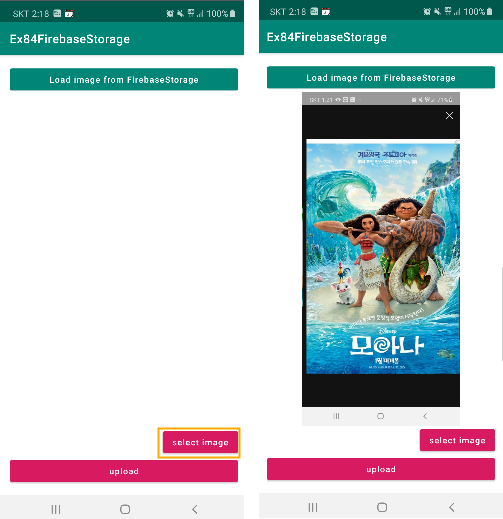
public void clickSelect(View view) {
//사진을 선탣할 수 있는 Gallery앱 실행
Intent intent= new Intent(Intent.ACTION_PICK);
intent.setType("image/*");
startActivityForResult(intent,10);
}
@Override
protected void onActivityResult(int requestCode, int resultCode, @Nullable Intent data) {
super.onActivityResult(requestCode, resultCode, data);
switch (requestCode){
case 10:
if(resultCode==RESULT_OK){
//선택한 이미지의 경로 얻어오기
imgUri= data.getData();
Glide.with(this).load(imgUri).into(iv);
}
break;
}
}
public void clickUpload(View view) {
}
}
|
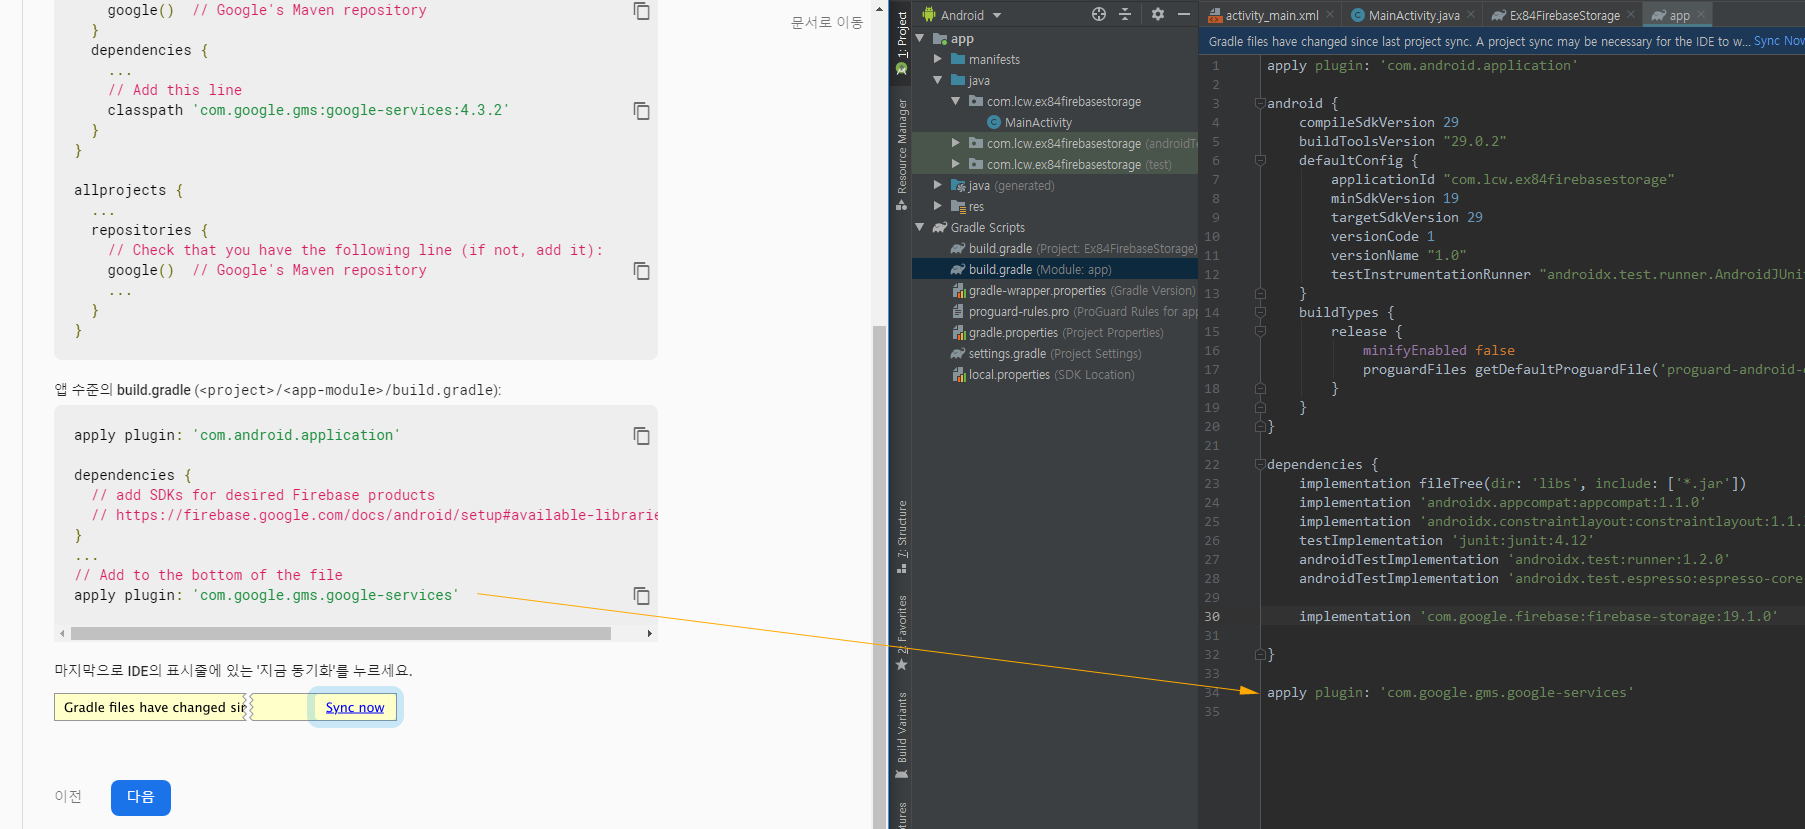
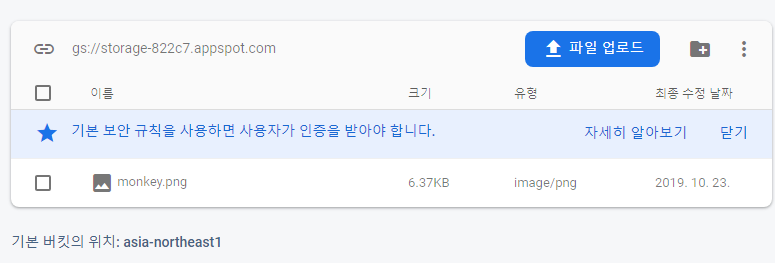
이제 업로드 버튼 기능을 구현하자.
<최종 실행 화면 및 서버에 이미지 업로드>
복붙용 코드
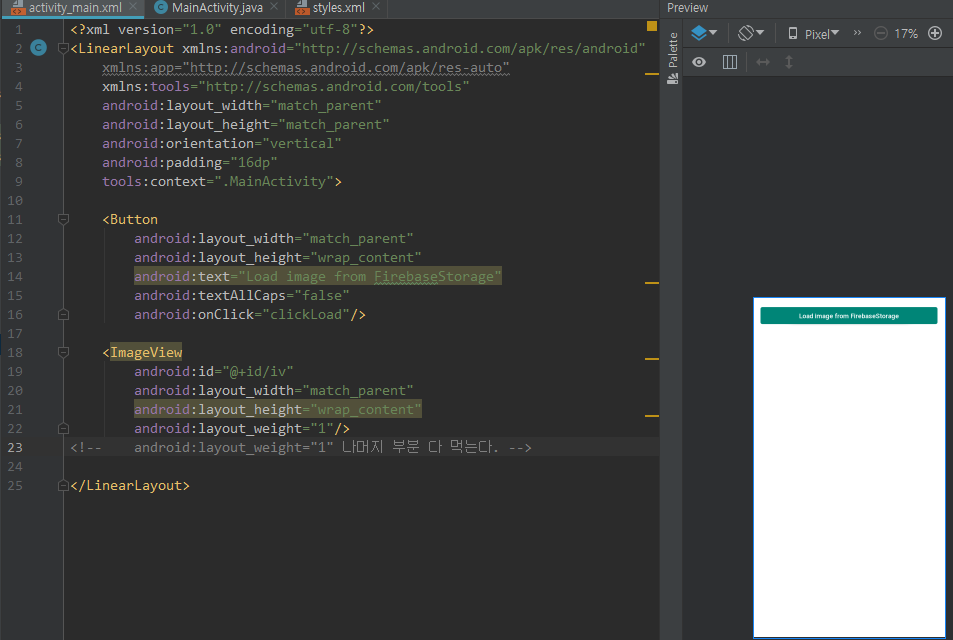
activity_main.xml
|
1
2
3
4
5
6
7
8
9
10
11
12
13
14
15
16
17
18
19
20
21
22
23
24
25
26
27
28
29
30
31
32
33
34
35
36
37
38
39
40
41
|
<?xml version="1.0" encoding="utf-8"?>
xmlns:app="http://schemas.android.com/apk/res-auto"
xmlns:tools="http://schemas.android.com/tools"
android:layout_width="match_parent"
android:layout_height="match_parent"
android:orientation="vertical"
android:padding="16dp"
tools:context=".MainActivity">
<Button
android:layout_width="match_parent"
android:layout_height="wrap_content"
android:text="Load image from FirebaseStorage"
android:textAllCaps="false"
android:onClick="clickLoad"/>
<ImageView
android:id="@+id/iv"
android:layout_width="match_parent"
android:layout_height="wrap_content"
android:layout_weight="1"/>
<!-- android:layout_weight="1" 나머지 부분 다 먹는다. -->
<Button
android:layout_width="wrap_content"
android:layout_height="wrap_content"
android:text="select image"
android:textAllCaps="false"
android:layout_gravity="right"
android:backgroundTint="@color/colorAccent"
android:onClick="clickSelect"/>
<Button
android:layout_width="match_parent"
android:layout_height="wrap_content"
android:text="upload"
android:textAllCaps="false"
android:backgroundTint="@color/colorAccent"
android:onClick="clickUpload"/>
</LinearLayout>
|
MainActivity.java
|
1
2
3
4
5
6
7
8
9
10
11
12
13
14
15
16
17
18
19
20
21
22
23
24
25
26
27
28
29
30
31
32
33
34
35
36
37
38
39
40
41
42
43
44
45
46
47
48
49
50
51
52
53
54
55
56
57
58
59
60
61
62
63
64
65
66
67
68
69
70
71
72
73
74
75
76
77
78
79
80
81
82
83
84
85
86
87
88
89
90
91
92
93
94
95
96
97
98
99
100
101
102
103
104
105
106
107
108
109
110
111
112
113
114
115
116
117
|
package com.lcw.ex84firebasestorage;
import androidx.annotation.Nullable;
import android.content.Intent;
import android.net.Uri;
import android.os.Bundle;
import android.view.View;
import android.widget.ImageView;
import android.widget.Toast;
import com.bumptech.glide.Glide;
import java.text.SimpleDateFormat;
import java.util.Date;
public class MainActivity extends AppCompatActivity {
ImageView iv;
//업로드할 이미지 파일의 경로 Uri
Uri imgUri;
@Override
protected void onCreate(Bundle savedInstanceState) {
super.onCreate(savedInstanceState);
setContentView(R.layout.activity_main);
iv=findViewById(R.id.iv);
}
public void clickLoad(View view) {
//Firebase Storage에 저장되어 있는 이미지 파일 읽어오기
//1. Firebase Storeage관리 객체 얻어오기
FirebaseStorage firebaseStorage= FirebaseStorage.getInstance();
//2. 최상위노드 참조 객체 얻어오기
StorageReference rootRef= firebaseStorage.getReference();
//읽어오길 원하는 파일의 참조객체 얻어오기
//예제에서는 자식노드 이름은 monkey.png
//하위 폴더가 있다면 폴더명까지 포함하여
if(imgRef!=null){
//참조객체로 부터 이미지의 다운로드 URL을 얻어오기
imgRef.getDownloadUrl().addOnSuccessListener(new OnSuccessListener<Uri>() {
@Override
public void onSuccess(Uri uri) {
//다운로드 URL이 파라미터로 전달되어 옴.
Glide.with(MainActivity.this).load(uri).into(iv);
}
});
}
}
public void clickSelect(View view) {
//사진을 선탣할 수 있는 Gallery앱 실행
Intent intent= new Intent(Intent.ACTION_PICK);
intent.setType("image/*");
startActivityForResult(intent,10);
}
@Override
protected void onActivityResult(int requestCode, int resultCode, @Nullable Intent data) {
super.onActivityResult(requestCode, resultCode, data);
switch (requestCode){
case 10:
if(resultCode==RESULT_OK){
//선택한 이미지의 경로 얻어오기
imgUri= data.getData();
Glide.with(this).load(imgUri).into(iv);
}
break;
}
}
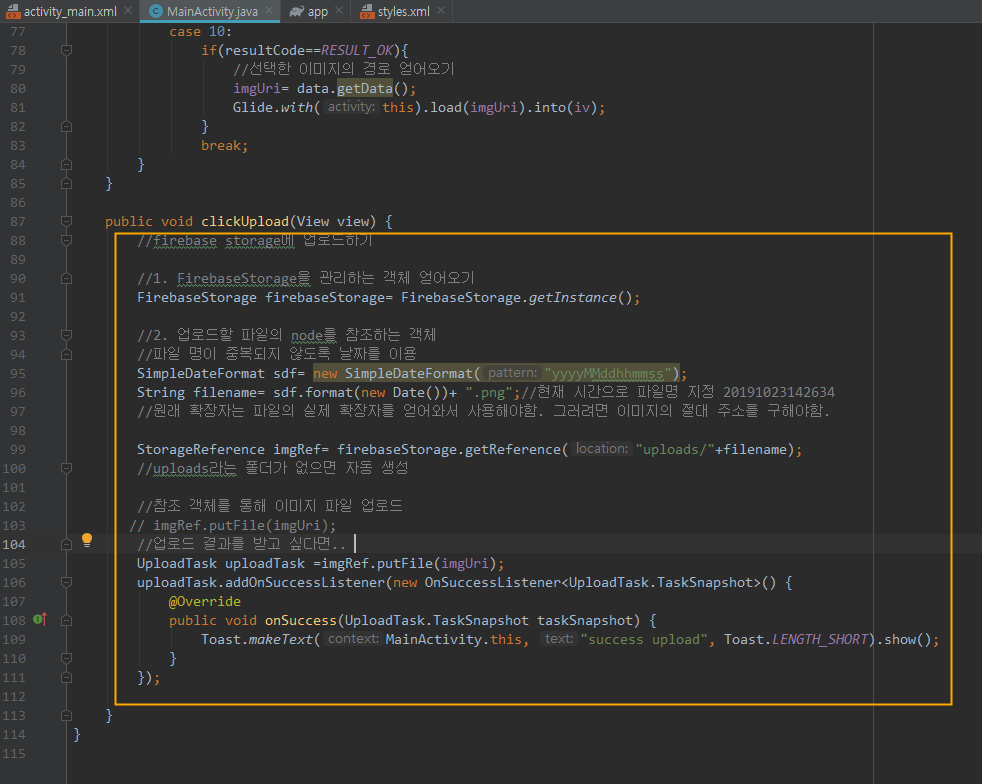
public void clickUpload(View view) {
//firebase storage에 업로드하기
//1. FirebaseStorage을 관리하는 객체 얻어오기
FirebaseStorage firebaseStorage= FirebaseStorage.getInstance();
//2. 업로드할 파일의 node를 참조하는 객체
//파일 명이 중복되지 않도록 날짜를 이용
SimpleDateFormat sdf= new SimpleDateFormat("yyyyMMddhhmmss");
String filename= sdf.format(new Date())+ ".png";//현재 시간으로 파일명 지정 20191023142634
//원래 확장자는 파일의 실제 확장자를 얻어와서 사용해야함. 그러려면 이미지의 절대 주소를 구해야함.
StorageReference imgRef= firebaseStorage.getReference("uploads/"+filename);
//uploads라는 폴더가 없으면 자동 생성
//참조 객체를 통해 이미지 파일 업로드
// imgRef.putFile(imgUri);
//업로드 결과를 받고 싶다면..
UploadTask uploadTask =imgRef.putFile(imgUri);
uploadTask.addOnSuccessListener(new OnSuccessListener<UploadTask.TaskSnapshot>() {
@Override
public void onSuccess(UploadTask.TaskSnapshot taskSnapshot) {
Toast.makeText(MainActivity.this, "success upload", Toast.LENGTH_SHORT).show();
}
});
//업로드한 파일의 경로를 firebaseDB에 저장하면 게시판 같은 앱도 구현할 수 있음.
}
}
|
build.gradle ( Module: app)
|
1
2
3
4
5
6
7
8
9
10
11
12
13
14
15
16
17
18
19
20
21
22
23
24
25
26
27
28
29
30
31
32
33
34
35
36
37
38
39
40
41
42
|
apply plugin: 'com.android.application'
android {
compileSdkVersion 29
buildToolsVersion "29.0.2"
defaultConfig {
applicationId "com.lcw.ex84firebasestorage"
minSdkVersion 19
targetSdkVersion 29
versionCode 1
versionName "1.0"
testInstrumentationRunner "androidx.test.runner.AndroidJUnitRunner"
}
buildTypes {
release {
minifyEnabled false
proguardFiles getDefaultProguardFile('proguard-android-optimize.txt'), 'proguard-rules.pro'
}
}
}
dependencies {
implementation fileTree(dir: 'libs', include: ['*.jar'])
implementation 'androidx.appcompat:appcompat:1.1.0'
implementation 'androidx.constraintlayout:constraintlayout:1.1.3'
testImplementation 'junit:junit:4.12'
androidTestImplementation 'androidx.test:runner:1.2.0'
androidTestImplementation 'androidx.test.espresso:espresso-core:3.2.0'
//fire base core library
implementation 'com.google.firebase:firebase-core:17.0.0'
//firebase storage library
implementation 'com.google.firebase:firebase-storage:19.1.0'
implementation 'com.github.bumptech.glide:glide:4.10.0'
implementation 'com.google.android.material:material:1.1.0-beta01'
}
apply plugin: 'com.google.gms.google-services'
|
반응형
'안드로이드 웹앱 콘테츠 개발자 양성(국비지원) > Firebase' 카테고리의 다른 글
| Android Studio(기능) Firebase - Database+Storage [채팅창 만들기3] (12) | 2019.10.24 |
|---|---|
| Android Studio(기능) Firebase - Database+Storage [채팅창 만들기2] (0) | 2019.10.24 |
| Android Studio(기능) Firebase - Database+Storage [채팅창 만들기1] (1) | 2019.10.24 |
| Android Studio(기능) Firebase - Realtime Database (1) | 2019.10.23 |


댓글