◎Bluetooth
블루투스로 서버, 클라이언트를 만들어서 채팅하는 앱을 만들것이다.
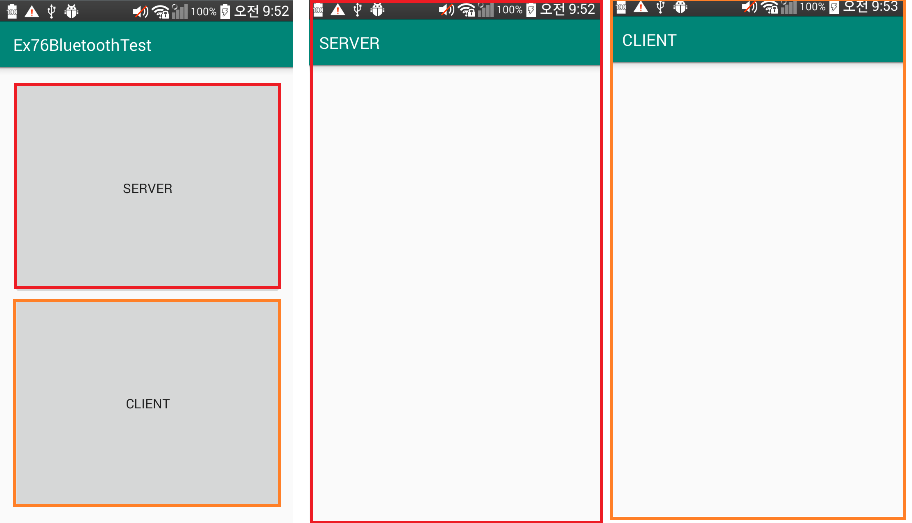
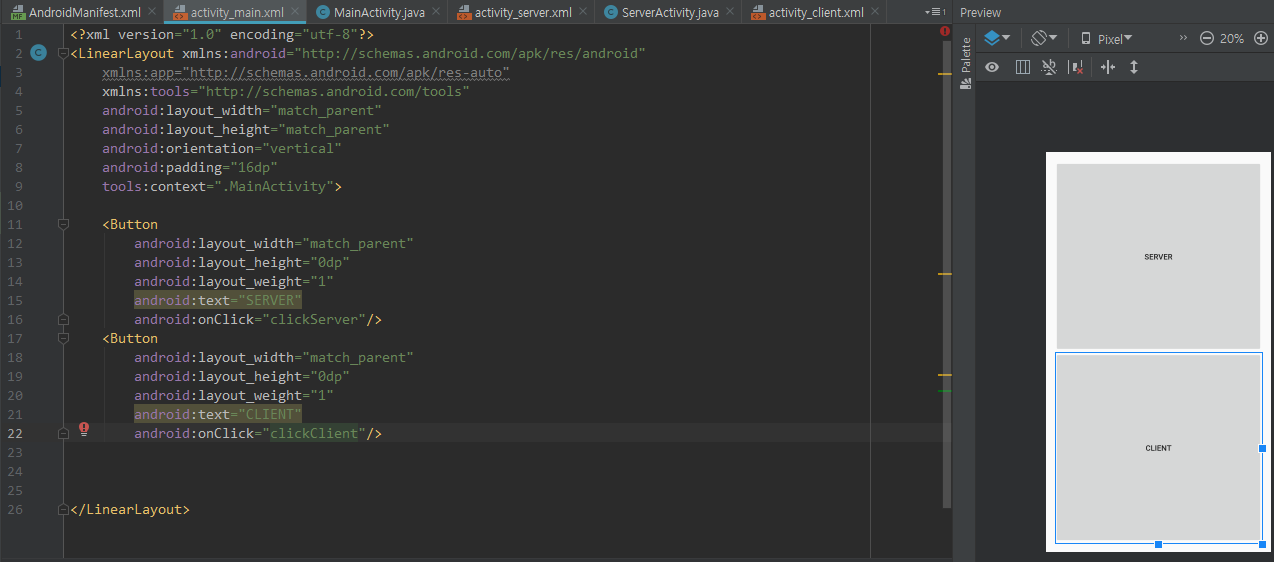
액티비티는 총 3개 [첫 화면은 서버와 클라이언트를 선택 화면, 두 번째 서버 화면, 세 번째 클라이언트 화면]
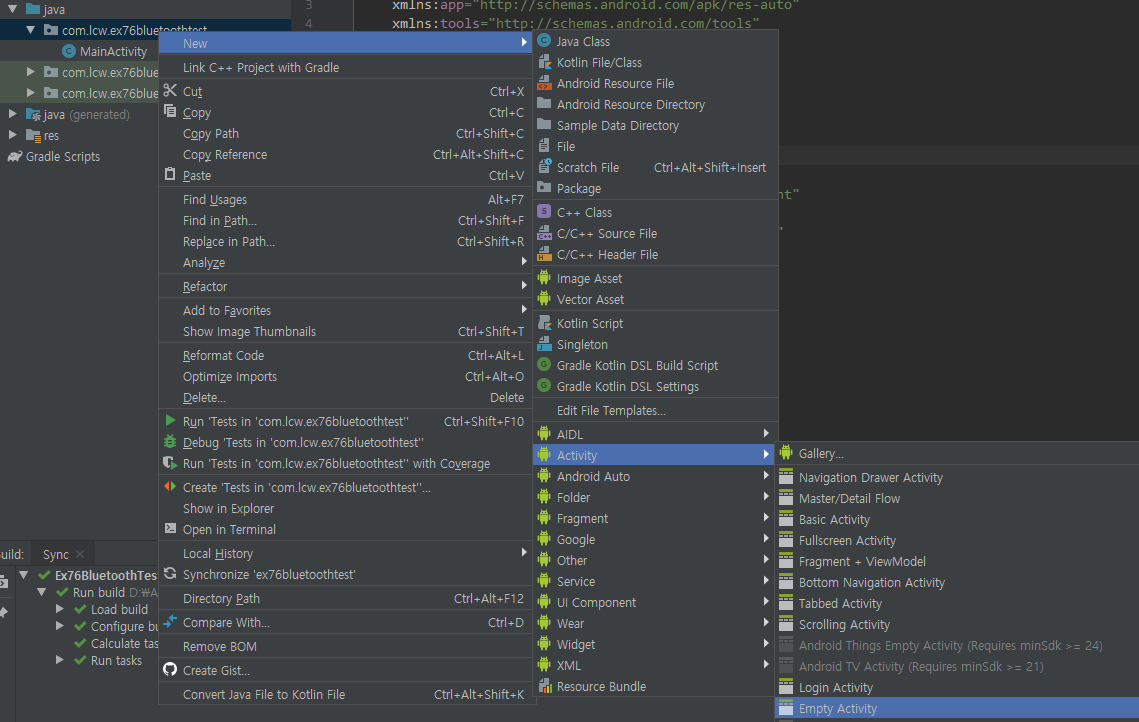
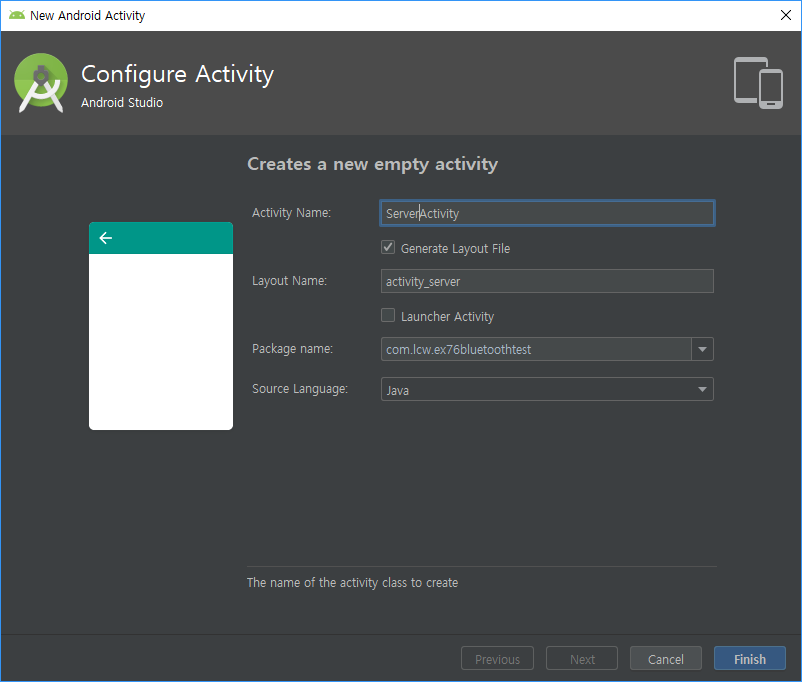
우선 Activity를 만들자. (Server와 Client)

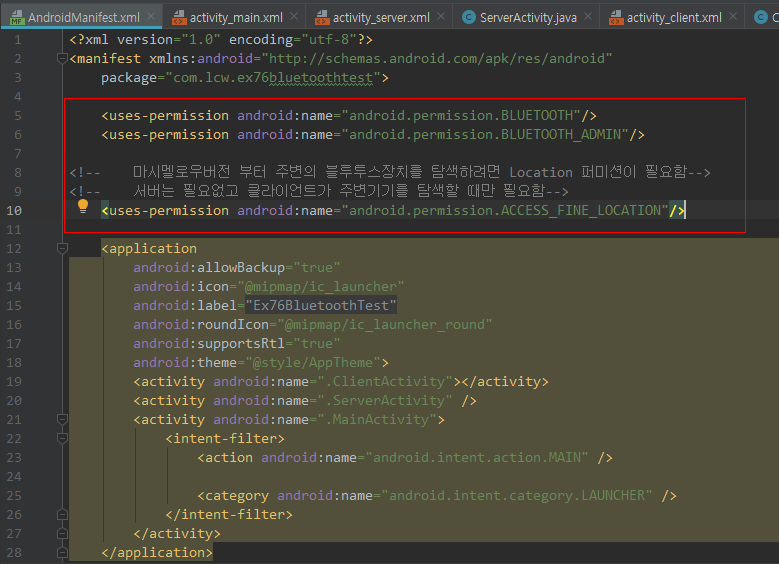
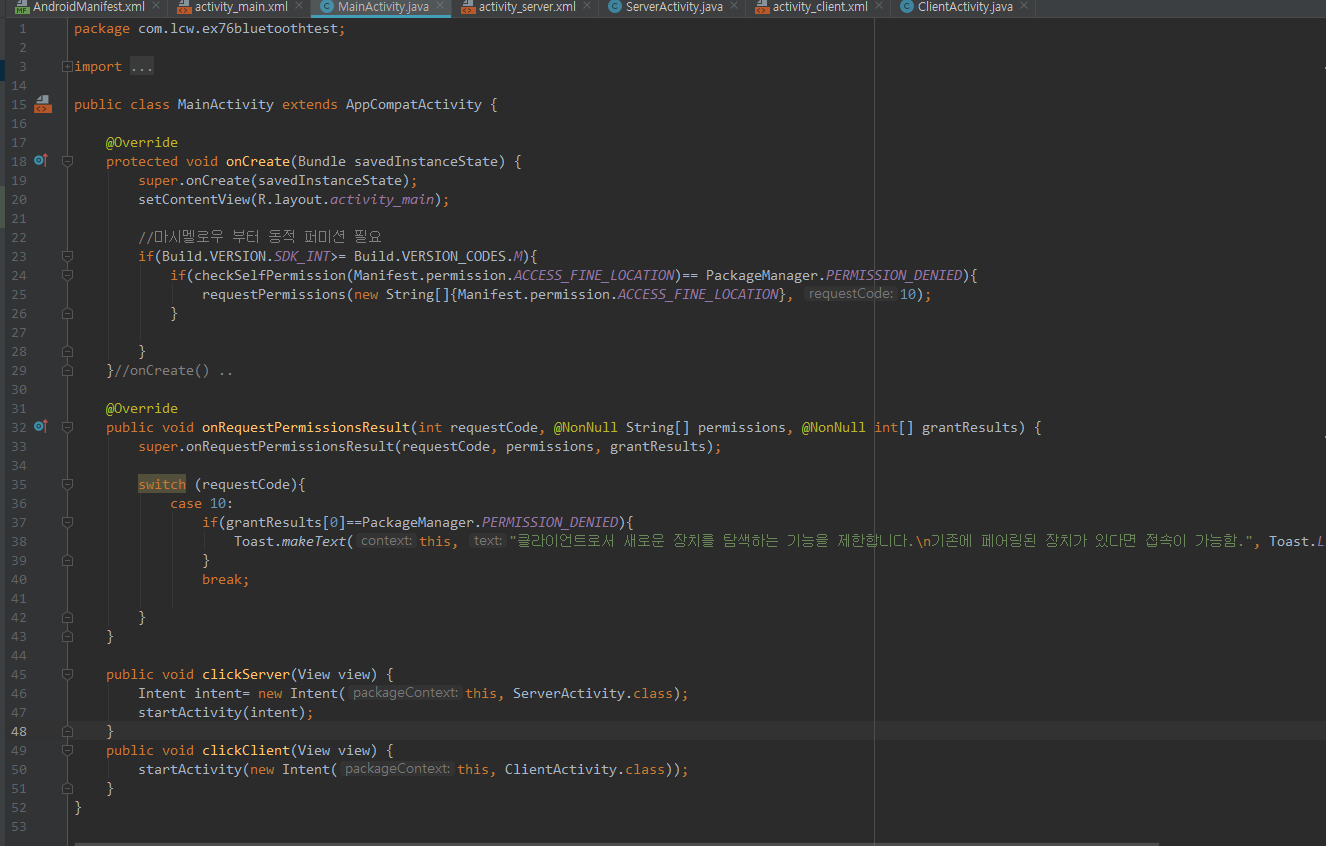
이제 퍼미션을 먼저 설정하자.
|
1
2
3
4
5
6
7
8
9
10
11
12
13
14
15
16
17
18
19
20
21
22
23
24
|
<?xml version="1.0" encoding="utf-8"?>
xmlns:app="http://schemas.android.com/apk/res-auto"
xmlns:tools="http://schemas.android.com/tools"
android:layout_width="match_parent"
android:layout_height="match_parent"
android:orientation="vertical"
android:padding="16dp"
tools:context=".MainActivity">
<Button
android:layout_width="match_parent"
android:layout_height="0dp"
android:layout_weight="1"
android:text="SERVER"
android:onClick="clickServer"/>
<Button
android:layout_width="match_parent"
android:layout_height="0dp"
android:layout_weight="1"
android:text="CLIENT"
android:onClick="clickClient"/>
</LinearLayout>
|
<uses-permission android:name="android.permission.ACCESS_FINE_LOCATION"/> 때문에 동적 퍼미션 필요
원래는 클라이언트에만 쓰면 되지만 예제는 한 앱에 서버와 클라이언트만 있으므로..
MainActivity에 작성하겠다.
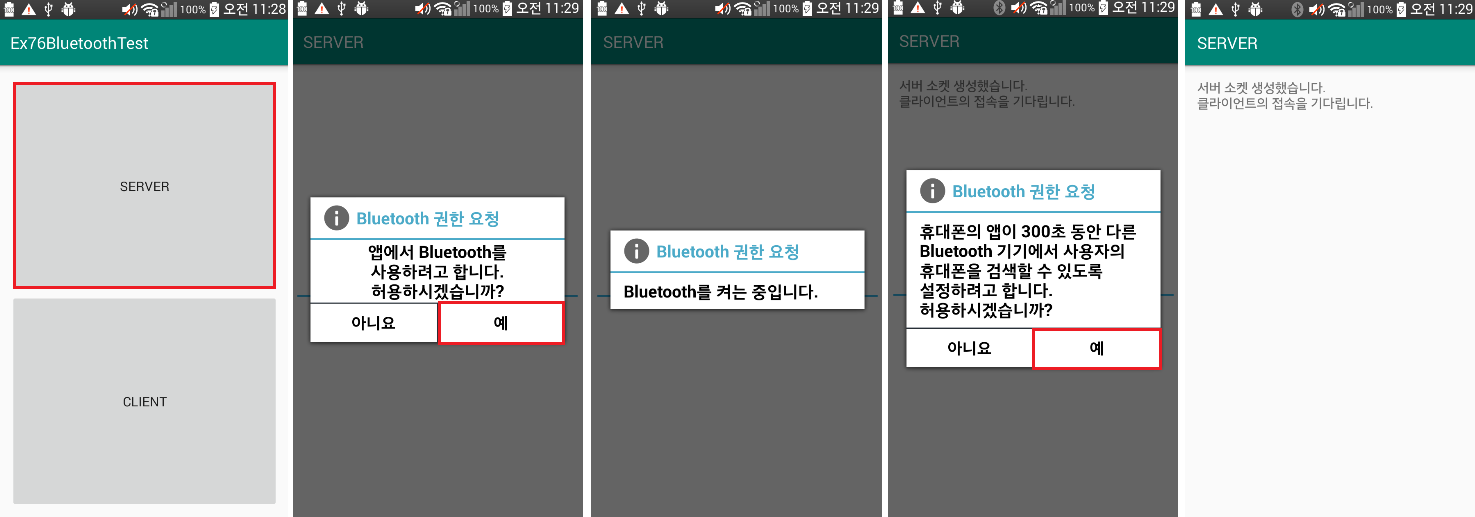
<현재 실행 화면>
해당 버튼을 누르면 새로운 화면이 뜰 것이다.
이제 서버를 화면 구성하고, 코드를 작성하자.
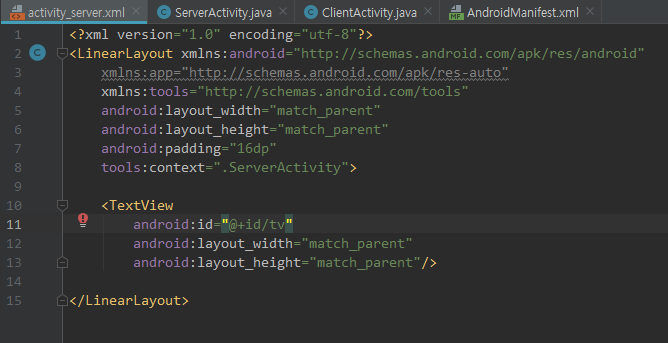
activity_server.xml 코드
|
1
2
3
4
5
6
7
8
9
10
11
12
13
14
15
|
<?xml version="1.0" encoding="utf-8"?>
xmlns:app="http://schemas.android.com/apk/res-auto"
xmlns:tools="http://schemas.android.com/tools"
android:layout_width="match_parent"
android:layout_height="match_parent"
android:padding="16dp"
tools:context=".ServerActivity">
<TextView
android:id="@+id/tv"
android:layout_width="match_parent"
android:layout_height="match_parent"/>
</LinearLayout>
|
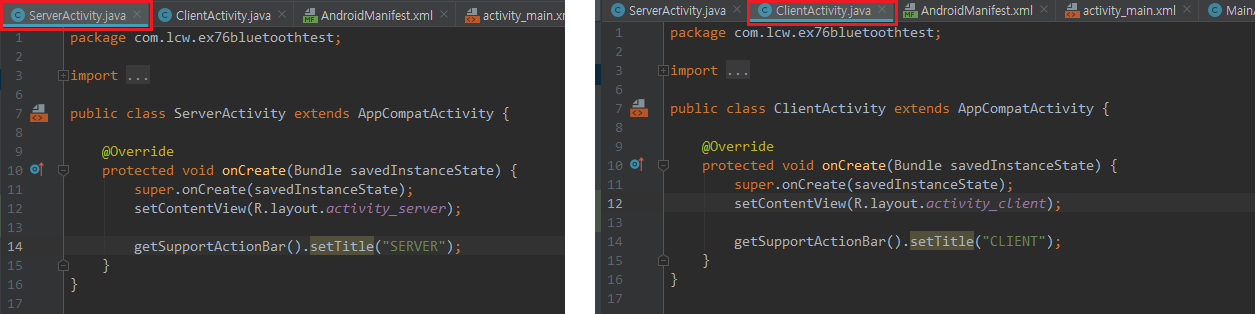
서버 화면 구성을 했으면 코드 작성을 하자.
ServerActivity.java
|
1
2
3
4
5
6
7
8
9
10
11
12
13
14
15
16
17
18
19
20
21
22
23
24
25
26
27
28
29
30
31
32
33
34
35
36
37
38
39
40
41
42
43
44
45
46
47
48
49
50
51
52
53
54
55
56
57
58
59
60
61
62
63
64
65
66
67
68
69
70
71
72
73
74
75
76
77
78
79
80
81
82
83
84
85
86
87
88
89
90
91
92
93
94
95
96
97
98
99
100
101
102
103
104
105
106
107
108
109
110
111
112
113
114
115
116
117
118
119
120
121
122
123
124
125
126
127
128
129
130
131
132
133
134
135
136
137
138
139
140
141
142
143
144
145
146
147
148
|
package com.lcw.ex76bluetoothtest;
import androidx.annotation.Nullable;
import android.bluetooth.BluetoothAdapter;
import android.bluetooth.BluetoothServerSocket;
import android.bluetooth.BluetoothSocket;
import android.content.Intent;
import android.os.Bundle;
import android.widget.TextView;
import android.widget.Toast;
import java.io.DataInputStream;
import java.io.DataOutputStream;
import java.io.IOException;
import java.util.UUID;
public class ServerActivity extends AppCompatActivity {
//블루투스 장치 식별 번호
static final UUID BT_UUID= UUID.fromString("00001101-0000-1000-8000-00805F9B34FB");
public static final int REQ_ENABLE= 10;
public static final int REQ_DISCOVERYABLE= 20;
TextView tv;
BluetoothAdapter bluetoothAdapter;
BluetoothServerSocket serverSocket;
BluetoothSocket socket;
DataInputStream dis;
DataOutputStream dos;
//이너클래스 참조 멤버 변수
ServerThread serverThread;
@Override
protected void onCreate(Bundle savedInstanceState) {
super.onCreate(savedInstanceState);
setContentView(R.layout.activity_server);
getSupportActionBar().setTitle("SERVER");
tv=findViewById(R.id.tv);
//블루투스 관리자 객체 소환하기
bluetoothAdapter= BluetoothAdapter.getDefaultAdapter();
if(bluetoothAdapter==null){
Toast.makeText(this, "이 기기에는 블루투스가 없습니다.", Toast.LENGTH_SHORT).show();
finish(); //이 순간 곧바로 종료되지 않음
return; //그래서 꼭 return 써주자.
}
//블루투스가 켜져있는지 확인
if(bluetoothAdapter.isEnabled()){
//서버소켓 생성 작업 실행
createSetverSocket();
}else{
//블루투스장치 ON 선택 액티비티 보이기(단, 액티비티의 스타일이 다이얼로그로 되어 있음)
Intent intent= new Intent(BluetoothAdapter.ACTION_REQUEST_ENABLE);
startActivityForResult(intent,REQ_ENABLE);
}
}//onCreate()..
@Override
protected void onActivityResult(int requestCode, int resultCode, @Nullable Intent data) {
super.onActivityResult(requestCode, resultCode, data);
switch (requestCode){
case REQ_ENABLE:
if(resultCode==RESULT_CANCELED){
//Enable을 시키지 않았으므로 프로그램 종료
Toast.makeText(this, "블루투스를 허용하지 않았습니다.\n앱을 종료합니다.", Toast.LENGTH_SHORT).show();
finish();
}else{
//서버 소켓 생성 및 실행
createSetverSocket();
}
break;
case REQ_DISCOVERYABLE:
if(resultCode==RESULT_CANCELED){
Toast.makeText(this, "블루투스 탐색을 허용하지 않았습니다.\n다른 장치에서 이 장치를 찾을 수 없습니다.", Toast.LENGTH_SHORT).show();
}
break;
}
}// onActivityResult
//서버소켓 생성 작업을 하는 메소드
void createSetverSocket(){
// 통신을 하기 위한 스레드 객체 생성
serverThread= new ServerThread();
//상대방이 내 디바이스의 블루투스를
//탐색하는 것을 허용하기
allowDiscovery();
}
//탐색 허용 작업 메소드
void allowDiscovery(){
//탐색 허용 여부를 보여주는 다이얼로그 스타일의 액티비티를 실행
Intent intent=new Intent(BluetoothAdapter.ACTION_REQUEST_DISCOVERABLE);
//기본으로 120초 동안 탐색을 허용하도록...
//최대 300초까지 설정 가능함
intent.putExtra(BluetoothAdapter.EXTRA_DISCOVERABLE_DURATION,300);// 300초
startActivityForResult(intent, REQ_DISCOVERYABLE);
}
//inner class////
class ServerThread extends Thread{
@Override
public void run() {
try {
//서버소켓 생성
serverSocket=bluetoothAdapter.listenUsingInsecureRfcommWithServiceRecord("SERVER",BT_UUID);
showText("서버 소켓 생성했습니다.\n클라이언트의 접속을 기다립니다.\n");
//클라이언트의 접속 기다리기..
showText("클라이언트가 접속했습니다.\n");
//접솓이 되었으니 둘사이에 데이터를 주고받을
//무지개 로드 (Stream)
dis=new DataInputStream(socket.getInputStream());
dos=new DataOutputStream(socket.getOutputStream());
//dis & dos 를 이용해서 원하는 통신 작업 수행!
} catch (IOException e) {e.printStackTrace();}
}//run() ..
void showText(final String msg){
runOnUiThread(new Runnable() {
@Override
public void run() {
tv.append(msg); // 글씨 누적
}
});
}
}//ServerThread
}//ServerActivity class..
|
<서버 실행 화면>
이제 클라이언트를 화면구성하고, 코드 작성해보자.
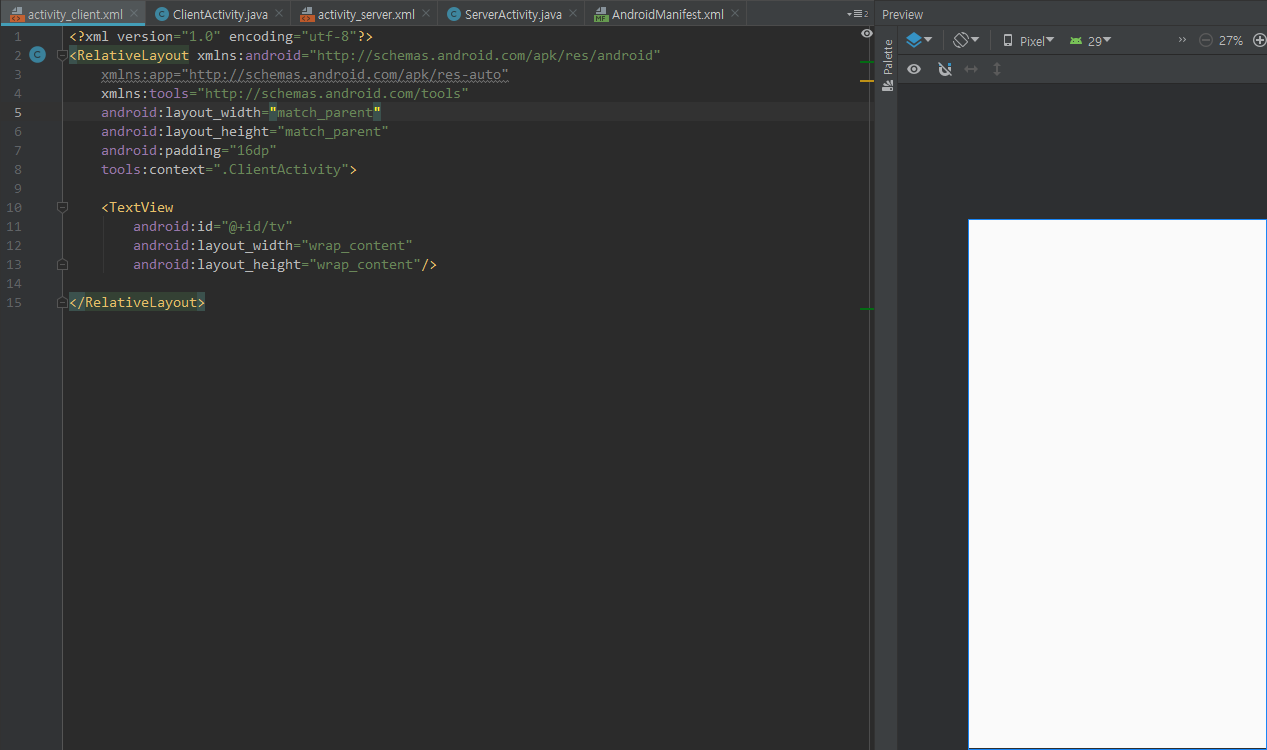
activity_client.xml 코드
|
1
2
3
4
5
6
7
8
9
10
11
12
13
14
15
|
<?xml version="1.0" encoding="utf-8"?>
xmlns:app="http://schemas.android.com/apk/res-auto"
xmlns:tools="http://schemas.android.com/tools"
android:layout_width="match_parent"
android:layout_height="match_parent"
android:padding="16dp"
tools:context=".ClientActivity">
<TextView
android:id="@+id/tv"
android:layout_width="wrap_content"
android:layout_height="wrap_content"/>
</RelativeLayout>
|
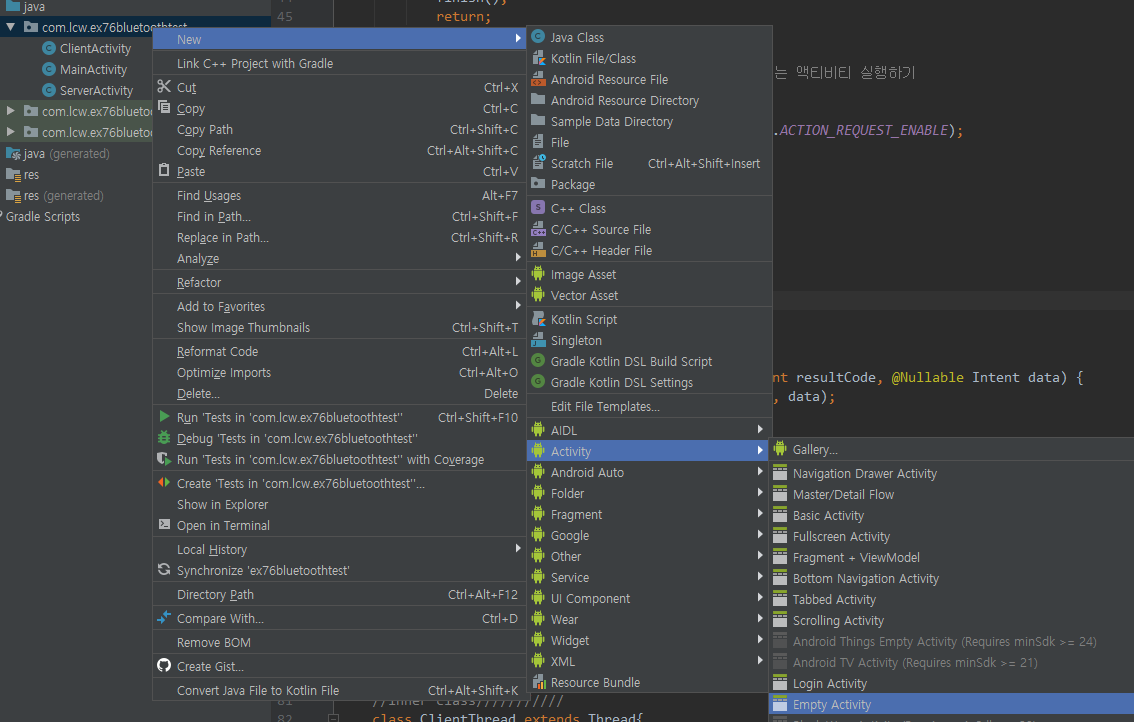
클라이언트 작성하는 중 새로운 액티비티 ListView를 만들어 줘야 한다.

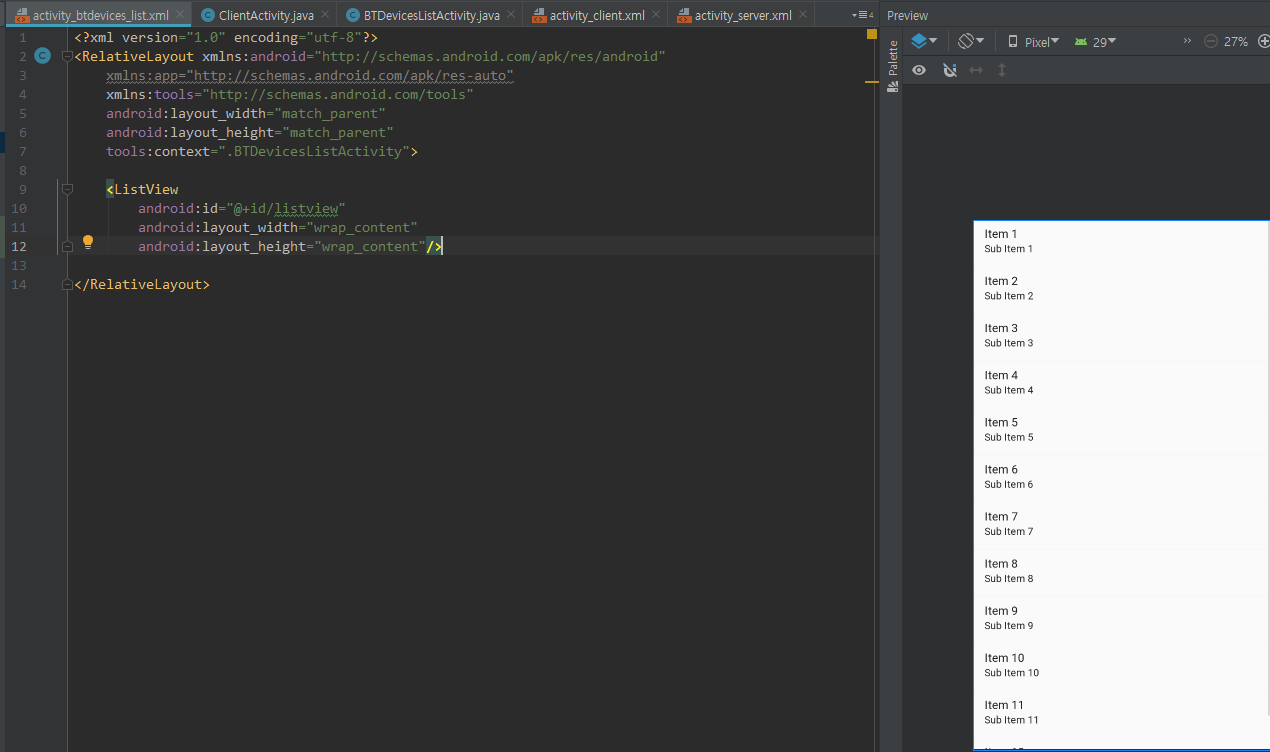
activity_btdevices_list.xml 코드
|
1
2
3
4
5
6
7
8
9
10
11
12
13
14
|
<?xml version="1.0" encoding="utf-8"?>
xmlns:app="http://schemas.android.com/apk/res-auto"
xmlns:tools="http://schemas.android.com/tools"
android:layout_width="match_parent"
android:layout_height="match_parent"
tools:context=".BTDevicesListActivity">
<ListView
android:id="@+id/listview"
android:layout_width="wrap_content"
android:layout_height="wrap_content"/>
</RelativeLayout>
|
이제 다시 클라이언트 코드를 부분 작성하자.
( 이거 작성하고 다시 BTDevicesListActivity 코드 작성할거임 그리고 마지막으로 클라이언트 코드 작성)
package com.lcw.ex76bluetoothtest;
import androidx.annotation.Nullable;
import androidx.appcompat.app.AppCompatActivity;
import android.bluetooth.BluetoothAdapter;
import android.bluetooth.BluetoothSocket;
import android.content.Intent;
import android.os.Bundle;
import android.widget.TextView;
import android.widget.Toast;
import java.io.DataInputStream;
import java.io.DataOutputStream;
import java.util.UUID;
public class ClientActivity extends AppCompatActivity {
static final UUID BT_UUID= UUID.fromString("00001101-0000-1000-8000-00805F9B34FB");
public static final int REQ_ENABLE=10;
public static final int REQ_DISCOVERY=20;
BluetoothAdapter bluetoothAdapter;
BluetoothSocket socket;
DataInputStream dis;
DataOutputStream dos;
ClientThread clientThread;
TextView tv;
@Override
protected void onCreate(Bundle savedInstanceState) {
super.onCreate(savedInstanceState);
setContentView(R.layout.activity_client);
getSupportActionBar().setTitle("CLIENT");
tv=findViewById(R.id.tv);
//블루투스 관리자 객체 소환
bluetoothAdapter= BluetoothAdapter.getDefaultAdapter();
if(bluetoothAdapter==null){
Toast.makeText(this, "이 기기에는 블루투스가 없습니다.", Toast.LENGTH_SHORT).show();
finish();
return;
}
if(bluetoothAdapter.isEnabled()){
//서버 블루투스 장치 탐색 및 리스트 보기를 해주는 액티비티 실행하기
discoveryBluetoothDevices();
}else{
Intent intent= new Intent(BluetoothAdapter.ACTION_REQUEST_ENABLE);
startActivityForResult(intent,REQ_ENABLE);
}
}//onCreate() ..
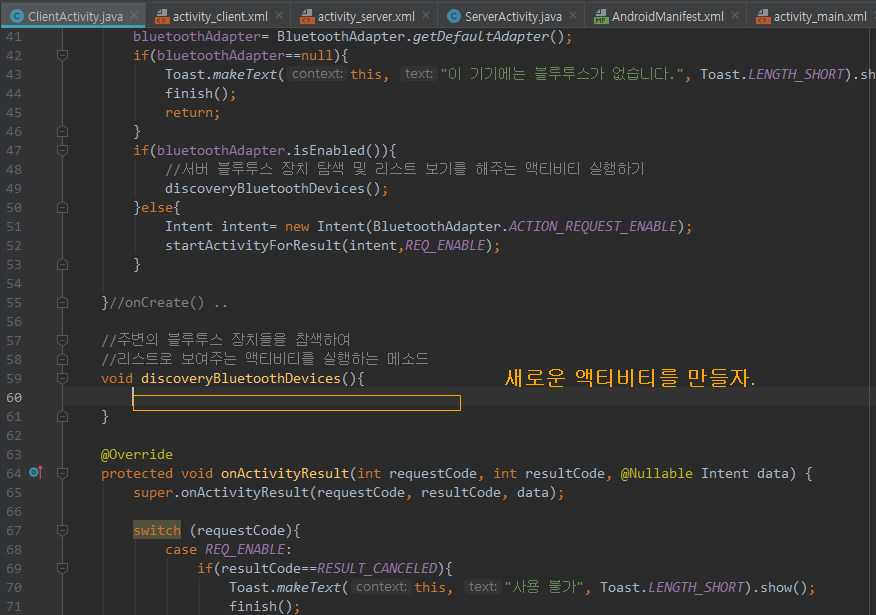
//주변의 블루투스 장치들을 참색하여
//리스트로 보여주는 액티비티를 실행하는 메소드
void discoveryBluetoothDevices(){
Intent intent= new Intent(this, BTDevicesListActivity.class);
startActivityForResult(intent,REQ_DISCOVERY);
}
@Override
protected void onActivityResult(int requestCode, int resultCode, @Nullable Intent data) {
super.onActivityResult(requestCode, resultCode, data);
switch (requestCode){
case REQ_ENABLE:
if(resultCode==RESULT_CANCELED){
Toast.makeText(this, "사용 불가", Toast.LENGTH_SHORT).show();
finish();
}else{
//서버 블루트스 장치 탐색 및 리스트 보기
discoveryBluetoothDevices();
}
break;
case REQ_DISCOVERY:
//결과가 OK면.
break;
}
}
//inner class///////////
class ClientThread extends Thread{
@Override
public void run() {
}
}//ClientThread clas..
///////////////////////////////////////
}//ClientActivity class..
다시 BTD 코드를 마저 작성하자.
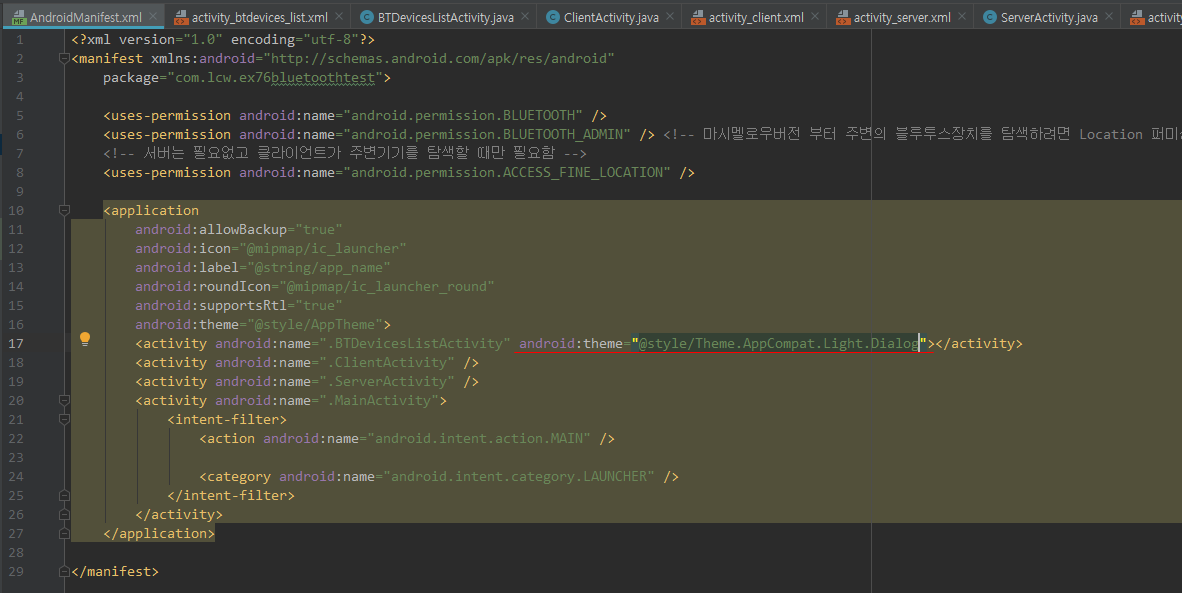
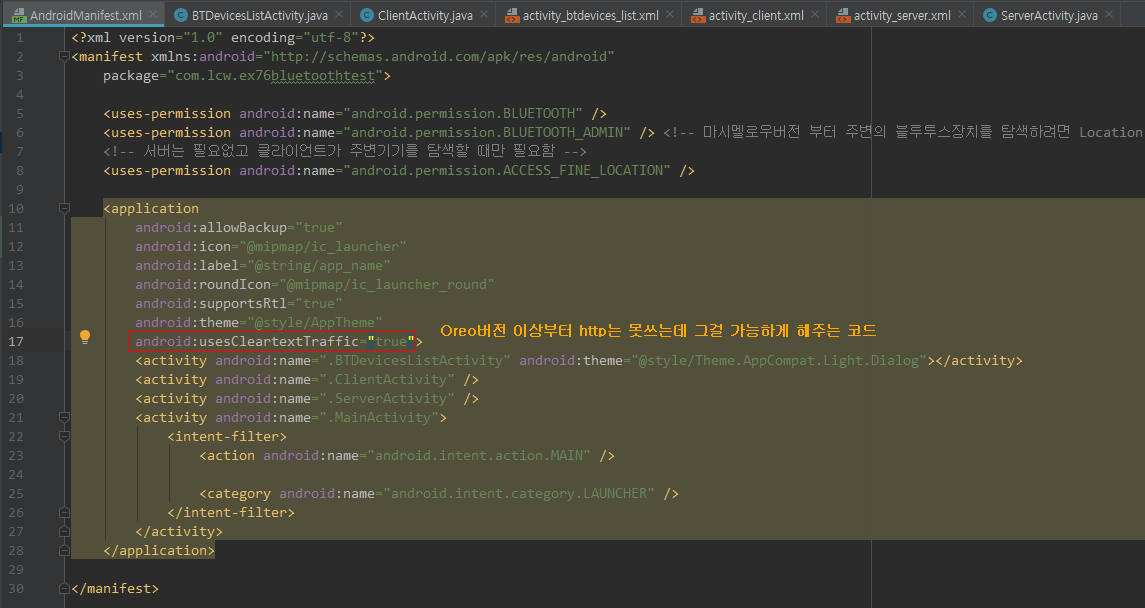
그 전에 Manifest를 수정 BTDevicesListActivity의 테마를 다이얼로그로 바꾼다.
BTDevicesListActivity.java 코드 (최종 코드)
|
1
2
3
4
5
6
7
8
9
10
11
12
13
14
15
16
17
18
19
20
21
22
23
24
25
26
27
28
29
30
31
32
33
34
35
36
37
38
39
40
41
42
43
44
45
46
47
48
49
50
51
52
53
54
55
56
57
58
59
60
61
62
63
64
65
66
67
68
69
70
71
72
73
74
75
76
77
78
79
80
81
82
83
84
85
86
87
88
89
90
91
92
93
94
95
96
97
98
99
100
101
102
103
104
105
106
107
108
109
110
111
112
113
114
115
116
117
118
119
120
121
122
123
124
125
126
|
package com.lcw.ex76bluetoothtest;
import android.bluetooth.BluetoothAdapter;
import android.bluetooth.BluetoothDevice;
import android.content.BroadcastReceiver;
import android.content.Context;
import android.content.Intent;
import android.content.IntentFilter;
import android.os.Bundle;
import android.view.View;
import android.widget.AdapterView;
import android.widget.ArrayAdapter;
import android.widget.ListView;
import android.widget.Toast;
import java.util.ArrayList;
import java.util.Set;
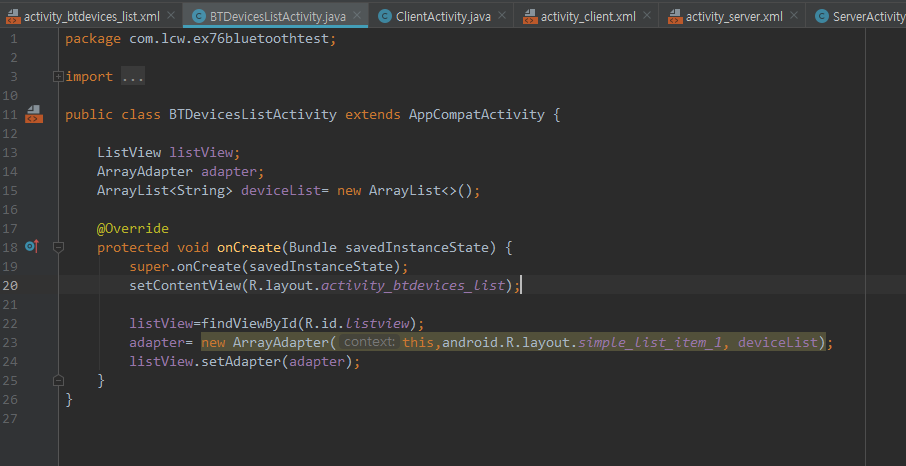
public class BTDevicesListActivity extends AppCompatActivity {
ListView listView;
ArrayAdapter adapter;
ArrayList<String> deviceList= new ArrayList<>();
BluetoothAdapter bluetoothAdapter;
Set<BluetoothDevice> devices;
DiscoveryResultReceiver discoveryResultReceiver;
@Override
protected void onCreate(Bundle savedInstanceState) {
super.onCreate(savedInstanceState);
setContentView(R.layout.activity_btdevices_list);
listView=findViewById(R.id.listview);
listView.setAdapter(adapter);
//액티비티에 적용된 다이얼로그 테마시에
//다이얼로그의 아웃사이드를 터치했을때
//다이얼로그가 cancel되지 않도록
setFinishOnTouchOutside(false);
//블루투스 관리자 소환
bluetoothAdapter= BluetoothAdapter.getDefaultAdapter();
//이미 페어링이 되어 있는 블루투스 장치의 리스트를 얻어오기
devices=bluetoothAdapter.getBondedDevices(); //set은 List와 같은 방식이지만 중복은 허용하지 않는 특징이있음.
//Set<> 이기에 중복데이터가 저장되지 않음.
for(BluetoothDevice device : devices){
String name=device.getName();
String address= device.getAddress();
deviceList.add(name+"\n"+address);
}
//탐색 시작 전에
//블루투스 장치 찾았다!! 라는 방송(Broadcast)을
//수신하기 위한 Receiver를 생성 및 등록
discoveryResultReceiver= new DiscoveryResultReceiver();
IntentFilter intentFilter;
intentFilter= new IntentFilter();
intentFilter.addAction(BluetoothDevice.ACTION_FOUND);
registerReceiver(discoveryResultReceiver,intentFilter);
intentFilter= new IntentFilter(BluetoothAdapter.ACTION_DISCOVERY_FINISHED); //위에 세줄과 같은 코드 (두줄을 한줄로 줄일 수 있다.)
registerReceiver(discoveryResultReceiver,intentFilter);
//주변 블루투스 장치 탐색시작
bluetoothAdapter.startDiscovery();
//리스트뷰의 아이템을 클릭하는 것을 듣는 리스너
listView.setOnItemClickListener(new AdapterView.OnItemClickListener() {
@Override
public void onItemClick(AdapterView<?> adapterView, View view, int position, long id) {
String[] ss=s.split("\n");
String address=ss[1];//BT mac주소만 얻어내기
//clientActivity에게 결과 address를
//전달해 주기 위해..
Intent intent= getIntent();
intent.putExtra("Address", address);
//이 결과가 Ok라고 설정
setResult(RESULT_OK,intent);// RESULT_OK는 임의 숫자 ClientActivity.java에 onActivityResult에 들어가는 resultCode로 보내는 값.
//블루투스 장치를 선택했으므로
//리스트를 보여주는 이 액티비티는 종료
finish();
}
});
}//onCreate() ..
@Override
protected void onPause() {
unregisterReceiver(discoveryResultReceiver);
super.onPause();
}
//inner class /////
//블루투스 탐색 결과 방송리스너 클래스
class DiscoveryResultReceiver extends BroadcastReceiver {
@Override
public void onReceive(Context context, Intent intent) {
String action=intent.getAction();
if(action.equals(BluetoothDevice.ACTION_FOUND)){
//찾아온 장치에 대한 정보 얻어오기
BluetoothDevice device=intent.getParcelableExtra(BluetoothDevice.EXTRA_DEVICE);
deviceList.add(device.getName()+"\n"+device.getAddress());
adapter.notifyDataSetChanged();
}else if(action.equals(BluetoothAdapter.ACTION_DISCOVERY_FINISHED)){
Toast.makeText(context, "블루투스 장치 탐색을 완료하였스빈다.", Toast.LENGTH_SHORT).show();
}
}
}
///////////////////////////////////////
}//BTDevicesListActivity class
|
ClientActivity.java 코드(최종 코드)
|
1
2
3
4
5
6
7
8
9
10
11
12
13
14
15
16
17
18
19
20
21
22
23
24
25
26
27
28
29
30
31
32
33
34
35
36
37
38
39
40
41
42
43
44
45
46
47
48
49
50
51
52
53
54
55
56
57
58
59
60
61
62
63
64
65
66
67
68
69
70
71
72
73
74
75
76
77
78
79
80
81
82
83
84
85
86
87
88
89
90
91
92
93
94
95
96
97
98
99
100
101
102
103
104
105
106
107
108
109
110
111
112
113
114
115
116
117
118
119
120
121
122
123
124
125
126
127
128
129
130
131
132
133
134
135
136
137
|
package com.lcw.ex76bluetoothtest;
import androidx.annotation.Nullable;
import android.bluetooth.BluetoothAdapter;
import android.bluetooth.BluetoothDevice;
import android.bluetooth.BluetoothSocket;
import android.content.Intent;
import android.os.Bundle;
import android.widget.TextView;
import android.widget.Toast;
import java.io.DataInputStream;
import java.io.DataOutputStream;
import java.io.IOException;
import java.util.UUID;
public class ClientActivity extends AppCompatActivity {
static final UUID BT_UUID= UUID.fromString("00001101-0000-1000-8000-00805F9B34FB");
public static final int REQ_ENABLE=10;
public static final int REQ_DISCOVERY=20;
BluetoothAdapter bluetoothAdapter;
BluetoothSocket socket;
DataInputStream dis;
DataOutputStream dos;
ClientThread clientThread;
TextView tv;
@Override
protected void onCreate(Bundle savedInstanceState) {
super.onCreate(savedInstanceState);
setContentView(R.layout.activity_client);
getSupportActionBar().setTitle("CLIENT");
tv=findViewById(R.id.tv);
//블루투스 관리자 객체 소환
bluetoothAdapter= BluetoothAdapter.getDefaultAdapter();
if(bluetoothAdapter==null){
Toast.makeText(this, "이 기기에는 블루투스가 없습니다.", Toast.LENGTH_SHORT).show();
finish();
return;
}
if(bluetoothAdapter.isEnabled()){
//서버 블루투스 장치 탐색 및 리스트 보기를 해주는 액티비티 실행하기
discoveryBluetoothDevices();
}else{
Intent intent= new Intent(BluetoothAdapter.ACTION_REQUEST_ENABLE);
startActivityForResult(intent,REQ_ENABLE);
}
}//onCreate() ..
//주변의 블루투스 장치들을 참색하여
//리스트로 보여주는 액티비티를 실행하는 메소드
void discoveryBluetoothDevices(){
Intent intent= new Intent(this, BTDevicesListActivity.class);
startActivityForResult(intent,REQ_DISCOVERY);
}
@Override
protected void onActivityResult(int requestCode, int resultCode, @Nullable Intent data) {
super.onActivityResult(requestCode, resultCode, data);
switch (requestCode){
case REQ_ENABLE:
if(resultCode==RESULT_CANCELED){
Toast.makeText(this, "사용 불가", Toast.LENGTH_SHORT).show();
finish();
}else{
//서버 블루트스 장치 탐색 및 리스트 보기
discoveryBluetoothDevices();
}
break;
case REQ_DISCOVERY:
//결과가 OK면.
if(resultCode==RESULT_OK){
//연결할 블루투스 장치의 mac주소를 얻어왔다.
String deviceAddress= data.getStringExtra("Address");
//이 주소를 통해 Socket연결 작업 실행
//하는 별도의 Thread객체 생성 및 실행
clientThread= new ClientThread(deviceAddress);
}
break;
}
}
//inner class///////////
class ClientThread extends Thread{
String address;// 연결할 장치의 mac주소
public ClientThread(String address) {
this.address = address;
}
@Override
public void run() {
//소켓생성하기 위해 Blutooth 장치 객체 얻어오기
BluetoothDevice device = bluetoothAdapter.getRemoteDevice(address);
//디바이스를 통해 소켓연결
try {
socket= device.createInsecureRfcommSocketToServiceRecord(BT_UUID);
socket.connect();//연결 시도
//만약 연결이 성공되었다고 메세지
runOnUiThread(new Runnable() {
@Override
public void run() {
tv.setText("서버에 접속되었습니다.");
}
});
dis= new DataInputStream(socket.getInputStream());
dos= new DataOutputStream(socket.getOutputStream());
//원하는 통신 작업 수행...
} catch (IOException e) { e.printStackTrace();}
}
}//ClientThread clas..
///////////////////////////////////////
}//ClientActivity class..
|
마지막으로 Manifest에 한줄 추가하자.
이렇게 하면 한쪽 핸드폰에서 서버를 눌러서 소켓 통신할 준비를 하고,
다른 핸드폰으로 클라이언트로 누르면 서버를 누른 휴대폰 기종이 뜰 것이다 서버 기종을 누르면 접속 될 것이다.
'안드로이드 웹앱 콘테츠 개발자 양성(국비지원) > Android 기능' 카테고리의 다른 글
| Android Studio(기능) ExoPlayer이용 json 파싱 및 영상 보여주기1-1 (0) | 2019.11.06 |
|---|---|
| Android Studio(기능) 비디오 보여주기VideoView, ExoPlayer (2) | 2019.11.05 |
| Android Studio(기능) 장면 전환 Transition (0) | 2019.10.15 |
| Android Studio(기능) 첫페이지 인트로 효과 주기(로고,제목 애니메이션 효과) (0) | 2019.10.15 |
| Android Studio(기능) Alarm (4) | 2019.10.15 |


댓글