반응형
state 변수를 변경하면 화면 갱신
props는 상수이므로 전달 받은 값을 변경 불가. 전달한 부모에서 변경 가능
자바 객체 만드는 방법
1. 리터럴 {name:"sma", age:20}
2. 함수로 객체 생성
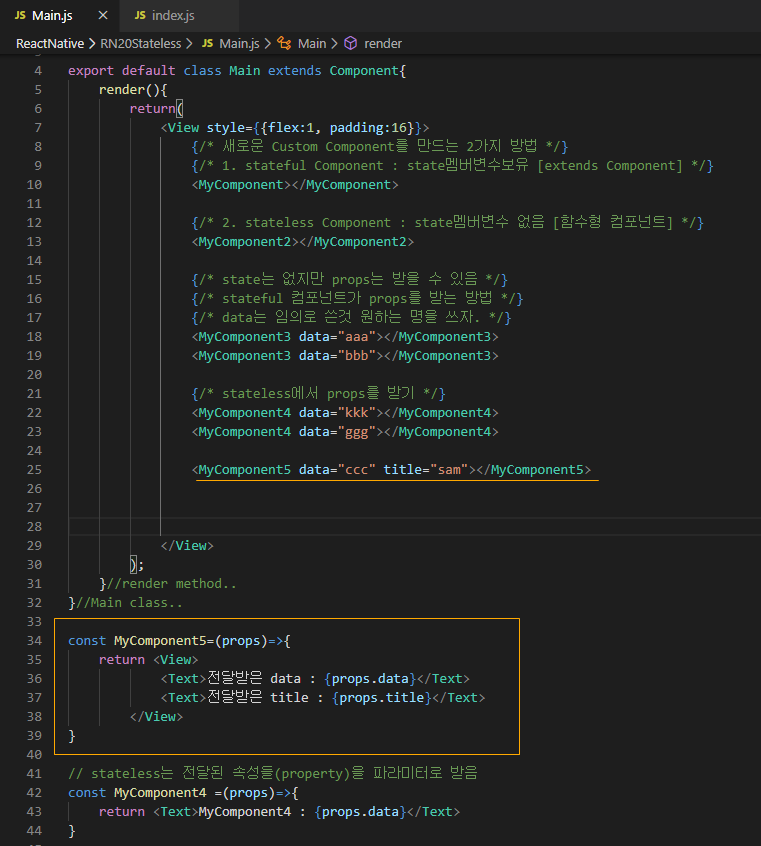
Mian class에 화면에 보이는 것들을 배치 시킬 수 있지만, 다로 컴포넌트를 만들어서 Main에서는 그 컴포넌트 <>만 쓰면 된다. 예) 함수도 내용은 밑에 함수안에 쓰고 Main에서는 함수 호출만 하듯이...
<최종 화면>

우선 AVD를 실행시켜놓자.
작업할 경로로 접근하여 init하자.


Main class에 <Text>를 놓지 않고, 임의의 컴포넌트를 만들어서 배치하자.
임의로 만든 Mycomponent는 Component이기 때문에 extends로 Component로 상속받자.

|
1
2
3
4
5
6
7
8
9
10
11
12
13
14
15
16
17
18
19
20
21
22
23
24
25
26
|
import React, {Component} from 'react';
import {View, Text, Button} from 'react-native';
export default class Main extends Component{
render(){
return(
<View style={{flex:1, padding:16}}>
{/* 새로운 Custom Component를 만드는 2가지 방법 */}
{/* 1. stateful Component : state멤버변수보유 [extends Component] */}
<MyComponent></MyComponent>
</View>
);
}//render method..
}//Main class..
// stateful component
class MyComponent extends Component{
render(){
return(
<View>
<Text style={{margin:8, padding:8}}>Hello MyComponent</Text>
</View>
);
}
}
|


새로 Mycomponent2는 컴포넌트이지만 상속을 받지 않고 만든다. 그리고 함수형
( Mycomponent 는 클래스라 생성자가 있지만, Mycomponent2 함수이기 때문에 생성자가 없는게 당연하다. )


<복붙요 코드>
Main.js
|
1
2
3
4
5
6
7
8
9
10
11
12
13
14
15
16
17
18
19
20
21
22
23
24
25
26
27
28
29
30
31
32
33
34
35
36
37
38
39
40
41
42
43
44
45
46
47
48
49
50
51
52
53
54
55
56
57
58
59
60
61
62
63
64
65
66
67
68
69
70
71
72
73
74
75
76
77
78
79
80
81
82
83
84
85
86
87
88
89
90
91
|
import React, {Component} from 'react';
import {View, Text, Button} from 'react-native';
export default class Main extends Component{
constructor(){
super();
msg:"Hello",
}
}
clickBtn=()=>{this.setState({msg:"nice to meet you."});}
render(){
return(
<View style={{flex:1, padding:16}}>
{/* 새로운 Custom Component를 만드는 2가지 방법 */}
{/* 1. stateful Component : state멤버변수보유 [extends Component] */}
<MyComponent></MyComponent>
{/* 2. stateless Component : state멤버변수 없음 [함수형 컴포넌트] */}
<MyComponent2></MyComponent2>
{/* state는 없지만 props는 받을 수 있음 */}
{/* stateful 컴포넌트가 props를 받는 방법 */}
{/* data는 임의로 쓴것 원하는 명을 쓰자. */}
<MyComponent3 data="aaa"></MyComponent3>
<MyComponent3 data="bbb"></MyComponent3>
{/* stateless에서 props를 받기 */}
<MyComponent4 data="kkk"></MyComponent4>
<MyComponent4 data="ggg"></MyComponent4>
<MyComponent5 data="ccc" title="sam"></MyComponent5>
{/* 컴포넌트들 간의 제어 : */}
<AA onPress={this.clickBtn}></AA>
</View>
);
}//render method..
}//Main class..
const AA=props=> <Button title="button" onPress={props.onPress}></Button> //화살표함수 간략화
const BB=({msg})=><Text>{msg}</Text> //구조분해할당 {}는 여러개의 의미가 있어서 ()가 있어야함.
//props를 구조분해할당으로 받기
const MyComponent5=({data,title})=><View><Text>전달받은 data : {data}</Text><Text>전달받은 title : {title}</Text></View>
// stateless는 전달된 속성들(property)을 파라미터로 받음
const MyComponent4 =(props)=>{
}
class MyComponent3 extends Component{
render(){
}
}
// stateless component
const MyComponent2= ()=>{
// constructor만들수 없음. 즉, this.state가 없음
// constructor(){} // error
// 이 컴포넌트가 보여줄 화면을 리턴만 하면됨
return(
<View>
<Text style={{margin:8, padding:8}}>MyComponent2</Text>
</View>
);
}
// stateful component
class MyComponent extends Component{
constructor(){
super();
}
render(){
return(
<View>
</View>
);
}
}
|
반응형
'안드로이드 웹앱 콘테츠 개발자 양성(국비지원) > HybridApp' 카테고리의 다른 글
| HybridApp-React Native 2세대 (기능 - DataArchitecture- Context API, 전역변수 같은) (0) | 2020.01.30 |
|---|---|
| HybridApp-React Native 2세대 (기능 - DataArchitecture ) (0) | 2020.01.30 |
| HybridApp-React Native 2세대 (기능 - Map Google 라이브러리 사용 ) (0) | 2020.01.29 |
| HybridApp-React Native 2세대 (기능 - Geolocation API ) (0) | 2020.01.29 |
| HybridApp-React Native 2세대 (기능 - AsyncStorage API ) (0) | 2020.01.29 |


댓글